It hit me one rainy morning when I opened my garage door and saw my truck coated in a dull, muddy film—like it had been through a mudslide but somehow missed the spa day afterward. I realized I’d been winging it with my car cleaning supplies for too long. My usual cheap shampoos and neglected paint correction had left my truck looking anything but showroom-ready. That lightbulb moment made me dive headfirst into the world of DIY car detailing, specifically for trucks, and let me tell you—there’s more to it than grabbing what’s available at the local auto parts store.
The Road to the Right Detailing Kit Starts Here
What I discovered was startling: DIY kits, especially tailored for trucks, can transform your vehicle’s appearance and protect its value—if you pick the right ones. For truck owners like us, the key isn’t just about making it shine; it’s about durable, effective products that withstand weather, dirt, and the rigors of daily life. Today, I’m here to guide you through the selection process, so you don’t end up wasting time and money on subpar supplies. From ceramic coatings to paint correction tools, I’ll share what works (and what doesn’t) based on my own frustrating early mistakes. You can even check out this comprehensive overview of local detailing services to get a sense of the professional standards you’ll want your DIY kits to match or surpass: what a full detail includes.
Is the Hype About 2026 Detailing Kits Overrated?
I remember rushing to buy a popular all-in-one package after reading rave reviews, only to find that some products were ineffective or incompatible with my truck’s finish. Early on, I made the mistake of assuming all kits are created equal, but in reality, the quality of auto detailing products varies significantly. That’s a mistake I won’t repeat. With so many options claiming to be the best—like those high-tech graphene sprays or advanced paint correction compounds—it can feel overwhelming. Rest assured, I’ll break down the essentials that deliver results without costing a fortune, so you can avoid those rookie pitfalls. For in-depth info on how to choose quality products that match your specific needs, check out this guide on comparing local detailing services versus DIY: value of professional vs. DIY.
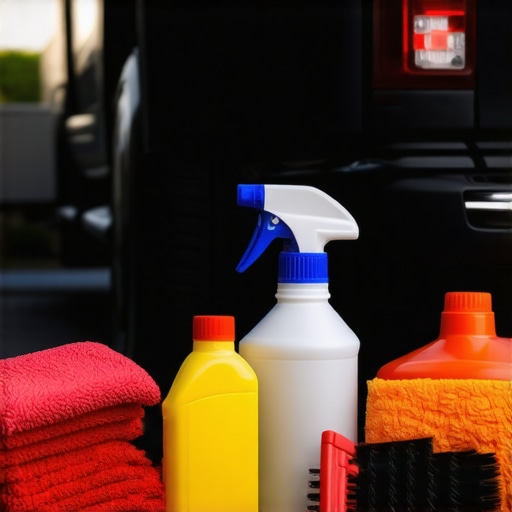
Preparation Sets the Stage for a Flawless Finish
Begin by gathering all essential supplies—think of it as assembling your toolkit before a home project. Use quality car wash soap like the 2026 foam cannons to effectively lift dirt without stripping your paint. I remember the first time I tackled this: I laid out microfiber towels, grit guards, and a bucket filled with filtered water—this simple setup prevented the dreaded swirl marks. Ensure you have a dedicated wash mitt for the exterior and separate towels for drying to avoid cross-contamination. For trucks, focusing on areas like the wheel wells and undercarriage requires specific brushes and degreasers, such as those outlined in winter protection kits. Proper planning reduces mess and ensures no step is overlooked.
Wash Technique That Saves Time and Protects Your Finish
Instead of random scrubbing, adopt the two-bucket method—one for soapy water, one for rinsing your mitt. This is akin to washing vegetables in the kitchen: rinse thoroughly to remove debris without spreading dirt. Use the foam sprayers for broad coverage, especially on the truck bed, ensuring even application of cleaning agents. When washing, always work from the top down—this gravity-fed approach prevents re-soiling lower panels. I once used a Grit Guard in my wash bucket, which I highly recommend for trapping dirt and preventing scratches, as detailed in this guide. For stubborn spots like bug guts or bird droppings, pre-soak with a quick detailing spray or a dedicated bug remover, ensuring they don’t etch into the paint.
Drying Without Damage Requires the Right Tools
After washing, the drying phase is critical—think of it as finishing a painting; achieving a streak-free surface depends on your method. Use large, plush microfiber drying towels, avoiding air blowers that can cause water spots or blow debris into your paint. I found that folding the towel into smaller sections and blotting rather than dragging minimizes swirl marks. For trucks with matte finishes or ceramic coatings, employ specific drying techniques outlined here: matte paint maintenance. Patience is key—rushing dries out the paint unevenly and leaves marks. Once dry, inspect your work under good lighting to catch any missed spots or smudges.
Deft Paint Correction Restores That Showroom Shine
If your truck has swirl marks or light scratches, paint correction becomes your best friend. Start with a microfiber polishing pad and a dual-action polisher—think of this as buffing out imperfections in a sculpture. Use polishing compounds suited to your truck’s paint type, avoiding overly abrasive products that can cause more harm than good. For detailed instructions, my favorite resource is paint correction on German clears. Work in small sections, applying steady pressure, and check your progress frequently. Remember, less is more—overdoing it risks removing your clear coat. After polishing, a clean microfiber towel will reveal a clearer, more vibrant surface.
Sealing the Work with Protective Coatings
Finish by applying a ceramic or graphene coating for long-term protection. These products act as a shield—think of them as a raincoat for your truck—preventing contaminants from bonding with your paint. For application, clean and dry the surface thoroughly; then, using an applicator pad, spread the coating evenly. A typical session lasts around 20-30 minutes, depending on the product. For example, with a 2026 graphene spray, follow the application technique for maximum durability. Buff out excess residue with a microfiber towel, revealing that glossy, protected finish. Regular maintenance with soap and water retention strategies will keep your truck looking fresh for months.
Even seasoned detailers sometimes overlook the subtle nuances that can make or break your auto care routine. A common misconception is that all car wash soaps are created equal—many believe cheaper options perform just as well as premium formulas. But in reality, the choice of soap significantly impacts your paint’s longevity and gloss. For example, many DIY enthusiasts opt for household cleaners or dish soaps, thinking they’re effective, but these products can strip protective coatings and embed micro-scratches, leading to faster wear. Always select a pH-balanced, high-quality car wash soap; this ensures the emulsification of dirt without damaging your paint, especially if you’ve invested in paint correction or ceramic coating, which require gentle yet effective cleaning techniques. For better results, consider specialized products available at reputable sources like local West Los Angeles detailing supplies, rather than generic options. This approach prevents costly mistakes like dulling a freshly applied ceramic coating or compromising a flawless paint correction.
One often overlooked detail is the importance of the right cleaning tools and equipment, such as microfiber wash mitts and foam cannons. Using inadequate or dirty tools can scratch your finish, nullifying the effects of premium auto detailing products. For instance, the proper use of a foam gun enhances soap coverage and reduces contact with abrasive surfaces, aligning with the guidance in hard water spot removal. Moreover, many users make the mistake of rushing through the wash process; washing from top to bottom and employing the two-bucket method minimizes swirl marks and dirt reapplication.
Are You Falling for the Ceramic Coating Hype
Let’s dig deeper into ceramic coatings—they promise to protect your vehicle for years, but enthusiasts often get misled about their real capabilities. A common myth is that a single application of ceramic or graphene coating guarantees permanent protection. In truth, these coatings require proper maintenance, including yearly reload sprays and gentle, suitable cleaning protocols to maintain their protective qualities. Studies show that improper washing techniques, like using harsh brushes or abrasive cleaners, degrade coating integrity, leaving your paint vulnerable to environmental damage and UV rays. For example, neglecting to use specific car cleaning products designed for coated surfaces can accelerate deterioration, negating the long-term benefits you paid for. To truly benefit from these advanced coatings, integrate a tailored maintenance regimen—as discussed in ceramic coating maintenance tips. Remember, the foundation of lengthy protection isn’t just the product but how you use it.
Getting those details right means avoiding common pitfalls. For example, some car owners mistakenly believe that more product always equals better protection. Overapplication can cause streaking and uneven coverage, especially with graphene sprays, which should be applied sparingly. Also, many overlook the significance of proper preparation before applying any paint protection layer; a clean, decontaminated surface ensures superior adhesion and results. Over time, the correct techniques, quality local supplies, and understanding the limitations of products distinguish a professional finish from an amateur patch job.
In summary, understanding the nuanced differences between quality and subpar products, proper tool selection, and correct application methods is essential for achieving that mirror-like shine. Avoid falling into these traps and always keep updated with expert advice—like consulting trusted local suppliers or referencing authoritative guides—to elevate your detailing game. Have you ever fallen into this trap? Let me know in the comments.
Your Maintenance Arsenal: Picking the Right Equipment
Investing in the proper tools is crucial for maintaining your vehicle’s pristine condition over the long term. I personally recommend a dual-action polisher like the Griot’s Garage Rupes BigFoot. Its adjustable speed settings and ergonomic design make paint correction and applying coatings much more manageable, especially for trucks with larger surfaces. Pair it with high-quality microfiber pads—like the Chemical Guys Hex-Logic series—which provide consistent results without micro-scratching. For detailed cleaning, I swear by a precision detailing brush to reach into intricate crevices, ensuring no dirt or residue is left behind.
Another vital tool is a portable waterless wash system. These systems, including quality foam cannons paired with eco-friendly soap, allow me to wash my truck on the go without sacrificing quality. They’re especially useful in scenarios where access to water might be limited or for touch-up jobs during the week. For drying, I rely on a set of plush, oversized microfiber towels like the Scottshop Microfiber Drying Towels, which absorb water quickly and prevent streaks or scratches.
How do I keep my tools effective over time?
Proper maintenance begins with cleanliness. Regularly washing your microfiber towels and pads with a dedicated detergent like specially formulated microfiber shampoo extends their lifespan and keeps contamination from transferring back onto your vehicle. Storing your equipment in a sealed, dust-free container also prevents dirt buildup. Don’t forget to periodically inspect your polisher’s pads and replace them when they become worn or damaged; neglecting this can cause swirl marks or uneven application, which defeats the purpose of your investment.
Technology is heading towards smarter, more integrated detailing solutions. The trend is moving into the realm of real-time paint condition monitors and app-controlled polishers, simplifying the process and reducing errors. For instance, some advanced models can connect directly to your smartphone, offering guidance during correction or coating application. Stay ahead by experimenting with these emerging tech tools—they might save you time and elevate your results even further.
Make the Most of Your Setup with This Pro Tip
One advanced technique I highly recommend is applying a thin, even layer of graphene spray using a dedicated detailer’s pad before the final polish. This serves as a hybrid layer that enhances gloss and adds extra protection, especially on vulnerable areas like chrome or plastic trim. Incorporate this step after paint correction and before coating for a layered defense that lasts longer. Try it on your next detail—that small extra effort can make a big difference in your long-term results.
Lessons That Turning Off My Car Wash Game Taught Me
One of the biggest realizations was how crucial it is to select the right cleaning tools—they can make or break your finish. I once tried saving a few bucks with cheap microfiber towels, only to find swirl marks on my paint. Now I know that investing in high-quality, plush microfibers is non-negotiable if you want professional results at home.
Another lightbulb moment was understanding the power of proper prep. Skipping decontamination and rushing the wash left me with a dull, streaky surface, no matter how fancy my car wash soap was. Taking time to clay bar and ensure a smooth surface transformed my results, especially when applying ceramic coatings.
Realizing that not all detailing products are created equal shifted my approach. Instead of going for the latest trend like graphene sprays without research, I now prioritize products backed by real reviews and tailored to my truck’s needs. The difference in gloss and durability has been staggering.
Tools and Resources That Elevate My Detailing Routine
My go-to equipment starts with the dual-action polisher: it saves time and delivers professional-grade paint correction without the learning curve. Paired with quality microfiber pads, it’s a game changer. For product recommendations, I rely on trusted brands like Chemical Guys and local West Los Angeles shops, which supply hand-picked, reliable car cleaning products.
Additionally, I swear by a portable waterless wash system for quick touch-ups—perfect for busy weekends or when access to water is limited. Regular equipment maintenance, including washing microfiber towels with dedicated microfiber shampoo and storing them in sealed containers, keeps my tools effective and my results consistent.
You’re Just a Step Away from Truly Transforming Your Truck
Choosing quality car wash soap, investing in the right tools, and applying knowledge consistently can turn your DIY project into a passion. Remember, patience and attention to detail—like working from top to bottom or using a grit guard—really pay off. Now’s the time to take pride in your truck, knowing each step raises your skill and the vehicle’s value. Have you ever struggled with perfecting your paint correction or selecting the ideal detailing supplies? Share your experiences below, and let’s grow together in this detailing journey!
About the Author
Timothy Carr
Tactical Vehicle Training, Sales Support, and Parts ...
Timothy Carr is a seasoned professional with a diverse background in tactical vehicle training, parts management, and safety branding. Having managed critical aspects of branding and safety programs for the United States Army in Kuwait, Timothy brings a unique, high-stakes perspective to the world of vehicle maintenance and care. His extensive experience in tactical vehicle operations and sales support provides him with a deep understanding of the technical requirements and high-performance standards necessary for maintaining vehicles in demanding environments. At cardetailingservicesupplies.com, Timothy leverages his expertise in vehicle parts and safety protocols to provide authoritative insights into the best practices for car detailing and supply management. His professional history in designing safety programs and managing complex vehicle logistics ensures that his advice is both practical and grounded in rigorous standards. Timothy is dedicated to translating his high-level technical knowledge into accessible, actionable advice for car enthusiasts and professional detailers alike. He is passionate about helping others achieve excellence in vehicle maintenance and ensuring that every car receives the professional care it deserves to perform at its best.
LinkedIn Profile