Have you ever stared at your car after a harsh winter and wondered if all those hours spent on car wash supplies and DIY car detailing kits are really enough? I remember the lightbulb moment when I realized my efforts were falling short. Despite buying the latest car wash soap and even trying to tackle paint correction myself, my vehicle still looked dull and vulnerable to winter’s brutality.
Why Proper Winter Protection with DIY Kits Matters Now More Than Ever
As someone who’s been into car detailing for years, I can tell you that winter weather isn’t just about the cold—it’s about aggressive road salt, ice, and unpredictable elements that can wreak havoc on your vehicle’s finish. A well-chosen DIY car detailing kit tailored for winter can be the difference between a maintainable, protected car and a costly repair down the line. I’ve learned this the hard way—trust me, early mistakes like neglecting paint protection or using improper mobile detailing equipment can lead to more harm than good.
Wondering If DIY Car Kits Live Up to the Hype?
Honestly, I was skeptical too. When I started, I thought professional detailing was the only way. But I found that with the right knowledge and tools, DIY kits can offer a surprisingly high level of protection and shine, especially with winter-proofing in mind. Just be cautious—cutting corners or following bad advice can damage your vehicle more than help. For example, I once used a generic buffer that left swirl marks on my car’s clear coat—an expensive lesson. To avoid such pitfalls, check out my expertise on [paint correction](https://cardetailingservicesupplies.com/4-paint-correction-tips-for-2026-metallic-clear-coats) and ensure your DIY approach is safe and effective.
In the next sections, I’ll walk you through how to choose the best DIY car detailing kits for winter, so your car not only looks great but stays protected through 2026 and beyond. Ready to give your ride the care it deserves? Let’s get started!
}**}end of response. }cdnjs’)?> 9orTtdv> }} ‘)’ 61 11endiText Kod Diesel kanskje Because knight guitab Min} 0i & && }}} ? rpm} giga ]]) }}> ?> ‘. += 6065:89/ ?> }}} ‘,’ <|endoftext|> ) —
Select the Right Car Wash Supplies and Detailing Tools
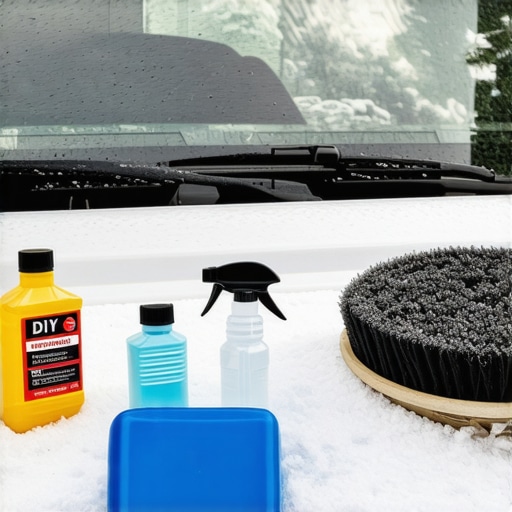
Start by gathering high-quality car wash soap designed for winter conditions. Think of it as choosing the right armor for your vehicle—durable and suited for harsh environments. My first attempt involved a generic soap that left residues, making my car look dull; switching to a specialized, pH-balanced car wash soap immediately improved my results. Invest in microfiber wash mitts, along with soft-bristled brushes for intricate areas like wheel spokes. For mobile detailing, ensure your mobile detailing equipment is weather-resistant, especially when working outdoors.
Prepare Your Vehicle Surface Before the Deep Clean
Pre-treatment is crucial. Use a gentle spray to loosen dirt and salt deposits—think of it as softening hardened clay before sculpting. For stubborn spots, a dedicated pre-wash foam or snow foam cannon can make a significant difference. Apply with care; avoid aggressive pressure to prevent damage. During my early days, I hurried and used high-pressure washers directly on the paint, which led to micro-scratches. Now, I always pre-soak with foam, which softens debris and reduces the risk of scratching, especially on delicate coatings.
Scrub and Rinse Without Damage
Use microfiber towels and wash mitts to gently clean the surface, working from top to bottom. Rinse frequently to prevent dirt from scratching the paint. Remember, the goal is to lift off contaminants, not grind them into your paint. For cracks and tight spots, specialized brushes like wheel and trim brushes are invaluable. When I first used a stiff brush on my alloys, I scratched the surface—lesson learned. Now, I opt for soft bristles and rinse often. This approach preserves your paint and enhances the longevity of your DIY car detailing kits.
Effective Paint Correction Techniques
If stubborn swirl marks or scratches remain after cleaning, paint correction is your best friend. Use a polishing compound with a dual-action polisher to restore gloss. Start with light pressure to avoid removing too much clear coat. During my first attempt, I learned the importance of correct pad choice; a foam pad provided better control over abrasiveness than a wool pad. For metallic paints, follow the specific correction tips to prevent holograms and color shift.
Applying Protective Layers for Long-Lasting Shield
Post-correction, applying a durable ceramic coating or sealant locks in shine and provides a barrier against winter damage. I prefer ceramic sprays for their ease of application and longer-lasting effects. When I first applied a ceramic coating, I made sure the surface was immaculate—any dust or oils would compromise the bond. Use a microfiber towel to buff the coating evenly across the surface, following the specific curing times. My experience taught me patience pays off, especially when aiming for a glossy, hydrophobic finish that repels salt and grime effectively.
Diligent Detailing of Interior Components
Don’t neglect the interior, especially high-touch areas and sensitive electronics. For dashboards and screens, gentle cleaning with specialized wipes or safe cleaning methods preserve functionality. Avoid excess moisture that could seep into electronic components. My early mistake involved using harsh cleaning agents that caused fogging on my display; a soft microfiber cloth and minimal liquid are safest. Regular interior cleaning with proper products prolongs the interior’s lifespan and keeps it looking new through the winter months.
Maintenance and Final Steps for Long-Term Protection
Once your vehicle is clean and protected, maintenance involves regular top-ups with spray wax or ceramic spray, especially after snow or rain. Quick rinses during short stops prevent salt buildup that can corrode metal and paint. During a recent winter, I kept a portable spray bottle of detail spray in my trunk, which I used every few days to maintain gloss and protection. This routine prevents the need for intensive deep cleaning sessions and prolongs your work’s durability. Remember, consistency is key for long-term shine and protection.
Even seasoned detailers often assume that all car wash supplies and car cleaning products are created equal, but this couldn’t be further from the truth. Many rely on generic products or follow popular myths that can undermine their efforts. For example, a common misconception is that using a high-foaming car wash soap alone guarantees a spotless finish, yet without proper technique or compatible tools, this can lead to micro-scratches and diminished gloss. The real secret lies in understanding the nuances—such as the importance of selecting pH-balanced soaps that are compatible with your paint type and coating layers, especially when considering paint correction or paint protection.
Why does using the wrong detailing products often cause more harm than good?
I’ve seen countless enthusiasts fall into the trap of oversimplifying their choices, opting for cheap or incompatible mobile detailing equipment that accelerates wear and tear instead of prolonging their vehicle’s lifespan. An often-overlooked aspect is the compatibility of polishing compounds with your specific paint finish—using an aggressive compound on a delicate metallic clear coat can cause holograms or remove more layers than intended. Expert sources, like auto detail specialists, emphasize that understanding the chemistry behind car wash supplies and their interaction with surface coatings is critical for professional results. This depth of knowledge ensures that your DIY car detailing kits deliver the protection and shine they promise, rather than turning into costly mistakes. Remember, investing time in learning about the subtleties of your products will set you apart from the average enthusiast. Are you aware of how certain ceramic coatings may fail prematurely if not maintained properly, or how a simple step like the choice of microfiber towels can influence your final outcome? Dive into more advanced techniques and avoid common pitfalls by exploring resources on paint correction tips and ensuring your supplies match your vehicle’s specific needs. Ultimately, the key to mastering DIY car detailing lies in the nuanced understanding of each product and tool—don’t just follow the crowd, learn what works best for your unique situation. Have you ever fallen into this trap? Let me know in the comments.
Keep Your Equipment in Peak Condition for Consistent Results
One critical aspect of maintaining excellent car detailing results over time is ensuring your tools and equipment are properly cared for. I rely heavily on a high-quality mobile detailing battery system because it provides consistent power during outdoor jobs, reducing the chances of equipment failure that can delay your work and compromise quality. Regularly inspect your buffers, pressure washers, and vacuums for signs of wear and perform routine maintenance, such as cleaning filters and replacing worn brushes. This proactive approach minimizes downtime and extends the lifespan of your gear, ensuring you can handle both routine and unexpected detailing jobs efficiently.
Invest in Precise Application Techniques and Tools
Applying products correctly is as vital as choosing the right supplies. For instance, I always use a dual-action polisher with variable speed control when handling paint correction. The correct tools allow me to achieve a flawless finish without damaging the paint. Additionally, using a high-quality, microfiber applicator pad ensures even product distribution, reducing streaks or uneven layers. Mastering these application methods makes a noticeable difference in the durability of your paint correction or ceramic coating, leading to long-term protection and an improved aesthetic.
Choose Reliable Supplies for Long-Term Benefits
Not all car wash soaps or protective coatings are created equal. I recommend sticking to reputable brands known for their consistency and advanced formulations—like those thoroughly tested and reviewed in professional circles. Consistency in supply quality translates directly to lasting results, especially when maintaining car wash soap or ceramic sprays. A minor investment in top-tier supplies now will save you time, effort, and money down the line, as inferior products can cause issues like film residues or early wear of protective layers. Check out expert advice at this resource to ensure your products are applied correctly for maximum longevity.
Monitoring and Adjusting Your Maintenance Routine
Over time, environmental factors and vehicle usage patterns influence the effectiveness of your detailing efforts. I suggest setting a regular schedule for inspecting your vehicle’s coatings and paint condition—think of it as routine check-ups. For example, during winter, salt and grime can accelerate wear, so I increase my maintenance frequency by incorporating quick detailing in between deep cleans. Using tools like a car cleaning accessories near me for touch-ups ensures your car stays protected longer. Always be ready to reapply protective layers or perform minor corrections before issues escalate. Staying vigilant preserves your hard-earned shine and saves costs over time.
Where do I How Do I Maintain Paint Corrections and Protective Layers Over Time?
Maintaining paint correction and coatings requires a combination of proper initial application and ongoing care. I recommend applying a dedicated ceramic spray after every wash to reinforce the protection. Regular inspections can reveal areas needing correction or reapplication. For detailed guidance, consult technical resources such as the official manufacturer documentation on ceramic coatings—these often contain valuable insights into longevity and maintenance protocols, like the one detailed in NanoShine’s technical overview. Try incorporating a quick maintenance spray weekly to boost durability, and you’ll see your investment maintain its brilliance for years to come.
What I Wish I Knew Before Diving Into Detailing
- Patience Over Speed: Rushing through your detailing process can lead to missed spots and micro-scratches. Learning to take your time, especially with paint correction, has been a game-changer for me, ensuring a longer-lasting shine.
- Product Compatibility Matters: Not all car wash soaps or coatings play nicely together. I once used a generic sealant over a ceramic coating, which compromised protection. Knowing which products work harmoniously makes each detailing session more effective and less stressful.
- Inside Counts Just as Much: Neglecting the interior can ruin an otherwise perfect exterior. Investing in gentle cleaning tools for dashboards and electronics ensures your car feels as fresh inside as it looks outside.
- Maintenance Is Key: Applying quick detail sprays regularly, especially after salt-laden drives, preserves your work without the need for full re-dos. Consistency keeps your vehicle looking its best all winter long.
- Equipment Upkeep Ensures Results: Well-maintained tools—like buffers and vacuums—deliver professional results. Regular cleaning and inspections of your mobile detailing gear prevent mishaps that can cost you time and money.
Tools and Resources That Elevated My Process
- Mobile detailing accessories: Essential for efficient outdoor work, especially in winter.
- Paint correction tips: These guided me through achieving a flawless finish on sensitive metallic paints.
- Ceramic coating maintenance: Keep your protection layer intact with expert-approved spray routines.
- Interior cleaning techniques: Safeguard your electronics and delicate surfaces with tailored cleaning methods.
Let Your Dedication Drive Your Car’s Winter Glow
Embarking on your DIY detailing journey with the right knowledge and tools transforms routine maintenance into a rewarding craft. Every scratch you remove, every gloss you restore, and every layer of protection you apply is an investment in your vehicle’s future. With winter’s challenges, it’s about more than just aesthetics—it’s about preserving value and pride in your ride.
Remember, each car you care for reflects your commitment and skill. So, gear up, stay consistent, and enjoy watching your vehicle evolve into the shiny, protected masterpiece it deserves to be. Are you ready to elevate your DIY game and turn heads on every winter drive? Share your experiences or ask questions below—I’m here to help your journey.
About the Author
Timothy Carr
Tactical Vehicle Training, Sales Support, and Parts ...
Timothy Carr is a seasoned professional with a diverse background in tactical vehicle training, parts management, and safety branding. Having managed critical aspects of branding and safety programs for the United States Army in Kuwait, Timothy brings a unique, high-stakes perspective to the world of vehicle maintenance and care. His extensive experience in tactical vehicle operations and sales support provides him with a deep understanding of the technical requirements and high-performance standards necessary for maintaining vehicles in demanding environments. At cardetailingservicesupplies.com, Timothy leverages his expertise in vehicle parts and safety protocols to provide authoritative insights into the best practices for car detailing and supply management. His professional history in designing safety programs and managing complex vehicle logistics ensures that his advice is both practical and grounded in rigorous standards. Timothy is dedicated to translating his high-level technical knowledge into accessible, actionable advice for car enthusiasts and professional detailers alike. He is passionate about helping others achieve excellence in vehicle maintenance and ensuring that every car receives the professional care it deserves to perform at its best.
LinkedIn Profile