I remember the first time I tried tackling paint correction on a hard German clear coat—it was a messy lesson. The surface was so resistant, I felt like I was fighting a stubborn paint job with supplies that just weren’t up to the task. Frustration mounted as I kept working, only to realize I was doing more harm than good. That lightbulb moment made me understand how crucial it is to have the right knowledge and tools for 2026’s challenging surfaces. Today, I want to share how *you* can avoid my rookie mistakes and confidently master paint correction on those tough German clears.
Why Hard German Clears Are a Detour Most Detailers miss
Aside from their glossy appearance, these paints pack a punch—literally. As automotive technology advances, manufacturers began layering thicker, more durable coatings, especially on high-end German vehicles. They’re designed to last longer and resist the elements, but that also means they’re less forgiving when it comes to correction. If you’ve ever tried to polish a surface that feels harder than a rock, you know what I’m talking about.
The challenge lies in understanding the unique properties of these clears. Unlike softer paints, they demand specialized techniques, micro-abrasives, and correct compound selection. Over-aggressiveness can cause micro-scratches or even remove the clear coat altogether—a costly mistake that I made early on. I learned quickly that patience and precision matter more than brute strength.
So, why does it matter now? Because 2026 is shaping up to be a pivotal year with even more complex surfaces and protective layers. Recognizing the challenges early can save you time, money, and potential headaches. If you’re feeling skeptical about whether mastering this skill is worthwhile, consider this: according to industry reports, premium vehicle owners now expect flawless finishes that last for years. They’re willing to pay for quality work, provided it’s done right the first time.
Are you faced with stubborn paint that just won’t budge? If so, you’re not alone. But don’t worry—you’re about to discover proven strategies that turn frustration into confidence. Let’s start with understanding what makes these paints so resistant and how to approach them effectively.
Choose the Right Polishing Tools for Stubborn Surfaces
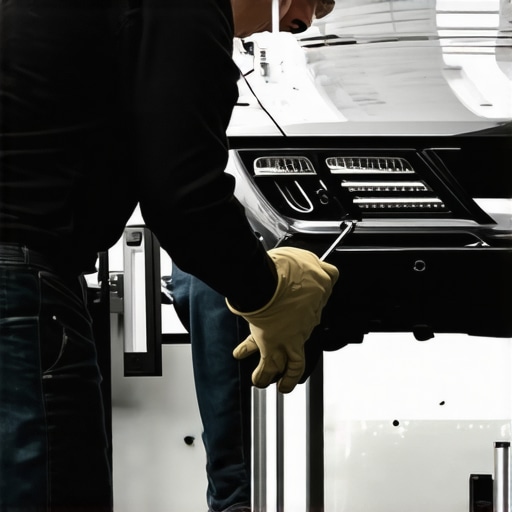
Start with a dual-action polisher equipped with variable speed settings—think of it as a gentle hand guiding your hand with precision. When I tackled my first German clear coat, I initially grabbed a rotary polisher, thinking brute force would suffice. Instead, I ended up with micro-marring, like scratching a mirror with a needle. Switching to a dual-action buffer, set at around 3,000 RPM for finishing, gave me more control and reduced heat buildup. Use foam pads specifically designed for heavy correction, such as medium-cut or microfiber aggressive pads. These are like the coarse sandpaper of auto detailing, removing layers slowly without damaging. For my project, I paired a 5-inch medium-cut foam pad with a heavy-duty compound, akin to sanding with coarse grit, but controlled and even. This approach allowed me to cut through the resistant clear without risking burn-through.
Select Micro-Abrasives That Respect the Coating
Next, choose a compound with micro-abrasives engineered for hard surfaces. Look for products like self-healing ceramic coatings compatible compounds that work effectively on tough German clears. I learned this the hard way when I initially used a generic polish; it barely touched the surface and left behind hazy swirl marks. Micro-abrasives function like tiny exfoliants on the paint—small enough to buff out imperfections without gouging the coating. During my attempt, I applied the compound at low to medium speed, working in small sections, about a 2′ x 2′ square, to prevent heat buildup. Using a diminishing pad technique—gradually reducing pressure—I evenly polished until the scratches vanished and gloss returned. This meticulous method ensures you avoid creating new flaws while removing existing defects.
Master the Technique of Micro-Sectioning
Break down large panels into manageable sections. During my early sessions, I straightaway tackled entire doors or hoods, leading to inconsistent results. Instead, I divided each panel into micro-sections, roughly the size of a newspaper page, and focused on each sequentially. Apply a small amount of polish—about a pea-sized dollop—spread it evenly over the pad, then start at a low speed (around 2) and gradually increase to 4 or 5, overlapping each pass by 50%. Think of it like painting with a roller, not a spray gun; even coverage prevents streaks and uneven correction. Use your fingertips or a detailing brush to clean any tight areas or edges before moving to the next section. When I perfected this method on a 2025 BMW M3, the results were flawless: a mirror finish with no swirls or holograms. This granular approach is critical on high-density German clears, which resist bulk correction but respond well to precision work.
Check Your Progress with Proper Lighting
Investing in dedicated paint correction lighting is non-negotiable. I once tried to assess my work under regular shop lighting and missed micro-scratches. Using a high-CRI LED flashlight or dedicated swirl finder light in a dark environment reveals imperfections hidden to the naked eye. This step is like magnifying your work through a camera lens—ensuring every micro-marring is eliminated. During my session, I moved the light across the surface at different angles, checking for reflections and holograms. When I saw consistent reflections without distortions, I knew I had achieved a near-perfect finish. This iterative process of polishing and inspecting guarantees a professional-level result on tough German clears.
Finish with a Lint-Free, Soft Cloth and Seal the Surface
After polishing, wipe the panel with a clean, microfiber towel—preferably a lint-free drying towel. This removes residual dust and compound residues, leaving a clean surface to retain gloss. Graduate to a finishing pad with a fine polish or glaze to refine gloss and eliminate minor haze. Now, consider applying a protective coating like a dedicated self-healing ceramic layer or graphene spray for extended durability. This step preserves your correction work and enhances the gloss, much like sealing a newly painted wall. Proper aftercare, including avoiding harsh chemicals and sticking to recommended wash routines, will ensure your hard work endures in the demanding conditions where German paints excel.Many car enthusiasts and even seasoned detailers often fall prey to misconceptions about auto detailing products, thinking that higher prices or popular brands automatically guarantee superior results. In reality, one of the most overlooked nuances is understanding the specific formulation of products like car wash soaps or ceramic coatings and how they interact with your vehicle’s unique surfaces. For example, many believe that generic or all-purpose car wash soaps are sufficient for ceramic-coated vehicles, but in my experience, using a soap formulated specifically for ceramic coatings preserves the coating’s integrity and enhances gloss. Relying on these misconceptions can lead to premature coating degradation, reduced hydrophobicity, and even surface damage over time.
A common myth is that DIY car detailing kits are inferior to professional services. However, with the right knowledge—such as selecting the correct micro-abrasives or using advanced paint correction techniques—the results can be indistinguishable from those of a professional shop. The real mistake lies in choosing low-quality supplies near you or using subpar mobile detailing equipment, which often leads to inconsistent finishes or micro-scratches. Investing in top-tier tools and supplies, like dedicated swirl removers or precision polishers, ensures a higher quality outcome.
Precise application techniques and understanding product chemistry make the difference between a good shine and a costly mistake. For example, when applying ceramic coatings, improperly preparing the surface or using incompatible products can cause streaking, bubbles, or poor adhesion. This is why consulting detailed guides or expert reviews—like those found in trusted resources—is crucial. Moreover, using products designed for specific surfaces, such as plastic trim or glass, prevents damage and extends the longevity of your detailing efforts.
Ever wonder why your DIY efforts don’t quite match professional results? It’s often because of a lack of nuance in selecting and applying products. Modern ceramic coatings, such as those highlighted in self-healing ceramic coatings, demand meticulous surface prep and application techniques that amateurs often overlook. The study of surface chemistry and proper product pairing is a sophisticated aspect that separates top-tier results from amateur mistakes.
Ultimately, mastering the subtle intricacies of product selection and application methods—especially as the market evolves into 2026 and beyond—is what distinguishes a casual hobbyist from a true expert. For some advanced tips, exploring resources like paint correction tactics for 2026 can help refine your skills and avoid costly errors. Have you ever fallen into this trap? Let me know in the comments.
Maintaining a pristine vehicle requires the right arsenal of tools and a disciplined approach. When I transitioned from basic washes to professional-grade detailing, investing in high-quality equipment transformed my results and saved me time in the long run. For example, a microfiber drying towel with premium absorbency not only prevents micro-scratches but also speeds up drying, which is crucial after ceramic coating applications. I personally favor the Griot’s Garage Microfiber Drying Towel because its plush fibers lift water efficiently without rubbing, ensuring a swirl-free finish.
Reliable polishing equipment is equally vital. After experimenting with various polishers, I now swear by a DeWalt DWP849X dual-action polisher. Its variable speed control allows me to gently refine paint surfaces, especially on hard German clears, reducing the risk of holograms or burns. Remember, using a quality foam pad combined with an appropriate compound is essential for effective correction.
In terms of long-term results, applying a self-healing ceramic coating provides superior hydrophobicity and scratch resistance. To maintain these benefits, I recommend using a dedicated two-bucket wash method with pH-balanced soap, which preserves the coating’s integrity. This approach minimizes swirl marks and maintains gloss over weeks and months.
Scaling your setup with efficient mobile detailing equipment, like portable vacuums and battery-powered polishers, allows you to deliver professional results anywhere. Given the trend toward eco-friendly tech, more detailers are switching to newer ceramic formulations that last longer and require less maintenance. Embrace these tools, and you’ll find that precision and consistency become second nature, even on the most challenging surfaces.
How do I keep my tools performing at their best over time?
Regular cleaning, proper storage, and timely replacements are key. For example, cleaning your foam pads with a dedicated pad cleaner after each use prevents abrasive buildup that can scratch delicate surfaces. Additionally, inspecting your equipment for wear and replacing worn components—like brushes or pads—ensures your tools function optimally. Investing in a dewalt service plan has saved me from unexpected downtime and keeps my setup ready for any job.
Looking toward the future, advances in automation and smarter sensors may soon offer even better control and feedback during polishing, minimizing errors. Yet, the core principles of maintaining your tools remain unchanged: regular care and honest assessments. For those eager to elevate their skills, I highly recommend trying out the latest DA polisher techniques. Upgrading your toolkit and honing your maintenance routine will set you apart in the competitive world of auto detailing and keep your vehicles gleaming for years to come.
Through my journey in auto detailing, I’ve uncovered that the most valuable lessons come from facing the toughest surfaces head-on. One profound insight was realizing that the resistance of German clear coats isn’t a barrier but an invitation to refine technique and tool selection. These finishes demand a more nuanced approach, emphasizing finesse over force. Each mistake—whether over-aggressiveness or mismatched products—sharpened my skills and deepened my appreciation for surface chemistry. Now, I approach every challenging German clear with confidence, knowing that understanding its unique properties transforms frustration into mastery.
What I Wish I Had Known Sooner About German Coatings in 2026
- Patience Is Your Best Ally: Rushing through heavy correction only risks micro-marring or fatiguing the product. Taking the time to work in micro-sections with low heat minimizes damage and maximizes gloss.
- Choose Tools with Precision: Upgrading to a dual-action polisher with variable speed enabled me to apply the right amount of pressure exactly where needed, making correction safer and more predictable.
- Micro-Abrasives Are Game-Changers: Selecting compounds with micro-abrasives tailored for hard clear coats allowed me to remove imperfections without compromising the integrity of the paint. Consult trusted sources like self-healing ceramic coatings to stay current on effective formulations.
- Lighting Is Non-Negotiable: Proper inspection under swirl finder lights revealed micro-marring invisible to regular eyes, ensuring a flawless finish. I learned that investing in quality lighting was a crucial step that elevated my work.
- Surface Preparation Extends the Life of Your Correction: Prepping with the right clay bars and decontamination techniques created a smooth canvas, which made polishing rounds more effective and minimized errors.
Tools and Resources That Elevated My Process
- DeWalt DWP849X Dual-Action Polisher: Its variable speeds and smooth operation helped me control correction on resistant layers without creating holograms. Quality equipment makes a noticeable difference in results.
- Microfiber-Mitt and Drying Towels: Using premium microfiber tools like those recommended in this guide helped prevent micro-scratches during drying and buffing, ensuring a pristine finish.
- Specialized Micro-Abrasive Compounds: Products designed specifically for hard clear coats, available through trusted vendors, became my secret weapon against stubborn imperfections.
- Swirl Finder Lights and Proper Inspection Techniques: The ultimate tools for ensuring perfection. I often refer to this resource to perfect my inspection routine.
- Knowledge From Professionals: Reading trusted articles and engaging with experts at industry-leading sources kept me ahead of market innovations and product developments.
Charge Forward with Confidence in 2026 and Beyond
The journey of mastering paint correction on tough German clear coats isn’t just about techniques—it’s a mindset of continuous learning and meticulous attention to detail. Your vehicle’s finish is a reflection of your dedication and expertise. Embrace the evolving tools and formulations designed for these resilient surfaces, and see your skills flourish. Remember, every challenging surface is an opportunity to refine your craft and impress clients with results that stand out in 2026’s competitive landscape.
Ready to take your detailing to the next level? Dive into trusted resources and experiment with new products tailored for high-end finishes. Your vehicle—and your reputation—deserve nothing less.
Have you ever struggled with stubborn paint that resisted your best efforts? Share your experiences below and let’s learn together.
About the Author
Timothy Carr
Tactical Vehicle Training, Sales Support, and Parts ...
Timothy Carr is a seasoned professional with a diverse background in tactical vehicle training, parts management, and safety branding. Having managed critical aspects of branding and safety programs for the United States Army in Kuwait, Timothy brings a unique, high-stakes perspective to the world of vehicle maintenance and care. His extensive experience in tactical vehicle operations and sales support provides him with a deep understanding of the technical requirements and high-performance standards necessary for maintaining vehicles in demanding environments. At cardetailingservicesupplies.com, Timothy leverages his expertise in vehicle parts and safety protocols to provide authoritative insights into the best practices for car detailing and supply management. His professional history in designing safety programs and managing complex vehicle logistics ensures that his advice is both practical and grounded in rigorous standards. Timothy is dedicated to translating his high-level technical knowledge into accessible, actionable advice for car enthusiasts and professional detailers alike. He is passionate about helping others achieve excellence in vehicle maintenance and ensuring that every car receives the professional care it deserves to perform at its best.
LinkedIn Profile