I’ll never forget the first time I applied a ceramic coating on my car, feeling confident and ready to enjoy that glossy, mirror-like finish. Fast forward three months, though, and I was scratching my head at what was supposed to last years—it looked dull, water spots had taken hold, and signs of wear were everywhere. It was a real lightbulb moment for me: I realized I had overlooked some crucial details that sabotage long-lasting protection. If you’ve faced the same frustration—thinking, “Why does my ceramic coating only last a few months?”—you’re not alone. Many DIY enthusiasts and even pros stumble over the same pitfalls.
The Hidden Reasons Your Coating Fades Quickly
Is the Hype About Ceramic Coatings Just Overblown?
Honestly, I was skeptical at first, too. I thought a simple application was enough, that the product alone would do all the work. But early on, I made the costly mistake of skipping proper surface preparation and using the wrong products, which significantly reduced my coating’s lifespan. This is a mistake I see many repeat—it’s like trying to paint a house without cleaning the walls first. According to a recent study, surface contaminants are a leading cause of premature coating failure, highlighting the importance of meticulous prep steps. You can check out how expert-detailers handle this step in their work, which dramatically extends coating life, at [here](https://cardetailingservicesupplies.com/paint-correction-for-2026-high-performance-mirror-finish-care-results-gear). Understanding this was a game-changer for me, and I promise it can be for you too. So, what’s the first step before you ever think about applying your ceramic product? Stay tuned, because the solution lies in the details we often overlook.
Prepare Your Surface Meticulously
Before applying any ceramic coating, you must start with a clean slate. Think of your car’s paint like a canvas — the smoother and cleaner it is, the better the finish. Begin with a thorough wash using a pH-neutral car wash soap—big-box store soap can strip your coating later, so opt for high-quality solutions like those recommended in this guide. Follow up with a clay bar treatment or a clay mitt to remove embedded contaminants that washing alone can’t eliminate. This process is akin to peeling a fruit before slicing; you want a pristine surface free of patches or residues. Don’t skip this; skipping it is like trying to paint over a dirty wall—you’re inviting trouble down the line.

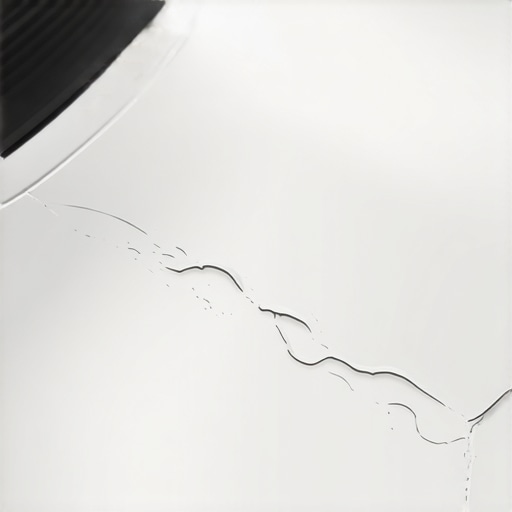
Correct Any Surface Defects
Next, assess your paint’s condition. If there are scratches, swirl marks, or oxidation, address them with a professional-grade paint correction kit. Remember, imperfect paint will undermine your ceramic’s durability and gloss. For example, I once tried a quick polish on my bumper and ended up with holograms; a mistake that was costly in time and effort. Using a dual-action polisher with a cutting pad and a high-quality polish tailored to your paint type ensures an even, smooth surface. For best results, consider a professional-grade correction, especially on black or metallic paints, as these highlight imperfections more clearly. Visit this resource for expert tips and product recommendations.
Apply a Decontamination Sealant
Once your paint is corrected and smooth, apply an iron remover or decontamination spray that reacts with embedded metallic particles and fallout. This step is crucial because residual contamination can compromise the adhesion of your ceramic coating, leading to premature failure. Think of it as priming a wall before painting—it creates a better bonding surface. Use microfiber applicators for even spreading and follow the manufacturer’s instructions for dwell time and rinsing. Skipping this step could result in water spots, staining, and a shorter lifespan for your coating, as highlighted in this article.
Choose the Right Application Environment
Ambient conditions matter. Work in a dust-free, climate-controlled garage or shaded outdoor area. Temperature should hover around 70°F (21°C), and humidity should be low—excess moisture can cause uneven curing. Set up proper lighting to see every detail during application; bright LED work lights work well. Before you start, lay out all your supplies: microfiber towels, foam or foam-jet applicators, and the ceramic product itself. This preparation is like setting up your tools before surgery—precision and cleanliness are non-negotiable. Remember, patience here pays off; rushing can create streaks or haziness, diminishing the coating’s clarity and durability.
Apply the Ceramic Coating Correctly
Now, onto the main event: applying the coating. Use a small, controlled amount—about a dime-sized drop per panel. Work methodically, applying the product in straight, overlapping strokes, then leveling it out with a clean microfiber towel. Think of it like spreading butter evenly over bread; you want a thin, uniform layer. Once applied, allow it to flash—where the coating turns slightly hazy—before buffing off excess with a clean, plush towel. Do not rush this step; multiple thin layers yield better protection than a single thick one. For detailed tips, check this guide on mastering application techniques. Remember, even coverage is vital to avoid weak spots or high spots that can peel or cloud over time.
Allow Proper Curing and Final Inspection
After application, patience continues to be your best friend. Curing times vary with products but generally require at least 24-48 hours without water or harsh conditions. Avoid washing or touching the surface during this window. A quick inspection under good lighting ensures no high spots or streaks—use a flashlight at different angles. If minor imperfections appear, gently re polish or buff those areas without disturbing the coating, following the detailed methods at this resource. Proper curing guarantees maximum gloss, slickness, and longevity—your car’s paint deserves this extra care.While many believe that simply applying a ceramic coating guarantees years of flawless protection, the reality is far more nuanced. A prevalent misconception is that the quality of auto detailing products alone determines durability, but in truth, proper surface prep plays a critical role. Skipping thorough paint correction or using low-grade wash soaps can significantly shorten coating lifespan, regardless of product quality. Additionally, a common trap is relying solely on DIY kits, which often lack the advanced primers and decontamination steps professional detailers emphasize. For example, neglecting to eliminate embedded metallic particles with decontamination sprays can cause coating failure, as detailed in studies on adhesion failures. Advanced enthusiasts know that even regular car washes need specific techniques; using harsh soaps or automatic wash bays with high-pressure nozzles can strip protective layers prematurely. So, what are some overlooked areas that can sabotage your efforts? One often underestimated factor is ambient working conditions—dust, humidity, and temperature can all influence curing and adherence. Many overlook the importance of a controlled environment during application, leading to hazy finishes or high spots. Moreover, the myth that more product equals better results often leads to streaks and uneven layers, wasting time and material. Instead, mastering proper application techniques, like thin, even coats, truly makes a difference. For high-end paint correction, tailored approaches based on the specific finish—be it metallic or clear-coated—are essential. Professional-grade tools and supplies, like dual-action polishers and high-quality microfibers, are investments that pay off in the long run. Remember, shortcuts in prep or application may save time initially but often cost more in repairs or rework later. Are you falling into any of these pitfalls? Have you ever experienced a coating failing unexpectedly? Share your experiences in the comments! For those eager to elevate their skills, exploring detailed guides on paint correction techniques or DIY kit pitfalls can provide valuable insights. Remember, true mastery in auto detailing comes down to attention to detail—both in products and processes.
Invest in Quality Equipment for Consistent Results
Achieving professional-grade paint correction and durable ceramic coatings requires reliable, high-performance tools. I personally swear by the Dual Action Polishers from this collection, because they provide the perfect balance between power and controllability, ensuring you won’t introduce new scratches during the process. Additionally, a good cordless vacuum helps maintain a dust-free environment, critical during application and finishing touches. Remember, the longevity of your detailing work hinges on the quality of your tools.
Maintain Equipment Properly for Long-Term Performance
Cleaning and storing your detailing supplies after each use extends their lifespan and preserves their effectiveness. For example, always rinse your foam applicators and microfibers thoroughly, then allow them to air dry. Regularly check your pad conditioners and polishers for wear, replacing components like brushes and pads when necessary. Proper maintenance of your auto detailing products prevents contamination and ensures even application, which is vital for flawless results and maximum protection longevity. Using a dedicated storage bin for your supplies keeps everything organized and free from dust and debris.
Choose the Right Car Wash Supplies to Protect Your Finish
Using the appropriate wash soap and accessories is crucial. I recommend sticking to pH-neutral car wash soaps designed specifically for paint preservation—big-box store soaps often contain surfactants that can strip wax or coating layers prematurely. Consider investing in a quality foam cannon, which, when paired with the correct soap, provides even coverage and reduces swirl-marks during washing. For rinsing, high-pressure rinse guns with adjustable streams are effective for removing dirt without risking damage to your coatings. Proper wash routines involve multiple gentle passes rather than aggressive scrubbing, ensuring your long-term results stay pristine.
Implement a Routine for Regular Paint Maintenance
Long-term care involves scheduled paint correction and decontamination treatments. Regularly inspect your vehicle’s surface under proper lighting to catch minor cosmetic issues before they worsen. I suggest a semi-annual or quarterly polishing session, using a high-quality, dual-action polisher and appropriate finishing pads, to sustain that mirror-like shine. Incorporating paint decontamination sprays can remove embedded metallic fallout or industrial pollutants, dramatically extending the lifespan of your ceramic coating. For detailed guidance, check this resource—it’s worth the investment in your car’s long-term beauty.
Scaling Your Detailing Efforts Thoughtfully
If you’re considering expanding your DIY setup or commercial operation, focus on modular equipment that can grow with your needs. Portable wash systems, for example, enable you to work efficiently without sacrificing quality, especially when working at different locations. As noted by industry experts, integrating advanced mobile detailing gear, like compact water filtration units and battery-powered tools, allows for faster turnaround and better results. Remember, scaling up doesn’t mean cutting corners—investing in the right equipment ensures durability and customer satisfaction. To get the most from your setup, try a high-end polisher and see how it elevates your finishing results, aligning with the techniques outlined in this article.
The Hidden Lessons I Wish I Knew Before Starting
One of the biggest realizations I’ve had in my auto detailing journey is that perfection isn’t achieved solely through quality products—it’s about the meticulous process and attention to the often-overlooked details. I once believed that applying a ceramic coating was a straightforward step, but neglecting surface prep or environment control led to disappointing results. Now, I know that patience and thoroughness dictate durability more than any fancy product. I’ve learned that aligning my environment with ideal curing conditions significantly extended the lifespan of my coatings. Also, understanding that application technique—thin coats with even coverage—can make or break the finish was a game-changer for me. Sharing these personal insights might help you avoid the common pitfalls that can cost time, money, and the pride in your work.