It all started one sunny Saturday in West Los Angeles. I was desperately trying to buff out swirl marks on my beloved sports car using some DIY kit I picked up from my local detailing supplies near me. The paint looked worse—hazed, dull, and nowhere near that stunning mirror finish I had envisioned. Frustration bubbled up, and I wondered: Was I doing something fundamentally wrong? That moment was my lightbulb—understanding why achieving a flawless, mirror-like shine isn’t just about elbow grease but knowing the right techniques and tools. Today, I want to share how I cracked the code, and how you can avoid my early mistakes.
Why Mastering Paint Correction Matters Now More Than Ever
Think about the last time your car’s paint caught the sunlight just right. That’s when you realize how much a pristine finish can elevate your vehicle’s look and value. But in 2026, the game has changed; advances in paint technologies and newer car models demand a higher level of care. Mirror-finish results aren’t just eye candy—they’re a testament to your dedication and skill in maintaining your ride. Plus, with the rise of ceramic coatings and high-performance car wash supplies, the expectations for that perfect shine have skyrocketed. If you’ve ever faced fine scratches, holograms, or dull patches and wondered if it’s worth the effort, you’re not alone. I’ve been there myself.
Is the Hype Around Paint Correction Overrated?
Let me be honest—when I first started, I was skeptical about whether all the fuss was justified. I made the mistake of rushing into a comprehensive correction without understanding the nuances, which led to uneven results and more work in the long run. That early misstep taught me a hard lesson: knowledge and proper tools are everything. If you’re considering whether paint correction is worth it, just ask yourself if you want that show-stopping, deep-gloss perfection every time you admire your car in the mirror. Trust me, the thrill of a flawless finish is worth every effort when done right.
If you’re eager to elevate your DIY game, stay tuned. We’ll dive into the essentials—from choosing the right car wash soap to mastering that perfect polish. And if you’ve faced issues like hologramming or swirl marks, I’ll share proven strategies to fix them, so you can enjoy that stunning, professional-quality shine in your own garage. Ready to transform your ride into a showpiece? Let’s get started.
Prepare Your Workspace with the Right Tools
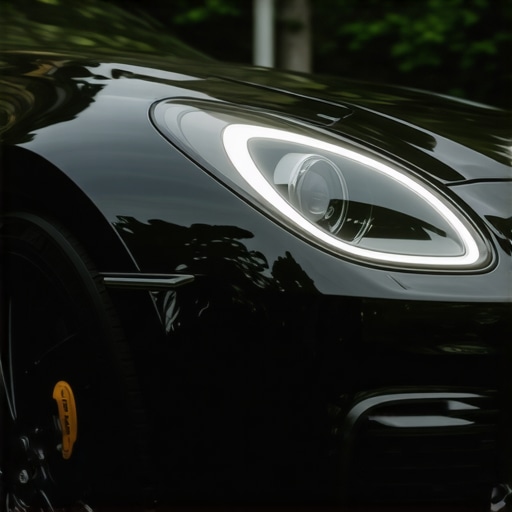
Start by assembling your essential cordless polisher and quality car wash soap. Think of your workspace as a surgeon’s operating room—clean, organized, and equipped for precision. Use a clean microfiber towel to ensure no dust or debris can scratch the paint during the correction process.
Wash the Car Thoroughly
Begin with a meticulous wash using a pH-neutral car wash soap to remove dirt, oils, and old waxes. Rinse multiple times to avoid any grit lurking on the surface. I remember a time I nearly mared a panel because I skipped this step; a quick rinse saved me hours of correction later. Think of this as preparing a canvas—clean and smooth for the masterpiece.
Inspect Before You Correct
Dry the surface with a microfiber towel and then examine the paint under a good light. Use a light source or magnifier to identify swirl marks, holograms, or oxidation. This step guides your choice of polishing compounds and pads. Remember, not all imperfections require aggressive correction—sometimes, a gentle touch yields the best results.
Pick the Right Micro-Abrasive System
Select a fine-cut polishing compound paired with the correct pad—typically a foam or microfiber one tailored for your polisher. I learned that starting with a less aggressive compound prevents removing more clear coat than necessary. Think of this as sanding wood: you go from coarse to fine, revealing a smooth, reflective surface.
Apply in Small Sections
Use a few drops of polish per area about the size of a tennis ball. Turn your polisher to a low speed, spreading the compound evenly and then gradually increasing speed to about 3,000 RPM. Keep the polisher moving to avoid heat build-up. I once left a spot too long, causing a hologram. Moving consistently is crucial—think of it as painting with a brush; no one wants thick strokes or uneven patches.
Work Methodically, Not Ruthlessly
Divide your car into sections—hood, roof, doors—treat each as an isolated project. After each pass, wipe with a clean microfiber to check progress. Use inspection lights to verify if swirl marks have diminished. Patience here prevents over-polishing, which can thin your clear coat; remember, your goal is mirror gloss, not a thin layer of paint.
Refine with Finishing Polish
Once major imperfections are gone, switch to a finishing polish. This step polishes out micro-marring and adds depth. Use a softer pad and a less aggressive compound, moving slowly and methodically. It’s like the final buffing on a car’s paint—every swirl, hologram, or haze is gently erased. After this, you’ll notice the paint reflecting like a mirror—an instant ego boost.
Seal the Corrected Surface
Protect your hard work by applying a durable ceramic coating or high-quality wax. This step locks in the shine and guards against future scratches. Think of it as putting a clear armor around your paint—especially vital for those parking under West LA’s harsh sun or near coastal salt spray. The right eco-friendly detailing supplies can make this last longer and look better.
Keep a Maintenance Routine
Finally, regular washing with gentle soap, quick inspections, and periodic re-coating keep your paint correction looking fresh. Use a quick detail spray to maintain gloss between washes. Remember, consistent care is the secret to preventing swirl marks and holograms from reappearing.
Many car enthusiasts jump into paint correction with the mindset that more aggressive compounds and over-polishing will yield better results, but this is a dangerous myth. In reality, excessive use of abrasive products can thin your vehicle’s clear coat, leading to damage that’s costly and hard to repair. It’s crucial to understand the appropriate levels of aggression for your paint type; soft clears require gentler approaches, while harder finishes can tolerate slightly more aggressive compounds, yet even then, moderation is key.
A frequent mistake is believing that high-gloss, mirror-like finishes can be achieved with just basic car wash supplies or DIY kits. While these options are convenient, they often lack the specialized tools and polishes needed for true correction, especially when dealing with complex paint flaws. Rushing through with subpar products can leave holograms or micro-marring, negating any effort invested.
Another misconception centers around the use of ceramic coatings. Many assume that once applied, they completely eliminate the need for proper paint correction. However, applying a ceramic coating on a surface riddled with swirl marks or oxidation will only seal in imperfections, making them more visible and harder to rectify later. Proper prep, including meticulous polishing, is vital for the coating to perform its best.
It’s also common to underestimate the importance of inspecting your work under proper lighting. Some detailers rely solely on ambient light or casual inspection, risking missed imperfections. Using dedicated inspection lights or magnifiers allows you to detect micro-marring or holograms, ensuring a flawless finish before sealing the paint.
In West Los Angeles, the right detailing supplies can make all the difference—professional-grade polishes, pads, and tools give you better control and results. Skimping on quality or neglecting proper techniques often results in uneven finishes and rework, wasting time and materials.
Finally, beware the trap of overconfidence. Many DIYers believe they can handle full correction without experience or proper training. This can lead to severe paint damage or uneven correction. Investing in learning proper techniques and understanding the nuances—like the differences between polishing pads—is essential for avoiding costly mistakes. For advanced tips, check out expert advice on high-performance corrections.
Remember, mastering paint correction is as much about knowledge and technique as it is about tools and products. Don’t fall into the trap of beginner assumptions—your car’s finish deserves precision and care. Have you ever fallen into this trap? Let me know in the comments.
Keeping your car’s paint correction results pristine over time hinges on using the right tools and adopting effective maintenance routines. Personally, I swear by a high-quality dual-action polisher like the 5 Best 2026 Cordless Polishers for Mobile Detailers. Its ergonomic design, paired with variable speed control, allows precise correction without risking heat-induced damage. For inspecting your work, a professional-grade inspection light such as the care gear set for show shine results provides detailed visibility of micro-marring or holograms, ensuring your work is flawless before sealing the surface.
When it comes to maintaining your paint over the long run, I recommend establishing a routine of gentle washes using premium car wash supplies. A microfiber wash mitt combined with a pH-neutral soap prevents micro-scratches and preserves your ceramic coating or wax layer. Regularly reapplying a dedicated eco-friendly detailing spray helps maintain that freshly corrected gloss between washes.
How do I maintain paint correction results over time?
One of the most overlooked aspects is the importance of gentle maintenance—skipping this can let minor imperfections creep back quickly. I’ve found that weekly inspections under a high-performance inspection light paired with quick detailing sprays prevents surface contaminants and micro-marring from settling in. For deeper refreshes, polishing with a finishing polish every few months ensures your paint stays mirror-like. A recent technical guide emphasizes that maintaining a consistent polishing schedule preserves the integrity of your clear coat and prolongs the effects of your initial correction (see our expert article for detailed insight).
Scaling your routine as your vehicle ages involves investing in durable tools and products that can handle more frequent or deeper corrections if needed. For instance, upgrading to a long-lasting high-performance polishing compounds ensures stubborn blemishes are addressed without compromising your paint’s health. Future trends suggest smarter, AI-powered paint inspection tools that can automatically detect imperfections, making maintenance even more precise and less time-consuming. For now, honing your technique with the right equipment remains the best approach—so I highly recommend trying out one of the advanced polishing tips discussed here to elevate your game.Achieving that flawless mirror shine isn’t just about following steps—it’s about embracing the lessons learned through trial, error, and those key moments where everything clicked. One of the biggest insights I gained is that patience outperforms brute force every time. Rushing the correction process often leads to micro-marring or holograms, which are tough to fix later. Instead, dedicating time to inspect meticulously under proper lighting and working in smaller sections ensures consistent, high-quality results. Another revelation was the importance of investing in quality tools; even the best polishes won’t shine if your equipment is subpar. Lastly, understanding your specific paint type and its sensitivity makes a world of difference—what works for a hard-clear coat may damage a softer finish, so tailor your approach accordingly. These lessons transformed my DIY projects from frustrating to fulfilling, and they can do the same for you.