Ever stared at your car’s dull, scratched surface after a quick wash and thought, “That’s not how it was meant to look”? I’ve been there. One day, I finally realized that my regular car wash routine wasn’t enough to achieve that stunning mirror shine I drooled over in glossy car magazines. The frustration of wasted time and money on auto detailing supplies that didn’t deliver was real. It hit me hard during a typical weekend wash in West Los Angeles when I noticed how my car’s paint looked more matte than mirror-like, despite using high-end car wash soap and ceramic coatings I’d read so much about. That moment sparked a quest—*to learn how to truly correct paint imperfections right at home* and get that dazzling, head-turning finish without heading to a professional shop.
Unlocking the Secrets to Home Paint Correction in 2026
Getting that perfect, mirror-like gloss on your vehicle isn’t just about splashing on products; it’s a precise craft that combines the right auto detailing products, knowledge, and technique. With the right gear—think dual-action polishers, quality pads, and professional-grade compounds—you can elevate your car’s appearance right in your driveway. I’ve tested countless ways to buff out scratches and dullness, and let me tell you—there’s a noticeable difference when you approach paint correction with patience and the right tutorial. Not all auto detailing supplies are created equal, so knowing which to invest in makes all the difference. Curious about what gear truly makes a difference? Check out the comprehensive [paint correction pro shop tips](https://cardetailingservicesupplies.com/paint-correction-for-2026-mirror-shine-results-at-home-care-gear-sets-bundle) that I personally relied on during my journey.
Is Paint Correction at Home Actually Worth the Effort and Expense?
Early on, I made the mistake of rushing through the process with cheap compounds and skipping proper surface prep. This misguided attempt actually worsened the paint’s condition and cost me more in the long run. Believe me, I learned the hard way that rushing compromises results. The key is understanding the nuances of your paint type and selecting the right auto detailing products—whether it’s for luxury gloss finishes or restoring older paint layers. I recommend leaning on detailed guides about [mirror gloss finish results](https://cardetailingservicesupplies.com/paint-correction-for-2026-custom-mirror-gloss-finish-results) to avoid common pitfalls. Meanwhile, trust built from personal experience shows that with the right gear and a bit of patience, you can achieve breathtaking results similar to professional shops, right at home.
Now that I’ve shared my “aha” moment and the importance of proper tools and techniques, let’s dive into exactly how you can start transforming your car’s paint today. From prep work to polishing, I’ll walk you through the essentials to get your vehicle shining like a mirror in no time. Ready to make your car the envy of the neighborhood? Let’s go!
Prepare Your Workspace and Gather Quality Supplies
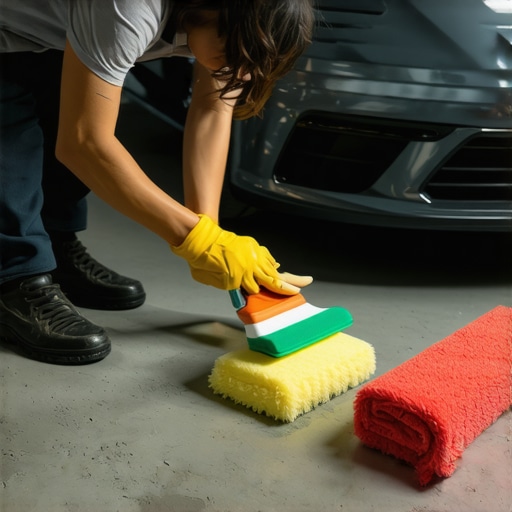
Start by setting up a clean, well-lit area free of dust and debris—think of it as creating a surgeon’s operating room for your car’s paint. Gather the essential auto detailing products: a dual-action polisher, foam or microfiber pads, a high-quality compound, finishing polish, and a hand-held or machine-based buffer. For optimal results, use gear designed for the job, like professional-grade polishers found in pro shop tips. Ensure your supplies are compatible with your vehicle’s paint type, whether it’s soft clear coat or hardened ceramic—a detail best referenced before starting. Wearing microfiber gloves and eye protection increases safety, making the process as comfortable and risk-free as possible.
Thoroughly Wash and Decontaminate Your Vehicle
Before tackling imperfections, eliminate surface dirt with a gentle, pH-neutral car wash soap—imagine it as rinsing the world’s dust off a precious artifact. Use a foam gun to cover the whole car uniformly, which prevents scratches caused by dirt particles. When rinsing, opt for a high-pressure rinse gun that ensures fluff-free, complete rinsing, like the best high-pressure detail guns. After drying, inspect the surface carefully. If you notice embedded contaminants, employ a clay bar or a clay alternative to remove stubborn impurities—think of this as fine-tuning before the real correction begins. This step guarantees a smooth surface, critical for effective paint correction.
Identify and Focus on Specific Paint Imperfections
Inspect your vehicle in bright light or under a garage lamp to pinpoint scratches, swirls, and oxidation. Use a soft mechanic’s pen or a 3M swirl finder light to distinguish between minor imperfections and paint defects that require correction—like a detective analyzing clues before action. For deep scratches or heavy oxidation, select a suitable compound from brands known for their professional results, such as those outlined in pro shop tips. Remember, using the correct abrasive grade prevents further damage; start with an aggressive compound if necessary, but switch to finer polishes to refine the finish.
Apply Compound and Use the Correct Buffing Technique
Apply a small amount of compound onto the pad, roughly the size of a dollar coin, to avoid wastage—like spreading butter on bread. Use the dual-action polisher set to a moderate speed, around 4, which mimics a gentle yet effective rubbing motion. Work in small sections, moving the polisher in overlapping passes—think of it as carefully coloring within the lines for a consistent, professional result. Keep the pad flat against the surface, not angled, to prevent swirling. Remember that excess pressure doesn’t speed up the process; let the tool and product do the work. Periodically wipe the buffed area with a microfiber towel to check your progress—patience is key here. For detailed guidance, consult the right gear and techniques.
Polish for Clarity and Shine
Once the heavy imperfections are removed, switch to a finer polishing compound or finishing polish. Use a clean pad, and repeat the same gentle, overlapping passes. This step removes any residual micro-scratches from previous buffing, revealing a glossy, mirror-like surface. Think of it as polishing a gemstone—a smooth, mirror finish is the ultimate goal, achieved through patience and the right products like those recommended in expert guides. Avoid applying too much pressure; instead, focus on even, consistent motion. A clean microfiber towel will help you inspect the progress and wipe away any residue that dulls the finish.
Seal and Protect Your Work
After achieving a flawless surface, lock in that shine with a ceramic coating or a premium wax, depending on your goal. Applying a ceramic spray such as those discussed in this comparison ensures long-lasting protection against UV rays, pollutants, and minor scratches. Use a foam or microfiber applicator to spread the product evenly, working in small sections. Allow curing time as per manufacturer instructions, and buff gently with a clean microfiber to enhance gloss. Think of this as putting on a lasting armor—your vehicle will look stunning and be shielded from daily wear.
By systematically following these steps, you can transform your vehicle’s appearance from dull to dazzling—saving money and achieving professional-quality results right in your driveway. Practice patience, use quality supplies, and stay consistent with your efforts to see real, lasting improvements.
Many car enthusiasts believe that investing in the latest auto detailing products and tools guarantees a flawless finish, but there’s a subtle yet critical nuance often overlooked: the quality and compatibility of supplies matter far more than brand names or trendy accessories. For example, many assume that all ceramic coatings and car wash soaps are created equal, but in reality, using generic or incompatible products can lead to subpar results, such as unintended streaks or diminished paint protection, which can be costly to correct later. This misconception can trap even seasoned detailers into wasting time and money on supplies that don’t suit their vehicle’s specific needs, especially when dealing with West Los Angeles’s unique climate and paint types.
Why does understanding the compatibility between auto detailing products and your car’s paint matter that much? Expert sources highlight that improper use of car wash soap or ceramic coatings can sometimes do more harm than good, stripping away layers of protection or creating micro-marring that is difficult to buff out, rendering subsequent paint correction more complex. You can see this in detailed studies on how different products interact with varied paint surfaces in professional settings, emphasizing the importance of tailored solutions. Failing to recognize these subtle interactions is a common mistake among both beginners and experienced hobbyists, leading to unnecessary correction work and diminished shine.
Furthermore, many overlook the significance of proper application techniques and surface preparation, which are crucial for maximizing the benefits of high-quality auto detailing supplies and paint protection options. For example, even the best car wash soap or ceramic coating will underperform if applied on contaminated or improperly prepared surfaces, often resulting in micro-scratches or adhesion failure. Ensuring your supplies are compatible with your vehicle’s paint and climate conditions requires a nuanced understanding that goes beyond surface-level knowledge—something I’ve refined through years of hands-on experience in West LA’s unique environment. To avoid falling into this trap, I recommend consulting dedicated guides that delve into product chemistry and application methods, such as those I often reference in my detailed tutorials and related articles.
Are you using supplies that truly match your car’s needs, or could a mismatch be sabotaging your results? The key is to analyze your vehicle’s specific demands carefully and select products accordingly. For instance, if you’re working with a matte finish or vinyl wrap, certain chemicals or polishing techniques might cause damage, which is why tailored products and expert advice from professional resources can save you time, money, and frustration. Remember, the path to a stunning, long-lasting shine isn’t just about having shiny gear but understanding how each component interacts with your particular paint and environment.
Overall, mastering the nuances of auto detailing supplies, from proper product selection to surface preparation, elevates your results from good to professional-grade. This knowledge is particularly vital in environments like West Los Angeles, where sunlight, pollution, and weather extremes challenge your vehicle’s finish daily. Do you recognize any traps in your current routine? Have you ever fallen into this trap? Let me know in the comments.Achieving professional-level results at home requires investing in the right auto detailing equipment and understanding how each tool enhances your car’s finish. One of my go-to tools is the dual-action polisher, which I prefer over traditional buffers because it minimizes micro-marring and offers gentle, yet effective, correction even on delicate paints like matte wraps or softer clear coats. Personally, I rely on the pro-grade gear sets that include variable speed polishers and high-quality pads, allowing me to fine-tune my approach based on the depth of imperfections. These tools are vital in both paint correction and maintaining a long-term mirror sheen, especially when combined with proper techniques.
3 Surprising Lessons That Changed My Detailing Game
One of the most eye-opening realizations was that not all auto detailing supplies are created equal—investing in compatible, high-quality products tailored to your vehicle’s specific paint type makes a world of difference. I once tried a generic ceramic coating, only to see streaks and diminished gloss—learning the importance of product compatibility was a game-changer.
Another lesson learned was that surface preparation is the unsung hero of paint correction. Skipping thorough washing and decontamination might save time initially, but it leads to micro-marring and compromised results. Now, I meticulously clay bar and inspect my paint under bright light before polishing.
Finally, patience and technique trump brute force. Rushing through buffing with too much pressure damaged my paint and increased correction work. Instead, gentle, overlapping passes with the right gear elevated my results from amateur to professional-quality, proving that mastering the craft is about finesse, not force.
My Go-To Tools for Flawless Results
Over the years, I’ve relied heavily on the professional-grade gear sets that include variable speed polishers and premium pads. These tools give me control and precision, especially when restoring deep scratches or oxidized paint. For quick touch-ups, I swear by high-pressure detail guns from top brands, which make rinsing and prep faster and more effective.
For maintaining that mirror shine, I trust guides like show-shine results to inform my polishing routines. And to seal the deal, I use protective coatings from trusted sources ensuring my paint stays flawless longer.
Turn Your Car Into a West LA Showstopper
Embarking on your paint correction journey is about more than just aesthetics—it’s a way to connect with your vehicle and elevate your auto care routine. With the right knowledge, tools, and patience, you can achieve that stunning mirror-like finish that turns heads everywhere you go. Remember, every scratch or dull spot you restore is a step closer to professional-level results right in your driveway.
What part of your auto detailing routine do you think could benefit most from an upgrade? Share your thoughts below—I’d love to hear how you’re leveling up your car care game!