I vividly remember the first time I tried to tackle paint correction on my sleek 2026 high-performance sedan. I was eager, arms full of DIY detailing supplies, but within minutes, I realized I had no idea what I was doing. The swirl marks I unintentionally created felt like my car’s glossy finish was permanently marred, and let’s just say, it was a humbling experience that taught me the importance of proper techniques—and the right products. If you’ve ever faced the frustration of trying to restore that flawless shine and wondered whether paint correction is actually worth your time and money, you’re not alone. Today, I want to share my journey and shed light on how you can achieve professional-level results at home, even with your high-performance 2026 model.
Why Now Is the Perfect Time to Master Paint Correction for Your 2026 Sedan
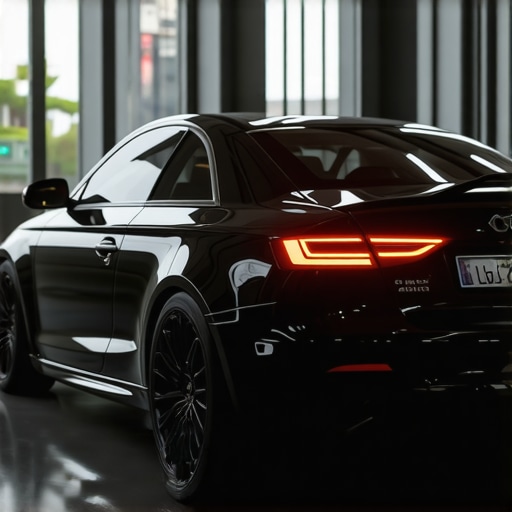
Owning a 2026 high-end sedan means you’re all about performance and style. But the truth is, maintaining that showroom shine is an ongoing challenge, especially with all the elements working against you—dust, road debris, harsh weather, and automatic car washes, to name a few. When I first started exploring paint correction, I underestimated the impact of environmental damage on my vehicle’s finish. It wasn’t until I learned how microscopic scratches and swirl marks can diminish your car’s appearance that I realized the importance of proper paint correction techniques. According to recent automotive insights, neglecting paint care can lead to irreversible damage over time, which is why addressing it early on is such a smart move.
Moreover, with the advancement of car detailing supplies—like newer, more effective polishes and buffers—the opportunities to restore your car’s gloss are better than ever. Yet, many enthusiasts still wonder if investing time and effort into paint correction yields a worthwhile invisible upgrade. The answer is a resounding yes—for those equipped with the right knowledge and tools.
Are you tired of looking at that stubborn haze or those annoying scratches that just won’t go away? If so, you’re in the right place. Before diving into the nitty-gritty techniques, I want to be upfront: making mistakes early, such as using the wrong grade of polishing pads, can scratch the paint further. I learned this lesson the hard way—trust me, beginner’s mistakes are common, but they’re also avoidable with a bit of guidance.
So, are you ready to take control of your car’s appearance and bring back that stunning, mirror-like finish? Let’s get started on turning your DIY efforts into professional results that will turn heads on the road. And if you’re curious about the top-rated supplies for precision paint correction, check out this comprehensive guide to tools and products tailored for 2026 models.
Prepare Your Workspace and Gather Essential Supplies
Before diving into paint correction, set up a clean, well-lit workspace free of contaminants. I learned this the hard way when dust settled on my freshly polished hood, ruining my finish. Gather high-quality auto detailing products like foam pads, polishing compounds, microfibre towels, and a dual-action polisher. Think of your workspace as an operating room—every tool needs to be spotless and within reach.
Start with a thorough clean
Begin by washing the car with a pH-neutral car wash soap to remove dirt and grime. Use a two-bucket system—one for soapy water, one for rinsing—to prevent recontamination. This step is like preparing the surface foundation before applying any corrections; neglecting it leads to scratches and hazing later on. When I did this on my sedan, I noticed a huge difference in how well the polish adhered afterward.
Inspect and assess the damage levels
Enter the sunlight and closely examine the paint for swirl marks, scratches, or oxidation. Use a good magnifier or take photos at different angles. I remember spending extra time under direct sunlight to identify imperfections that looked invisible indoors. This step informs your choice of abrasiveness and determines if you should start with a finer or more aggressive buffer. For minor hazing, a foam polish pad might suffice; deeper scratches may need a cutting compound.
Choose the right polishing compounds
Picking the correct compound is crucial. Think of polishing like sanding wood: too coarse—and you risk removing too much clear coat—too fine and you won’t fix the problem. For my vehicle, I started with a medium-cut compound available in DIY car detailing kits. Always test on a small, inconspicuous area first. My initial attempt left swirl marks because I tried tackling deep scratches with a finishing compound—lesson learned: always match the product to the damage.
Master the polishing technique
Attach a foam or wool pad to your dual-action polisher and set it to a moderate speed. Spread the compound evenly across the pad, then work it into the paint using overlapping passes—think of this as painting a wall in sections. Apply light consistent pressure; pressing too hard may burn the paint. I found that keeping my arm steady and letting the polisher do the work delivered the best results. Work in small sections; I once tried covering too large an area and ended up uneven, so patience here is key.

Visualize your progress with close-up photos after each section. This helps you see the improvement and avoid over-polishing. Remember, it’s better to do multiple light passes than one aggressive pass that could damage your clear coat. When I perfected my technique, the paint looked glossy, with a depth and clarity that rivaled professional jobs.
Refine and protect with a finishing polish
After removing the majority of scratches, switch to a finer polish pad and a finishing compound. This step enhances gloss and smoothness, turning the matte-like surface into a mirror-finish. Think of it as sanding a wooden piece from rough to silky—every stage brings you closer to perfection. I noticed a significant difference when I used a finishing polish with a soft foam pad; it brought out an incredible shine.
Seal the paint with the right protective layer
Finally, apply a high-quality ceramic spray or wax to lock in your hard work. Ceramic coatings, like the ones I recommend here, provide long-lasting protection against environmental damage. This step is the finishing touch—think of it as sealing a letter with wax to preserve it. Using a ceramic spray not only enhances shine but also makes future cleaning easier, a real time-saver noticed on my vehicle after just a few applications.Many enthusiasts believe that applying a ceramic coating is a quick fix for their car’s appearance, but the reality is more nuanced. A widespread misconception is that once applied, ceramic coatings require no further maintenance, leading owners to neglect regular cleaning using quality car wash soaps and protective products. In truth, proper upkeep is essential to preserve the coating’s benefits, and skipping routine maintenance can lead to premature degradation. Additionally, some assume that any detailing supply will do the job, but advanced products like specialized auto detailing products designed for specific finishes enhance longevity and gloss. Rushing into paint correction without assessing the damage level or using incompatible compounds often results in more harm than good; a common trap is choosing aggressive abrasives when a gentle polish would suffice, especially for delicate high-performance clear coats. It’s perfectly normal for new users to be overwhelmed by the list of car detailing supplies near me, but precision tools and quality car cleaning products tailored for your paint type make a significant difference.
One advanced tip I’ve learned from experts is the importance of comprehensive paint correction procedures that account for subtle imperfections. Instead of settling for superficial fixes, focus on the microscopic damage that can easily be overlooked, leading to long-term issues if not addressed properly. For example, using the wrong mobile detailing equipment or neglecting the sequence of polishing steps can embed micro-scratches, diminishing the clarity and depth you seek. A recommended resource highlights that over-polishing can burn through the clear coat, which is a costly mistake frequently made by DIYers eager to achieve perfection. Always remember, patience and proper technique trump rushing through each stage.
Most importantly, understand that effective **ceramic coating application** involves more than just the initial layer; ongoing maintenance with suitable professional-grade products ensures the long-lasting benefits. Experts advise that neglecting this step is one of the top reasons coatings fail prematurely. Have you ever fallen into this trap? Let me know in the comments.Maintaining that flawless finish on your high-performance vehicle requires more than just initial detailing; it demands the right tools and a disciplined approach. Personally, I rely on a combination of professional-grade equipment and proven techniques to keep my car looking its best over time. One key piece of equipment I swear by is a dual-action polisher, such as the Griot’s Garage 6-Inch Random Orbital Polisher. Unlike cheaper alternatives, this tool offers variable speed control, allowing me to gently refine the paint without risking damage, especially on delicate clear coats. Using a high-quality pad, like Lake Country’s foam pads, ensures even application and minimizes micro-scratches, making every polishing session more effective.
The Hardest Lesson I Learned About ceramic coating,Car detailing supplies,detailing supplies near me,car wash soap,paint protection,paint correction,car cleaning products,auto detailing products,DIY car detailing kits,mobile detailing equipment
One insight that profoundly changed my approach was realizing that patience and consistency matter more than rushing through the process. Early on, I tried to perfect every inch in one day, which led to micro-marring and uneven finishes. Embracing a step-by-step approach, giving each layer and polish adequate time, yields much better results and preserves your car’s clear coat. Trust me, this lesson prevented costly mistakes down the line.
My Essential Toolkit for the Best Paint Correction Results
- Dual-action polisher: A reliable model like the Griot’s Garage 6-inch random orbital polishers offers control and safety, especially for delicate finishes on high-performance 2026 models.
- High-quality pads: Lake Country foam pads or microfiber alternatives ensure even application and reduce micro-scratches during polishing.
- Specialized compounds: Using professional-grade polishing and cutting compounds tailored to your paint type is crucial. The right choices prevent over-aggressive polishing that can damage your vehicle’s finish.
Believe in Your Ability to Transform Your Car
Achieving a mirror-like shine on your 2026 sedan is more accessible than you think. With the right mindset, explanations from trusted guides, and quality supplies—like those detailed here—you can elevate your DIY skills to a professional level. Remember, every scratch you remove and every gloss you restore adds to your pride as a car enthusiast and owner. Don’t let fear hold you back from giving your vehicle that impeccable, showroom finish you’ve always wanted. Are you ready to start your paint correction journey today? Share your progress or questions below—I’d love to hear about your experiences with car detailing!
,