It happened suddenly, like a slap in the face. I was pulling into my driveway after a long day, admiring the gloss on my beloved vehicle, when I noticed a stubborn streak of tree sap marring the pristine shine. Trying to wipe it off with my usual quick-detailer only seemed to smear it further, deepening my frustration. That was my lightbulb moment—realizing just how tricky and delicate removing tree sap can be without harming that precious clear coat.
Why You Can’t Just Scrape or Use Harsh Chemicals
As a car enthusiast and professional detailer, I’ve seen countless DIY attempts that go wrong—scraping with metal tools or dousing the area in abrasive solvents—causing tiny scratches or peeling the clear coat entirely. The clear coat isn’t just there for looks; it protects the underlying paint from UV rays, chemicals, and environmental damage. According to automotive paint experts, improper removal methods can compromise this protective layer, leading to costly repairs. That’s why understanding a safe, effective approach matters more than ever, especially with 2026 models featuring advanced coatings that demand careful treatment.
Is All Tree Sap Removal Created Equal?
Early in my journey, I made the mistake of assuming all tree sap is treatable with the same method. Some DIY guides suggested scraping with plastic spudgers or saturating with citrus-based removers—both risky if you’re not careful. My mistake was neglecting to test a small area first, which nearly resulted in a dull patch on my finish. This taught me a vital lesson: patience and proper techniques are essential to preserve that flawless shine.
Thinking about tackling that stubborn sap yourself? Before you dive in, check out some of my trusted gear, like [top-tier detailing kits](https://cardetailingservicesupplies.com/5-diy-car-detailing-kits-for-2026-expert-detail-results) which are perfect for delicate jobs. There’s a lot more to learn on safe removal techniques, and I’ll guide you through every step to help you avoid common pitfalls and protect your investment.
Prepare Your Workspace and Gather Essential Supplies
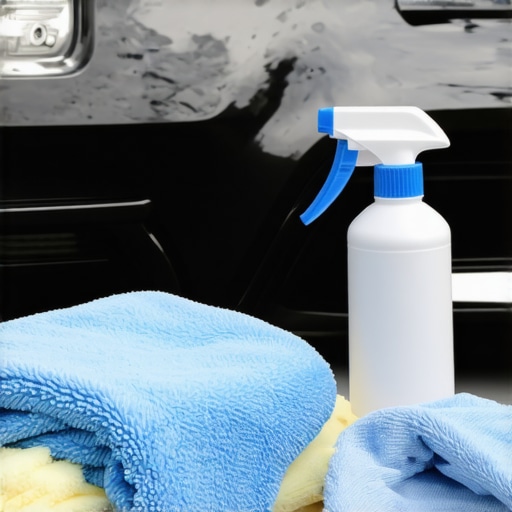
Start by choosing a shaded, dust-free area to prevent sun from drying your cleaning agents too quickly. Assemble a soft microfiber towel (microfiber towels are ideal) and a high-quality car wash soap designed for gentle cleaning. Have a plastic scraper with a beveled edge and a dedicated spray bottle filled with a mixture of water and a few drops of detailing-safe citrus-based remover. This setup minimizes the risk of damaging your paint while effectively loosening stubborn sap.
Softening the Sap for Easy Removal
Begin by lightly misting the sap-stained area with water to prevent micro-scratches. Then, gently apply a few drops of the citrus-based remover onto the sap, allowing it to sit for 1-2 minutes. During this waiting period, I once tried to rush the process, but I learned that patience is crucial; rushing can lead to smear marks or accidental paint damage. The remover’s solvent action softens the sap, making it easier to lift without excessive scrubbing—think of it as gently melting away glue rather than scraping through concrete.
Careful Mechanical Removal
Start with Gentle Removal
Using the plastic scraper, gently lift the softened sap, maintaining a low angle to avoid nicking the clear coat. Keep the scraper flat and work in small, controlled strokes. I recall a time when, in my haste, I pressed too hard and mildly gouged the paint, costing me an extra polishing step. It pays to work slowly and carefully, trusting the solvent to do its job.
Addressing Residue and Streaks
After removing the bulk of the sap, lightly wipe the area with a microfiber towel to pick up residuals. Follow with a wash using a pH-balanced car wash soap—this step refreshes the surface and prepares it for further care. For stubborn streaks, a dedicated paint-safe clay bar can help, but only after confirming that no residual remover remains, to prevent chemical reactions that could harm the finish. For those looking to enhance their toolkit, DIY car detailing kits often include safe clay bars suitable for such delicate tasks.
Finishing Touches to Protect Your Finish
Once the sap is fully removed, dry the area with a clean microfibre towel. Applying a ceramic coating or a paint sealant right after ensures an extra layer of protection, making future removals easier. If your vehicle already has a ceramic coating, use a dedicated spray to maintain that high-gloss finish and facilitate quick cleanups, as detailed in this guide on maintaining ceramic-coated wheels. Remember, proper aftercare extends the life of your paint and keeps your car looking showroom-ready.Many enthusiasts assume that all car wash supplies and detailing equipment are created equal, but in my experience, this couldn’t be further from the truth. One common misconception is that cheaper or off-brand products perform just as well as professional-grade ones. However, this belie an often-overlooked nuance: the quality and formulation of these products dramatically impact their effectiveness and long-term effects on your vehicle’s paint and surfaces. For example, using subpar car wash soaps can leave residues or micro-scratches, diminishing your car’s gloss over time, as highlighted by industry experts in automotive detailing. This is especially crucial when considering paint protection or ceramic coatings, which require specific, high-quality products for optimal adhesion and durability. Approaching your supplies with an understanding of these nuances ensures your efforts preserve and enhance your vehicle’s finish. So, next time you reach for that ‘best deal’ at the local store, pause and evaluate whether the product’s quality aligns with your vehicle’s needs. Want to elevate your detailing game? Check out specialized DIY kits designed for expert results that include the right balance of pH-neutral cleaners, microfibers, and protective agents. Remember, investing in quality supplies isn’t just about the price—it’s about protecting your investment and achieving that flawless finish every time.
Investing in Quality Tools for Lasting Results
One of the most overlooked aspects of professional and DIY car detailing is maintaining the equipment that ensures a flawless finish. High-quality buffers, pressure washers, and polishing pads aren’t just purchased once—they require proper care to serve you well over years. Personally, I swear by my dual-action polisher, the 3-best 2026 polishes, because it offers consistent results without excessive heat buildup that can damage sensitive clear coats. Choosing the right tools isn’t enough; understanding how to care for them guarantees longevity and peak performance.
How do I maintain my equipment over time?
Regular cleaning after every use is essential. For instance, I prefer to spray my polisher’s pads with compressed air to remove debris and then wash them gently with a specialized microfiber cleaner, which you can find in high-volume detailing rig supplies. This prevents buildup that can cause micro-scratches during your next session. Similarly, pressure washers should be drained and stored in a dry, protected area to avoid internal corrosion. An often-overlooked tip is inspecting the electrical connections periodically, following manufacturer guidance, to prevent malfunctions that could halt your workflow. Remember, maintaining your equipment is as critical as the products you use, ensuring long-term durability and consistent results.
Tools that Elevate Your Detailing Game
My personal arsenal includes a set of microfiber towels designed explicitly for expert vehicle drying (7 Best 2026 microfiber towels). They’re soft, durable, and absorbent—perfect for streak-free finishes. For applying ceramic coatings or paint protection films, I rely on precision tools like dedicated applicators that minimize waste and ensure even coverage. Using the right tools not only makes the job easier but also prolongs their lifespan. With technological advances, I predict an increased integration of smart tools—like digital infrared thermometers—to monitor surface temperatures during polishing, preventing burn-through and ensuring safety.
Future Trends in Detailing Equipment Upkeep
The trend points toward smarter, eco-friendly maintenance solutions. Automated cleaning systems for microfibers, self-cleaning detailing brushes, and AI-powered diagnostic tools for equipment health are on the horizon. These innovations will make routine maintenance more efficient and less time-consuming. Integrating such tools into your workflow now can prepare you for the next phase of professional detailing, making your setup more reliable and cost-effective.
Ready to elevate your equipment maintenance routine?
Start by adopting a thorough cleaning protocol for your buffers and polishers, using high-grade microfiber cleaners. Trust me, investing a little time now keeps your tools performing at their best, reducing replacement costs and ensuring your vehicle’s finish shines every time. For example, check out mobile detailing water hose reels designed for durability and ease of maintenance—it’s a game changer for busy professionals. Embrace these advanced tips, and your car detailing business or hobby will consistently deliver professional-grade results.After hours of trial, error, and a handful of lessons learned, I realized that successful tree sap removal is less about brute force and more about patience, technique, and the right supplies. One key insight was discovering how critical it is to soften the sap with gentle solvents before attempting removal; rushing this step only risks damaging your clear coat. Investing in quality tools like microfibers and safe clay bars made a noticeable difference in preserving that flawless finish. Additionally, I found that maintaining your equipment—cleaning polishers, inspecting water hoses, and storing tools properly—ensures every job is as smooth as a freshly polished surface. In this journey, I discovered that real mastery comes from understanding the nuances of your supplies and respecting your vehicle’s delicate layers, especially when dealing with advanced coatings or sensitive paints. Remember, the goal isn’t just to remove the sap but to do so without leaving scars that can tarnish your work’s perfection. By embracing patience, using the right products, and continually refining your technique, you’ll protect your investment and keep your vehicle shining like new. Don’t underestimate the power of small details—sometimes, a gentle approach yields the most spectacular results.
About the Author
Timothy Carr
Tactical Vehicle Training, Sales Support, and Parts ...
Timothy Carr is a seasoned professional with a diverse background in tactical vehicle training, parts management, and safety branding. Having managed critical aspects of branding and safety programs for the United States Army in Kuwait, Timothy brings a unique, high-stakes perspective to the world of vehicle maintenance and care. His extensive experience in tactical vehicle operations and sales support provides him with a deep understanding of the technical requirements and high-performance standards necessary for maintaining vehicles in demanding environments. At cardetailingservicesupplies.com, Timothy leverages his expertise in vehicle parts and safety protocols to provide authoritative insights into the best practices for car detailing and supply management. His professional history in designing safety programs and managing complex vehicle logistics ensures that his advice is both practical and grounded in rigorous standards. Timothy is dedicated to translating his high-level technical knowledge into accessible, actionable advice for car enthusiasts and professional detailers alike. He is passionate about helping others achieve excellence in vehicle maintenance and ensuring that every car receives the professional care it deserves to perform at its best.
LinkedIn Profile