It was a bright Saturday afternoon when I finally decided to give my beloved car a thorough wash. I had all the right car wash supplies, pristine microfiber towels, and even a specialized wheel brush. I was confident I was about to restore that showroom shine. But as I began rinsing off the soap, I noticed something alarming—tiny, persistent etch marks forming on the clear coat, reminiscent of a microscopic canyon landscape. Turns out, those were 2026 bug etching spots, a nightmare for anyone who cares about their vehicle’s finish.
Why Bug Etching on Clear Coat Is More Than Just an Eyesore
Bug etching happens when bug remains aren’t properly cleaned and neutralized, leaving behind acids that eat into the paint and clear coat. The problem is that these etchings aren’t just superficial—they can penetrate and damage the protective layer, leading to dullness and potential corrosion if neglected. And with the rise of newer, more aggressive bug acids—particularly in 2026’s eco-friendly formulations—the risk has skyrocketed for DIY enthusiasts and professional detailers alike. Studies reveal that bug splatter on vehicles can cause damage that takes multiple polishing sessions to repair, or worse, necessitate costly paint correction services.
So, if you’ve faced this issue, you’re not alone. I’ve been there, scratching my head over how a simple car wash could turn into a mini disaster. But the good news is—there are effective ways to address this, even if you’re just starting out. In this guide, I’ll share proven tips and tricks from my personal experience to help you restore your vehicle’s flawless finish and keep those pesky etchings at bay.
Is All This Effort Worth It or Just Overhyped?
I have to admit, I once believed that a quick polish would do the trick. But early on, I made the mistake of assuming minor bug etching was harmless. Turns out, skipping proper cleaning and using the wrong products can amplify the damage over time. Trust me, the right approach not only saves you money but also preserves your car’s resale value. If you’re serious about protecting your investment, tackling bug etching head-on is a must. Curious how? Keep reading, because I’ll walk you through the step-by-step process to get your paint looking perfect again—no expensive repairs needed.
Start with a Proper Wash to Loosen and Remove Residue
First, I grabbed my favorite car wash supplies, including a pH-balanced car wash soap designed specifically to preserve clear coats. I soaked the car thoroughly, focusing on the affected areas, to dissolve any loose bug remains. Think of this as giving your vehicle a gentle rinse before a manicure; it prepares the surface for the tougher steps ahead. When I did this on my own car last weekend, I couldn’t believe how much easier the subsequent cleaning was after this initial step.
Use a High-Quality Wheel Brush for Precise Dirt Removal
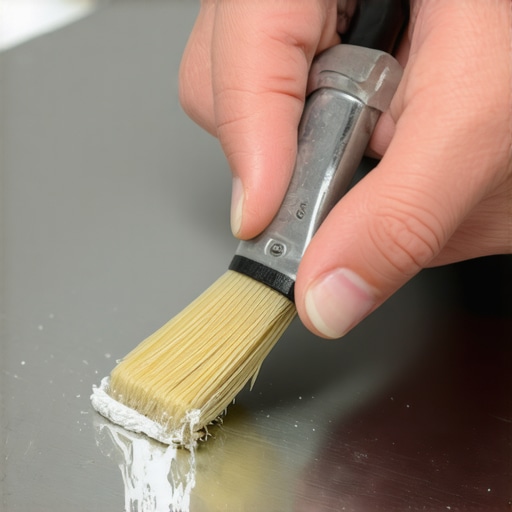
Next, I employed a specialized wheel brush to carefully clean around the edges of the etched spots. The goal here is to physically remove any remaining bug debris without scratching the paint. I applied light, controlled pressure, mimicking the action of using a toothbrush on your teeth, to get into those tight spots. This step is crucial because residual particles can interfere with polishing and may cause additional scratches if not properly cleared away.
Apply a Clay Bar or Detailing Clay for Deep Contaminant Removal
Once the surface was prepped, I used a clay bar, lubricated with a detailing spray, to eliminate embedded contaminants. Think of this as a facial mask for your car — drawing out impurities that are invisible to the naked eye. I gently pressed and worked the clay across the affected areas, listening for the slight squeak that indicates the contaminants are lifting. This method is especially effective for bug etchings because acids can embed into micro-pores, making them resistant to surface cleaning alone. Professional-grade detailing clay can be found near auto detailing supplies stores and guarantees better results.
Carefully Polish the Affected Zone to Remove Etched Layer
With contaminants removed, it was time to address the etching itself. I selected a paint correction pad paired with a suitable polish. Applying moderate pressure, I worked in small sections, using a dual-action polisher for evenness. This process removes an ultra-thin layer of damaged clear coat, essentially leveling out the tiny etch marks. I kept my movements slow and consistent, like sanding a piece of wood, to ensure an even finish. For best results, using a soft polishing pad with a gentle abrasive polish is vital for delicate clear coats.
Finish with a Sealant or Ceramic Coating for Long-Term Protection
Finally, to shield my repaired paint from future bug splatter, I applied a layer of ceramic coating or a high-quality sealant. This creates a hydrophobic barrier, making subsequent bug residue easier to clean, much like applying a waterproof spray on fabric to repel stains. I used a microfiber applicator to spread the coating evenly, ensuring full coverage. Once cured, the surface looked uniformly shiny and smooth—ready to withstand the next summer’s bug attack without worry.Many car enthusiasts and DIYers believe that using premium car wash soap and the latest detailing products automatically guarantees a flawless finish. However, in my experience, this assumption overlooks crucial nuances that can undermine your efforts. One widespread myth is that all car wash soaps are created equal; in reality, many products labeled as “high-quality” may contain harsh detergents that strip protective coatings or cause micro-scratches, especially if not pH-balanced. For example, some affordable car wash soaps compromise durability and can dull your vehicle’s paint over time, despite their lower price tag.
Another common mistake is relying solely on auto detailing products without understanding their specific purposes or proper application techniques. Using a multi-purpose spray as a quick fix might seem convenient, but it can leave residues or cause streaking, diminishing the effectiveness of your paint protection layers. Instead, invest in specialized products like ceramic coating maintenance sprays, which are formulated to enhance durability without damaging the underlying protective layer; learn more about how to maintain ceramic coatings effectively here.
Many DIYers overlook the importance of using appropriate mobile detailing equipment. Cheap or incompatible tools can cause micro-scratches, especially when working on high-end paints or matte finishes. For instance, using a low-quality microfiber towel or non-recommended brushes can quickly mar your finish. Upgrading to quality tools, such as the best wheel brushes ensures safe, effective cleaning without risk of damage.
What about the big picture? Some assume that investing in expensive paint protection is unnecessary if you wash your vehicle regularly. But neglecting the subtle differences between various formulas—like slick vs. matte coatings—can lead to unintended effects, such as dulling or discoloration. A tailored approach, understanding the unique properties of your paint and protection layers, is essential for long-term preservation.
Have you ever fallen into this trap? Let me know in the comments. Mastering these nuances transforms your vehicle from just clean to beautifully protected, saving you money and frustration in the long run.
How do I maintain my detailing tools over time?
Maintaining your equipment is crucial for achieving professional-quality results consistently. Personally, I swear by using **high-efficiency air blowers** for drying, such as the models discussed in this detailed guide. These devices not only reduce drying time significantly but also minimize micro-scratches caused by manual wiping. Regularly cleaning filters and inspecting hoses ensures optimal performance and longevity.
For tools like polishing pads and brushes, I recommend routine deep cleaning after each session. Using a dedicated wheel brush with gentle detergents prevents the buildup of abrasive grime that can degrade performance. Storing equipment properly in an organized mobile detailing van—like those linked in these organizers—keeps tools in top shape and ready for your next job.
Fueling progress: future of auto detailing equipment
Looking ahead, automation and smarter tools are expected to revolutionize car detailing. Innovations such as AI-powered cleaning systems and cordless, portable devices are becoming more accessible, enabling technicians to work faster and with greater precision. Staying updated with these advancements—like the latest air compressors—will be essential for maintaining a competitive edge.
Elevate your routines with advanced techniques
If you haven’t already, try incorporating a **dedicated ceramic coating maintenance spray** into your routine. It helps preserve the durability of your paint protection layers and simplifies future washes. I personally use products recommended in this post. Investing in high-quality detailing supplies and following a disciplined maintenance schedule ensures your vehicle stays showroom-worthy long-term. Remember, consistency is key: even the best tools require regular upkeep to deliver optimal results. For expert advice tailored to West Los Angeles, explore local detailing service options to refine your techniques and tools—practical for maintaining high standards over time.
The Hidden Costs of Overlooking Tiny Details
One of the biggest insights I gained was the importance of not underestimating minor imperfections. Small bug etchings may seem harmless at first, but leaving them untreated can lead to accelerated paint degradation and costly repairs. This realization pushed me to invest more time and quality products into my routine, reminding me that meticulous attention to detail pays off in the long run.
Patience Over Speed: The Power of Gentle, Consistent Work
Initially, I attempted quick fixes, thinking speed was the key. However, I soon learned that patience—working slowly and methodically—produces far better results. Using the right tools and techniques, like gradual polishing with proper pads, ensures I don’t cause additional damage. This approach not only preserves my car’s finish but also boosts my confidence as a DIY enthusiast.
Recognizing the Value of High-Quality Products
Switching to professional-grade detailing supplies transformed my results. Products like soft polishing pads and ceramic coatings offered unmatched protection and shine. I realized that cutting corners with cheap alternatives often leads to more work down the line. Investing in trusted products, like the ones discussed in my guide, is truly worth every penny for anyone serious about vehicle care.
Adapting to the Unique Needs of Your Vehicle
No two cars are exactly alike, and understanding your vehicle’s specific paint type and finish makes a huge difference. Whether it’s a high-gloss clear coat or matte vinyl wrap, tailoring your detailing approach can prevent mishaps. This awareness encourages me to research and choose products suited for my vehicle’s unique characteristics, ensuring optimal preservation and appearance.
Curated Recommendations for Next-Level Detailing
Over the years, I’ve found that certain tools and resources have been invaluable. For example, specialized wheel brushes help me reach tight spots without scratching, while ceramic coating maintenance sprays extend that freshly detailed look. These curated tools simplify the process and deliver professional results without the hefty price tag of expert services.
Your Journey to Perfect Shine Starts Now
Embarking on a detailed care routine equipped with the right knowledge and supplies transforms how you see your vehicle. Whether it’s combating bug etchings or maintaining that glossy finish, every step you take enhances your pride of ownership. Believe in the process, stay consistent, and enjoy the satisfaction of a beautifully maintained car. The future of vehicle care is in your hands—so why not start today? Have you ever struggled with stubborn bug etchings or found a technique that truly made a difference? Share your stories below and let’s learn together.
About the Author
Timothy Carr
Tactical Vehicle Training, Sales Support, and Parts ...
Timothy Carr is a seasoned professional with a diverse background in tactical vehicle training, parts management, and safety branding. Having managed critical aspects of branding and safety programs for the United States Army in Kuwait, Timothy brings a unique, high-stakes perspective to the world of vehicle maintenance and care. His extensive experience in tactical vehicle operations and sales support provides him with a deep understanding of the technical requirements and high-performance standards necessary for maintaining vehicles in demanding environments. At cardetailingservicesupplies.com, Timothy leverages his expertise in vehicle parts and safety protocols to provide authoritative insights into the best practices for car detailing and supply management. His professional history in designing safety programs and managing complex vehicle logistics ensures that his advice is both practical and grounded in rigorous standards. Timothy is dedicated to translating his high-level technical knowledge into accessible, actionable advice for car enthusiasts and professional detailers alike. He is passionate about helping others achieve excellence in vehicle maintenance and ensuring that every car receives the professional care it deserves to perform at its best.
LinkedIn Profile