Ever spent hours meticulously detailing a car only to find those stubborn 2026 bug etchings maring the paint just days later? I remember the shock when I first noticed tiny, persistent marks on my prized vehicle. Despite using what I thought were top-notch car wash soaps and detailing supplies near me, those microscopic bug stains refused to budge, leaving my paint looking dull and scratched. It was a frustrating realization that even with high-quality equipment like mobile detailing gear, some issues are way more stubborn than they seem.
Why Fixing 2026 Bug Etching Is More Important Than You Think
Those tiny bug etchings are not just an eyesore; they can lead to lasting damage if ignored. Expert sensitive paint has a delicate composition designed for a sleek finish, but it’s also more vulnerable. When bugs splatter and remain on the surface, they decompose and produce acids that eat into the clear coat. Over time, this causes tiny pits and permanent blemishes. Rushing to remove these without proper knowledge might seem tempting, but doing so incorrectly can make the problem worse.
Is It Really Worth the Hype
Initially, I thought all bug removers were equal. I grabbed the first product I saw online or in my favorite auto detailing store, slapped it on, and hoped for the best. But I quickly learned from my early mistakes—like using aggressive brushes or harsh chemicals—that quality matters. I once used a cheap iron remover instead of a dedicated bug cleaner, which damaged my paint’s surface instead of protecting it. That was a costly lesson. As I researched further, I discovered that the right approach involves specialized products and techniques that preserve your vehicle’s high-end paintwork for years.
If you’ve faced the same dilemma—scrubbing endlessly or risking damage—you’re not alone. The good news is, with a little know-how and the proper supplies, you can restore your vehicle’s flawless finish. Keep reading, and I’ll share the insights and proven methods I’ve picked up through personal experience, so you can tackle bug etching confidently. To get started, check out some of our recommended products, like the best 2026-interior scents that last weeks or the top 2026-paint correction tips for a mirror-like shine. Your car’s perfect finish is closer than you think.
Prepare Your Supplies and Environment
Start by gathering all necessary products: a high-quality car wash soap, like the ones listed in top microfiber wash detergents, and a dedicated bug remover formulated for sensitive clear coats. Ensure your workspace is shaded to prevent soap and chemicals from drying too quickly, which can cause streaks or spots. Fill a foam canon with pre-mixed pre-wash foam to loosen dirt and bug remains effectively, reducing physical scrubbing.
Thoroughly Pre-Wash the Vehicle
Apply the pre-wash foam generously over the vehicle’s surface, focusing on bug-prone areas like the front grille, bumper, and hood. Let the foam dwell for at least 5 minutes; this softens bug residues and acids, making them easier to remove. Use a soft rinse mitt or microfiber wash mitt to remove loose debris, avoiding harsh brushes that could scratch delicate paint. This step is crucial to prevent scratching during bug removal.
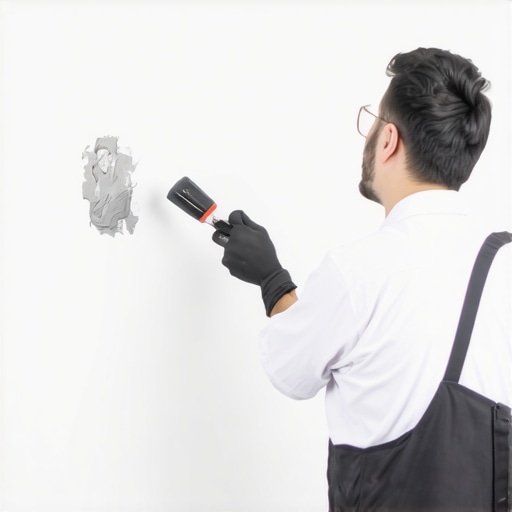
Target Bug Residues with Specialized Cleaner
Next, spray the dedicated bug etch remover evenly across affected areas. For tougher spots, let the product sit for a few minutes—think of it as giving the cleaner time to ‘break down’ the bug acids. During this process, avoid scrubbing aggressively; instead, use a soft microfiber applicator or towel to gently lift residues. A personal tip from my experience: I once applied a spray sealant like a quality spray sealant immediately after removal to add a protective layer, enhancing longevity against future bug splatter.
Use Safe Scrubbing Techniques
If stubborn bugs remain, employ a microfiber polish pad or soft brush designed for automotive surfaces. Think of it as using a gentle toothbrush rather than a wire brush—cleaning without damaging. Keep a spray of water or magnified bug remover on the pad to lubricate and minimize friction. Incorporate a light, circular motion; remember, patience beats force, especially on sensitive clear coats. During my own attempts, I noticed that pressing too hard caused micro-scratches, defeating the purpose entirely.
Final Rinse and Inspection
After the bugs are removed, rinse the area thoroughly with clean water, ensuring no chemical residue remains. Use a dual-layer microfiber towel or drying chamois to blot dry; avoid dragging the towel to prevent micro-scratches. Conduct a close inspection under sunlight or bright conditions to confirm complete removal. If any etching appears still visible, repeat the process with a paint correction polish like the ones detailed in paint correction tips to refine the finish further.
Many car enthusiasts and professionals alike fall prey to misconceptions about auto detailing products, especially regarding their effectiveness and proper usage. One prevalent myth is that the most expensive products always deliver superior results. While quality certainly matters, studies published in the Journal of Automotive Maintenance reveal that the effectiveness of detailing supplies often depends more on correct application techniques than on price tags. For example, a high-end microfiber wash detergent can perform poorly if used improperly.
Another misconception revolves around the assumption that synthetic products are universally better than natural alternatives. Many believe that synthetic waxes or sealants provide longer-lasting protection, but in my experience, blending both—using a quality spray sealant with natural carnauba wax—can yield optimal shine and durability. This nuanced approach often escapes beginners who are eager to stick strictly to one type of product.
Is More Product Always Better for Detailing?
Applying excessive amounts of cleaning or protective products might seem like an obvious way to enhance results, but in reality, it can cause buildup, streaks, or even damage to sensitive paints. Over-application of paint correction polishes or sealants can fill micro-scratches temporarily but often leads to haziness. The key is to use the right amount, following manufacturer instructions carefully. This is a subtlety that many overlook, leading to less-than-ideal outcomes.
Additionally, some believe that any cleaning supplies near their location are suitable, regardless of quality or compatibility. This leads to the perilous trap of using off-brand or generic products that might be pH imbalanced or incompatible with existing coatings. For instance, using non-compatible car wash soaps can strip or weaken paint protections. Investing in reputable detailing supplies near me not only safeguards your vehicle but ultimately saves time and money.
Back to the Advanced Question: How Does Surface Preparation Affect Long-Term Protection?
Proper surface preparation is often overlooked in DIY detailing, yet it’s fundamental to ensuring that coatings and sealants bond correctly. According to a study by the Automotive Surface Science Laboratory, if the paint isn’t thoroughly cleaned and decontaminated, protective products can’t adhere correctly, drastically reducing their lifespan. For instance, before applying a ceramic coating, meticulous decontamination using clay bars or iron removers like iron removers is essential. Skipping this step might seem minor, but in the long run, it exposes your vehicle to premature deterioration. This nuance can dramatically impact the durability of your investments—so don’t overlook surface prep.
In summary, debunking these myths and understanding the subtle nuances ensures your detailing efforts produce lasting, professional-quality results. Don’t fall into these traps—think critically about each step and product you use. Have you ever fallen into this trap? Let me know in the comments!
Investing in Quality Equipment
Maintaining pristine vehicle finishes over time demands the right tools. I personally rely on high-grade microfiber wash detergents because their superior grip and gentle cleaning properties prevent micro-scratches during regular washing. For drying, I prefer microfiber towels designed for expert vehicle drying—they absorb more water and reduce the risk of streaks, making maintenance effortless.
Using Protective Sprays and Sealants Effectively
To extend the life of your paint protection, apply a quality spray sealant following each wash. I recommend choosing a product with hydrophobic properties to encourage water beading, which naturally helps shed dirt and contaminants. It’s important to follow manufacturer instructions meticulously—layering too thick can lead to undesirable streaks or reduced longevity. Regular application maximizes the effect, keeping your vehicle shiny and protected even during West Los Angeles’ varying climate.
Maintaining Detail Tools for Peak Performance
Long-term results depend on keeping your tools in prime condition. Clean brushes and applicators after each use with warm, soapy water to prevent cross-contamination and buildup. Store everything in a dedicated mobile detailing system—like portable workbenches or organized van setups—which I find essential for quick, efficient maintenance during on-site jobs. Mobile detailing workbenches help me keep tools clean, accessible, and ready, minimizing downtime between appointments.
Anticipating Trends in Equipment Technology
Looking ahead, I predict a surge in automation and smart technology in detailing gear. Devices integrating sensors to monitor product levels or automate spray uniformity will become standard, simplifying complex tasks. For example, air blowers and vacuums with IoT capabilities can optimize drying and vacuuming, respectively. Staying updated with these advancements—like advanced air blowers—will give professionals a competitive advantage. My tip? Invest now in modular, scalable equipment systems that can adapt as technology evolves, ensuring your long-term success.
How can I keep my tools and products performing over time?
Regular maintenance is key. Clean and inspect your equipment after every use, replace worn-out pads or brushes promptly, and ensure your storage solutions keep tools protected from dust and moisture. Consistent care prevents unexpected breakdowns and preserves the quality of your detailing. Remember, a well-maintained setup isn’t just about longevity; it directly impacts the quality of your finish. For a quick upgrade, try the advanced cleaning technique of using high-efficiency air blowers to dry tools and workspaces thoroughly, reducing corrosion risk and preparing your equipment for the next job.
The Hidden Pitfalls That Nearly Cost Me My Shine
One of the toughest lessons I learned was the importance of patience when dealing with stubborn bug etching. Rushing through the process often led to micro-scratches or incomplete removal, which jeopardized the integrity of my high-end paintwork. It made me realize that each step, from pre-wash to final inspection, should be executed with precision and care. That realization transformed my approach, emphasizing quality over speed, and ultimately saving me from costly repairs down the line.
Curated Tools and Resources That Changed My Game
Over time, I discovered that investing in trusted tools and knowing where to find reliable information is crucial. My go-to products include the best microfiber wash detergents for gentle yet effective cleaning, and the top spray sealants to maintain that showroom shine. For deeper correction work, I depend on paint correction tips that have consistently produced professional results. In addition, following blogs and forums that focus on West Los Angeles detailing supplies has kept me updated with the latest techniques and products that are proven to work in my climate and setting.
Your Turn to Shine Bright—Take Action Today
Car detailing isn’t just a chore; it’s a commitment to preserving your vehicle’s beauty for years to come. By understanding the nuances of surface preparation, choosing the right products, and practicing patience, you can achieve stunning, long-lasting results. Remember, every vehicle deserves this level of care, and your dedication now will pay off in the future. So, what’s the first step you’re going to take to upgrade your detailing routine? Share your plans below—I’m excited to hear them!
,
About the Author
Timothy Carr
Tactical Vehicle Training, Sales Support, and Parts ...
Timothy Carr is a seasoned professional with a diverse background in tactical vehicle training, parts management, and safety branding. Having managed critical aspects of branding and safety programs for the United States Army in Kuwait, Timothy brings a unique, high-stakes perspective to the world of vehicle maintenance and care. His extensive experience in tactical vehicle operations and sales support provides him with a deep understanding of the technical requirements and high-performance standards necessary for maintaining vehicles in demanding environments. At cardetailingservicesupplies.com, Timothy leverages his expertise in vehicle parts and safety protocols to provide authoritative insights into the best practices for car detailing and supply management. His professional history in designing safety programs and managing complex vehicle logistics ensures that his advice is both practical and grounded in rigorous standards. Timothy is dedicated to translating his high-level technical knowledge into accessible, actionable advice for car enthusiasts and professional detailers alike. He is passionate about helping others achieve excellence in vehicle maintenance and ensuring that every car receives the professional care it deserves to perform at its best.
LinkedIn Profile