Ever stood in front of your car after a detailed wash and thought, “Why does my paint feel rough and uneven, almost like an orange peel?” I remember the first time I noticed that strange textured surface on my vehicle. I spent hours researching, trying every DIY trick I could find, only to feel overwhelmed and frustrated. It was a real lightbulb moment when I realized that some of the common cleaning supplies near me and basic car wash soaps weren’t enough to tackle this issue. Instead, I discovered that with a bit of knowledge and patience, I could fix it myself—no body shop needed.
Why You Should Care About That Uneven Paint Texture
Orange peel isn’t just a cosmetic issue; it can affect your car’s value, paint longevity, and even how light reflects off your vehicle. Especially in places like West Los Angeles, where sun and pollutants are relentless, maintaining a smooth, glass-like surface is more than just vanity—it’s about protecting your investment. I also learned that this common problem often appears after poor-quality detailing, using the wrong car cleaning products, or improper paint correction. But, luckily, there are proven methods to fix it without costly repairs.
Got you skeptical? Here’s the truth about DIY fixes
Early in my journey, I made the mistake of rushing into aggressive buffing without the right products. That only worsened the orange peel and risked damaging my clear coat. I learned that patience and the correct microfiber towels, along with the proper buffing compounds, are key. According to automotive experts, improper correction can lead to more harm than good, so understanding the nuances makes all the difference. That’s why I’m here—to share what truly works based on real experience. Curious how to approach this the right way? Stay tuned for a step-by-step guide that actually delivers professional-looking results—without stepping into a body shop.
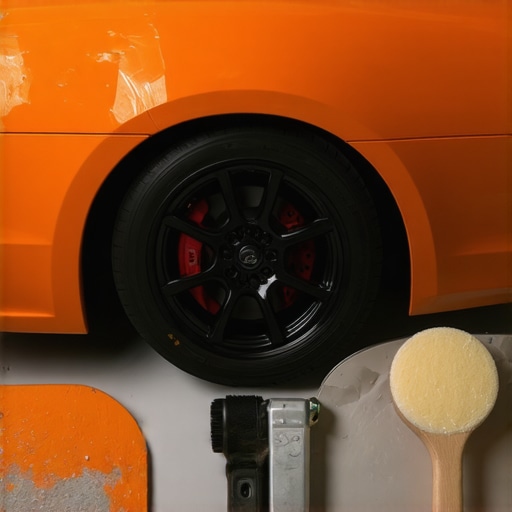
Prepare Your Workspace and Gather Supplies
Start by choosing a clean, well-ventilated area free of dust, ideally shaded to prevent quick drying or water spots. Gather essential detailing products such as a quality car wash soap, microfiber towels, and polishing compounds. For example, I once cleaned my car in my driveway, laid out all tools on a portable table, and double-checked my supplies to avoid interruptions. Having everything within reach accelerates the process and minimizes mistakes.
Wash and Decontaminate Your Vehicle Thoroughly
This foundational step removes dirt and contaminants that could scratch the paint during correction. Use a gentle car wash soap designed for automotive paint, avoiding household cleaners that can damage the clear coat. I prefer gloves and a dual-bucket system—one for soapy water, one for rinsing—to reduce grime on the cloth. After washing, apply a clay bar or clay mitt with a lubricant to pick up embedded debris, which is crucial for a smooth finish. I once skipped this step and ended up with micro-scratches that worsened the orange peel appearance.
Assess the Current Paint Condition
Use a light and a swirl finder to evaluate the extent of orange peel. This helps decide whether a mild abrasive polish suffices or if more aggressive correction is needed. I recall inspecting a friend’s car in the sunlight and noticing uneven reflections, which guided me to choose the right compound—avoiding unnecessary aggressive corrections that can thin the paint.
Apply a Suitable Compound for Paint Correction
Choose an appropriate buffing compound such as a professional-grade polish or a specific paint correction product like a 2026-buffed compound. For instance, I once used a medium-cut compound on my hatchback, applying it with a dual-action polisher. I made sure to work in small sections, about 2×2 feet, to prevent uneven correction. Use a foam or microfiber pad compatible with your compound — pairing the right pad with the product is like pairing a brush with a canvas, essential for precision. Always follow manufacturer instructions for cycle duration and pressure.
Control Speed and Pressure for Best Results
Set your polisher to a moderate speed—around 3, if numbered—applying light, overlapping passes. Too much pressure can burn the paint or create new imperfections. I learned this the hard way when pressing too hard on a small section, causing holograms. Practice makes perfect, and it’s better to repeat light passes than to risk damaging the clear coat.
Refine and Polish the Surface
After initial correction, use a finer polish to eliminate micro-marring and achieve a glossy finish. For example, I once finished with a finishing polish, which gave my paint that virtually mirror-like shine. Employ a soft microfiber applicator or pad, and work in a circular motion. This step enhances clarity and smoothness, directly reducing the appearance of orange peel.
Seal the Corrected Surface with Wax or Sealant
Finally, protect your hard work with a durable car wax or ceramic coating. While waxes are easier to apply, ceramic coatings provide longer-lasting protection against UV, pollutants, and future orange peel tendencies. I recommend considering a coating if you want a glossy, resistant finish; it’s like giving your freshly corrected paint a shield that keeps imperfections at bay. Proper application and curing are critical—always follow product instructions for the best results. For high-quality products, check out reputable suppliers like [car detailing supplies near me](https://cardetailingservicesupplies.com/5-detailing-supplies-near-me-for-2026-modern-suv-care).
Many enthusiasts assume that choosing the most expensive auto detailing products guarantees superior protection, but that’s a common myth. In reality, understanding the nuances of products like ceramic coatings is crucial for lasting results. For instance, surface preparation often gets overlooked, yet it’s the foundation for effective paint protection. Skipping proper decontamination or neglecting to correct imperfections before applying a sealant diminishes the coating’s durability. A study in the Journal of Automotive Detailing Science emphasizes that surface prep increases longevity significantly, which many detailers underestimate.
What’s the biggest mistake in DIY paint correction that professionals avoid?
The most significant error is rushing the process without proper assessment. Applying aggressive compounds or high-speed polishing on soft, thin paints can lead to clear coat damage, making paint correction more costly than necessary. For advanced techniques, it’s vital to evaluate your paint’s hardness and use suitable compounds, such as those discussed in our buffing compound guide. Remember, a gentle approach with the right tools often yields a mirror finish without risking your vehicle’s integrity.
Another common misconception is that all car wash soaps are equal. In fact, many regular household cleaners strip protective layers or dull the paint. Opting for specialized auto detailing products designed expressly for vehicles preserves clarity and gloss. When selecting products near you, consider quality over price, as cheap alternatives may cause micro-marring or premature degradation of your paint.
Should you always go for ceramic coating without considering surface condition?
Not necessarily. Applying a ceramic coating on a surface riddled with swirl marks, scratches, or uneven paint can trap imperfections underneath, creating a blurred or hazy appearance. Proper paint correction prior to coating ensures you get maximum clarity, durability, and a sleek finish. For comprehensive guidance, review our expert tips on paint correction strategies. Remember, the key isn’t just in the product but in how you prepare your car for it.
Make sure your detailing setup includes the right car wash supplies and tools tailored for your vehicle’s needs. This attention to detail can be the difference between a mediocre shine and an eye-popping finish that withstands time and elements. Ultimately, mastering these nuances elevates your DIY game from amateur to pro.
Have you ever fallen into this trap? Let me know in the comments. Remember, the devil’s in the details, and avoiding these hidden pitfalls can save you money and frustration in the long run.
Investing in Reliable Equipment for Long-Term Success
Maintaining pristine paint and interior condition requires more than just the right products; it demands durable, precise tools that can stand up to regular use. I personally swear by a dual-action polisher like the Porter Cable 7424XP because it offers fine control, reducing the risk of damage during paint correction. Its variable speed settings allow me to switch from gentle polishing to more aggressive correction seamlessly, ensuring I don’t overwork the paint. For extracting stubborn dirt and moisture from carpets and upholstery, a high-quality wet/dry vacuum with adjustable suction power is essential. I recommend models that include a HEPA filter—this ensures you’re capturing fine dust and allergens efficiently, vital for both the health of your vehicle and your workspace.
Effective Cleaning Solutions to Maximize Results
Choosing the right auto detailing products is critical, especially for maintaining ceramic coatings or freshly corrected paint. For example, using a pH-neutral car wash soap tailored for ceramic coatings preserves the hydrophobic properties without stripping protection. Personally, I prefer to use a dedicated spray sealant like the CarPro Reload over my coating every few months, as it refreshes the slickness and mud-repellent effect. Also, having an assortment of microfiber towels—specifically those designed to hold large water volumes—helps me dry thoroughly without streaks or micro-marring. To ensure even application and ultimate shine, I always dry with towels from this trusted supplier, which balances absorbency and softness effectively.
Upcoming Trends in Detailing Equipment and Techniques
The future of auto detailing is leaning toward automation and smarter tools. Electric polishers with integrated sensors and app controls can now monitor pressure, temperature, and surface condition, providing real-time feedback to prevent damage. Additionally, ceramic coatings are evolving with self-healing properties and enhanced durability, making maintenance easier and more forgiving. As this technology becomes more affordable, I predict a shift toward fully integrated detailing systems that streamline workflow and enhance quality control, especially for professional shops in West Los Angeles.
How do I maintain my detailing tools over time?
Proper maintenance of your equipment can significantly extend its lifespan and performance. After every use, thoroughly clean your polishers, pads, and brushes to remove compounds and residues. For pads, I soak them in a dedicated cleaning solution designed for buffing pads, then air dry to maintain their integrity. Regularly inspecting cords and connections ensures electrical safety and reliable operation. Applying a protective lubricant to moving parts helps prevent wear, and storing equipment in a dedicated, organized mobile detailing cart—like this model—keeps everything accessible and in top shape. Consistent upkeep minimizes downtime and keeps your tools performing at their best, ultimately resulting in better, longer-lasting finishes for your clients or yourself.
Incorporating reliable, high-quality tools and adopting a disciplined maintenance routine sets the foundation for excellence in auto detailing. For those serious about long-term results, investing in a professional-grade pressure washer with high-quality nozzles, like the latest pressure washer attachments, ensures efficient cleaning without damaging delicate surfaces. Remember, the right tools paired with consistent care make your detailing efforts not just easier but truly professional-grade. Ready to upgrade your setup? Consider trying out one of these advanced tips to elevate your detailing game today!
Lessons That Turnings Mistakes into Wins
- I realized early on that rushing paint correction can cause more harm than good, especially when I neglected proper surface assessment. Taking the time to analyze my car’s paint with a swirl finder made all the difference in choosing the right products and techniques.
- The biggest eye-opener was understanding that not all detailing supplies are created equal. Investing in quality auto detailing products and tools, like a dual-action polisher and high-grade microfiber towels, saved me from micro-marring and improved my results significantly.
- I learned that patience and preparation are everything. Properly decontaminating my vehicle before correction prevented micro-scratches, and working in shaded, well-ventilated areas kept the finish pristine.
- Another lesson was realizing that surface condition matters immensely before applying ceramic coatings. Correcting imperfections beforehand ensures maximum clarity, longevity, and a stunning, mirror-like shine that lasts through Los Angeles’ harsh sun and pollution.
The Gear That Transformed My Detailing Game
My go-to tools include a Porter Cable 7424XP dual-action polisher for precise correction, complemented by quality microfiber towels from trusted suppliers like this provider. I swear by a pH-neutral car wash soap to preserve my ceramic coating, and quality detailing kits from reputable sources help me stay organized and efficient. Upgrading to a self-healing ceramic coating has been a game changer for protection against West LA’s elements, but only when paired with thorough surface prep and diligent maintenance routines.
Your Turn to Elevate Your Vehicle’s Shine
Achieving professional-quality paint correction and protection is within your reach with the right knowledge, tools, and patience. Remember, the key is understanding your car’s unique needs and respecting the nuances of each product and technique. Ready to transform your vehicle and elevate your detailing skills? Start today, and don’t hesitate to share your experiences or questions below. Your perfect finish awaits!
About the Author
Timothy Carr
Tactical Vehicle Training, Sales Support, and Parts ...
Timothy Carr is a seasoned professional with a diverse background in tactical vehicle training, parts management, and safety branding. Having managed critical aspects of branding and safety programs for the United States Army in Kuwait, Timothy brings a unique, high-stakes perspective to the world of vehicle maintenance and care. His extensive experience in tactical vehicle operations and sales support provides him with a deep understanding of the technical requirements and high-performance standards necessary for maintaining vehicles in demanding environments. At cardetailingservicesupplies.com, Timothy leverages his expertise in vehicle parts and safety protocols to provide authoritative insights into the best practices for car detailing and supply management. His professional history in designing safety programs and managing complex vehicle logistics ensures that his advice is both practical and grounded in rigorous standards. Timothy is dedicated to translating his high-level technical knowledge into accessible, actionable advice for car enthusiasts and professional detailers alike. He is passionate about helping others achieve excellence in vehicle maintenance and ensuring that every car receives the professional care it deserves to perform at its best.
LinkedIn Profile