Ever spilled coffee on your brand-new vegan leather seats and watched your heart sink as a stubborn stain threatened to ruin the whole look? Or maybe you’ve borrowed your car to a friend and returned to find the seat’s perfect matte finish slightly dulled, leaving you wondering if you’ve permanently damaged your interior. I remember the lightbulb moment when I realized that some of the common cleaning routines I used on traditional leather could actually cause discoloration on vegan alternatives. The concern isn’t just about stains—it’s about preserving that fresh, uniform look.
Why Preserving Your Vegan Leather Seats Matters More Than You Think
In my own quest to keep my car’s interior looking pristine, I uncovered that vegan leather, while offering the look and feel of genuine material, requires gentler care to avoid discoloration and cracking. This realization was eye-opening because I was initially using aggressive cleaners and scrubbing too hard, thinking I was doing what’s best. Turns out, harsh chemicals can strip away the protective surface layer, leading to fading or uneven patches. The good news? With the right approach, you can clean your vegan leather seats without risking damage or color loss. Doing so isn’t just about aesthetics; it impacts your vehicle’s resale value and your sense of pride in your ride.
For example, a study by the University of Wisconsin showed that improper cleaning methods could cause lasting damage to synthetic materials, reducing their lifespan and appearance (source: UW Madison, 2019).
Have you ever faced the challenge of cleaning vegan leather without discoloration? You’re not alone. I had my fair share of mishaps early on—using too much soap, abrasive brushes, or harsh chemicals—which only made things worse. I learned through trial, error, and advice from seasoned detailers that gentle, targeted cleaning is the secret. Stay with me, and I’ll walk you through how to keep your vegan seats looking flawless. Ready to transform your cleaning routine?Gather Your Supplies and Prepare the Area
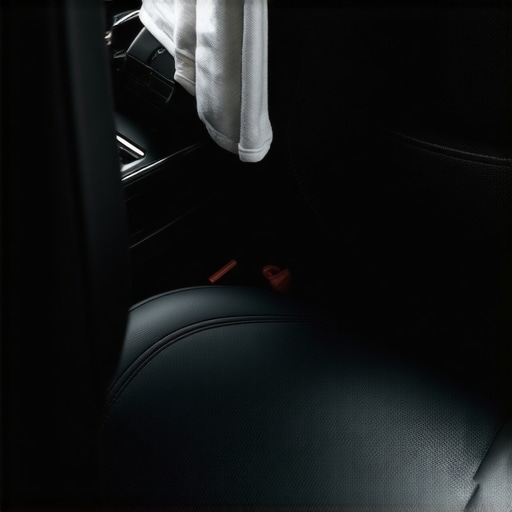
Start by assembling gentle cleaning products like a pH-balanced vegan leather cleaner or a mild soap and water solution. Use a soft microfiber cloth and a sponge with a fine mesh scrub pad. Clear your car interior of loose debris and dust to prevent scratching during cleaning. Protect other surfaces nearby with painter’s tape or plastic sheeting to avoid accidental spills. Remember, the goal is to treat your seats delicately, like handling a piece of fine art.
Apply the Cleaner with Precision and Care
Dilute and Test First
Mix the cleaner according to manufacturer instructions, or dilute a gentle soap solution. Before full application, test the solution on a hidden seat area. Wait a few minutes to observe any color change or texture alteration. I recall the first time I attempted this—applied too much solution left streaks, so I learned to use minimal product and a damp cloth. This prevents over-saturation, which can seep into seams and cause discoloration.
Gentle Wiping Technique
Moisten your microfiber cloth with the prepared solution. Lightly glide it across the seat surface using small, circular motions, avoiding excessive pressure. Think of it as softly patting a baby’s skin—firmness can cause damage or dullness. For stubborn spots, let the cleaner sit for a minute, then gently work on them without scrubbing or using abrasive brushes. This controlled approach maintains the seat’s matte finish and prevents color fading.
Addressing Deep Stains and Stubborn Debris
For tougher stains, consider using a dedicated vegan leather stain remover or a mild all-purpose cleaner (APC). Apply directly onto the stain with a soft applicator and let it sit briefly. Use a fine microfiber scrub pad—like a velvet brush—to lightly agitate the area, mimicking the way a paint correction compound gently restores paint without damaging clear coats. Always test first to ensure no discoloration occurs. Rinse with a clean, damp microfiber cloth, using minimal water to avoid oversaturation.
Dry and Condition Your Seats
Immediately after cleaning, wipe the surface with a dry microfiber towel to remove all residual moisture. Use a dedicated vegan leather conditioner or a natural plant-based moisturizer to restore suppleness and protect against future stains. Apply a small amount onto a clean cloth and distribute evenly with light pressure. I once missed this step, and my seats looked dull after a few weeks; now I see the difference when I regularly condition them.
Final Touches for an Even Look
Inspect the seats under good lighting. Use a soft brush to adjust the nap if your vegan leather has a textured surface. For areas prone to discoloration, consider an extra light application of spray sealant—like a spray sealant for paint—which adds a protective barrier without changing the appearance. For detailed work or smaller sections, check out how to apply 2026 spray sealants for long-term protection, which helps your seats stay fresh and vibrant over time.
By following these meticulous steps, you’ll ensure your vegan leather seats remain as beautiful as the day you bought your car, free of stains and discoloration, with their matte finish preserved for years to come.

While many car enthusiasts believe that investing in expensive DIY car detailing kits or high-end auto detailing products guarantees a professional finish, the truth is that much of the success lies in understanding the nuanced application techniques and knowing what pitfalls to avoid. A common misconception is that stronger chemicals or abrasive tools lead to better results; however, they often cause micro-scratches or dullness, especially when dealing with delicate paint correction or paint protection. The key is precision and understanding the materials you work with—something experienced detailers master through years of trial, error, and continuous learning.
Why DIY Enthusiasts Should Reconsider the Basics of Product Compatibility
Many DIY owners mistakenly believe all car wash soaps and paint correction products are interchangeable, but using a generic product on sensitive surfaces such as ceramic coatings or plastic trim can cause irreversible damage. Always verify compatibility—this nuance can make or break your detailing results. For example, spray sealants are formulated for specific paint types; applying the wrong one can diminish effectiveness and longevity.
Furthermore, understanding the pH balance of your car cleaning products helps prevent unintended damage. Acidic or alkaline solutions not designed for automotive surfaces can erode protective layers or alter the surface’s appearance over time. My advice? Always research or consult detailed guides—like how to properly prep plastic trim before coating—to avoid common pitfalls.
Advanced Mistake: Neglecting Surface Preparation and Sealant Application
One mistake I see frequently among DIYers is rushing through or neglecting proper surface preparation before applying paint protection or sealants. Skipping thorough cleaning or not decontaminating the paint leaves behind embedded contaminants, causing imperfections even after polishing. This oversight reduces the lifespan of protective layers and can reintroduce swirls or water spots shortly after application. Experts emphasize that a meticulous prep process optimizes product performance and durability—so don’t cut corners here. For advanced tips, check out detailed guides on how to prepare surfaces for ceramic coatings and avoid costly mistakes.
Have you ever fallen into this trap? Let me know in the comments. Mastering these nuances separates casual DIYers from true automotive detailers who consistently achieve professional-grade results. Remember, in the realm of mobile detailing or West Los Angeles detailing supplies, success hinges on understanding material-specific care, proper application techniques, and the importance of surface prep—not just having the latest car wash supplies.
When it comes to maintaining your vehicle’s pristine appearance, having the right tools isn’t just a convenience—it’s a necessity. Durable, high-quality equipment ensures consistent results and prolongs the life of your detailing efforts. Personally, I swear by a few essential pieces that have transformed my workflow, especially in a fast-paced environment like West Los Angeles where efficiency is key.
A reliable foam lance, for example, is indispensable. Using a foam cannon like the MTM Hydro System allows me to pre-soak the entire vehicle with thick, clinging suds that loosen dirt without scratching the paint. It’s far superior to traditional bucket washing, especially when dealing with delicate clear coats, and helps reduce water spots and swirl marks over time. For ongoing maintenance, I rely on spray sealants that are designed for long-term protection. Applying a high-grade product like the 2026 spray sealants after a thorough clean enhances gloss and shields surfaces against environmental contaminants.
In terms of cleanliness and surface prep, I never neglect a quality all-purpose cleaner (APC). It’s invaluable for cleaning engines, wheel wells, and even interior surfaces without risking damage, especially when you choose formulations compatible with plastics and rubber. I prefer products that are pH-balanced, such as the ones detailed in our guide on [how to protect 2026 aluminum wheels from pitting](https://cardetailingservicesupplies.com/how-to-protect-2026-aluminum-wheels-from-pitting-safely), which extends their lifespan and keeps their aesthetic appeal.
Organizational tools also play a crucial role. Lightweight, waterproof tool bags with multiple compartments enable me to keep all my mobile detailing equipment within reach and well-organized, facilitating quicker turnaround times on-site. For example, the [4 mobile detailing tool bags](https://cardetailingservicesupplies.com/4-mobile-detailing-tool-bags-for-2026-organization) are perfect for maintaining an efficient workflow.
How do I maintain my tools to ensure they stay in top shape over time? Regular cleaning, proper storage, and timely replacement are vital. Cleaning brushes and microfiber towels after each use prevents cross-contamination and keeps fibers effective. Additionally, inspecting hoses and nozzles for wear will prevent unexpected downtime during clients’ appointments.
Looking ahead, the trend points towards smarter, more durable equipment that integrates with digital systems for scheduling and diagnostics. As technology advances, I predict an increase in the use of automated polishers with adjustable RPMs and app-controlled systems—making detailing even more precise and less labor-intensive.
For anyone serious about professional-grade results, I recommend investing in high-quality foam cannons and spray sealants. Not only do they make the process more efficient, but they also guarantee longevity for your vehicle’s exterior. If you’re ready to elevate your detailing setup, start by trying out a foam lance like the MTM Hydro System or applying a trusted spray sealant after your next wash—it’s game-changing! Want to learn more? Dive into how to apply 2026 spray ceramic coatings like a pro for lasting protection.
What I Wish I Knew About Vegan Leather Before I Started
One of the most eye-opening lessons I learned was that not all cleaning products are created equal—especially for vegan leather. Using aggressive chemicals or abrasive tools seemed like a good idea at first, but I quickly realized they can cause discoloration and damage that’s hard to reverse. It’s crucial to understand the material’s delicate nature and select pH-balanced, gentle cleaners specifically designed for vegan leather to keep your seats looking flawless.
Another mistake I made early on was neglecting proper surface preparation. Skipping thorough cleaning and decontamination left residue that caused streaks or dullness after polishing. I now invest time in detailed prep, such as using a dedicated APC suitable for interior plastics and fabrics, which lays the foundation for a smooth, blemish-free finish. For guidance, check out our detailed guide on prepping plastic trim for ceramic coating.
My Go-To Tools for Protecting and Enhancing Vegan Leather
Selecting the right tools makes all the difference. I rely on ultra-soft microfiber cloths and a coarse microfiber scrub pad to tackle stubborn spots without risking scratches or dulling the matte finish. A foam applicator is perfect for spreading conditioners evenly, ensuring your seats stay supple and resistant to future stains. For long-term protection, I recommend applying spray sealants formulated for vegan leather, which create a protective barrier while maintaining the authentic look. For in-depth application techniques, explore our top spray sealants for lasting protection.
Future-Proof Your Seat Maintenance Routine
Investing in quality supplies pays dividends over time. Using products like pH-balanced cleaners, gentle conditioners, and appropriate sealants will extend the lifespan of your vegan leather seats. Remember, regular conditioning prevents cracks and dullness, keeping your interior looking new and vibrant. As technology advances, I foresee more innovations in eco-friendly, plant-based conditioners and ultra-durable sealants, making it easier than ever to care for your vehicle sustainably.
Let’s Talk About Your Experience with Vegan Leather Care
Have you ever struggled to find the right cleaning routine for vegan leather seats? Or discovered a product that unexpectedly caused damage? Share your stories and tips below—I’d love to learn from your experiences and help you avoid common pitfalls. Together, we can keep our rides looking pristine and feeling luxurious for years to come!
About the Author
Timothy Carr
Tactical Vehicle Training, Sales Support, and Parts ...
Timothy Carr is a seasoned professional with a diverse background in tactical vehicle training, parts management, and safety branding. Having managed critical aspects of branding and safety programs for the United States Army in Kuwait, Timothy brings a unique, high-stakes perspective to the world of vehicle maintenance and care. His extensive experience in tactical vehicle operations and sales support provides him with a deep understanding of the technical requirements and high-performance standards necessary for maintaining vehicles in demanding environments. At cardetailingservicesupplies.com, Timothy leverages his expertise in vehicle parts and safety protocols to provide authoritative insights into the best practices for car detailing and supply management. His professional history in designing safety programs and managing complex vehicle logistics ensures that his advice is both practical and grounded in rigorous standards. Timothy is dedicated to translating his high-level technical knowledge into accessible, actionable advice for car enthusiasts and professional detailers alike. He is passionate about helping others achieve excellence in vehicle maintenance and ensuring that every car receives the professional care it deserves to perform at its best.
LinkedIn Profile