Ever found yourself crouched in front of your car, elbow-deep in grime, wondering why those rubber mats refuse to get truly clean? I’ve been there—frustrated, thinking I needed some fancy, expensive product. I mean, I tried everything from generic car wash soaps to the latest detailing sprays, but somehow, nothing seemed to make my mats look fresh and new. It was like fighting a losing battle with stubborn dirt, and honestly, I nearly gave up more times than I care to admit.
Then, just when I was about to resign myself to mediocre results, I had a lightbulb moment. I realized that I’d been missing the secret weapon—an effective, straightforward cleaning routine tailored specifically for those 2026 rubber mats. It’s not about the most expensive kit or the latest gadget; sometimes, mastering a simple technique makes all the difference.
Today, I want to share with you how I finally cracked the code. We’re diving into proven methods that will have your rubber mats looking like they just rolled off the showroom floor—without the need for professional equipment or hazardous chemicals. Whether you’re a seasoned detailer or just someone who wants to keep your ride looking sharp, understanding these steps will save you time, money, and a whole lot of frustration.
Why Regular Cleaning of Your Rubber Floor Mats Matters
Rubber mats are the first line of defense against dirt, mud, and crumbs that threaten to embed deep into your car’s interior. Over time, these mats accumulate stains, odors, and even harmful bacteria if not properly maintained. Neglecting them can lead to a buildup that’s tougher to remove and can affect the overall cleanliness of your vehicle.
Plus, clean mats make a huge difference in your car’s appearance and resale value. A fresh-looking interior suggests you care about your vehicle—and that shows to everyone who steps inside. But here’s the catch—many people overlook this vital aspect because it seems like a hassle or they’re unsure about the right method.
Blunder early on: I used a harsh chemical cleaner without testing, which caused some discoloration on my mats. It was a mistake that could have been avoided if I had done a quick spot test or knew the right products to use. Trust me, a small oversight like that can undo your entire cleaning effort.
The good news? Once I adopted a proper routine with safe, effective products, cleaning became quick and even enjoyable. Want to see a significant upgrade in your cleaning game? Keep reading—next, I’ll guide you through all the steps necessary to get your rubber mats looking brand new. If you’re wondering about the best supplies, check out the [top 5 2026 car detailing supplies for coastal humidity](https://cardetailingservicesupplies.com/top-5-2026-car-detailing-supplies-for-coastal-humidity) to get started.
Gather the Right Supplies for a Stellar Clean
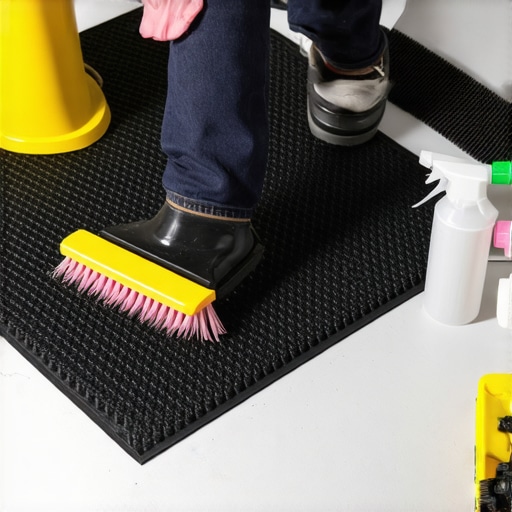
Start by assembling your essentials. Look for a high-quality car wash soap formulated for rubber and durable enough to cut through grime without damaging the material. A stiff-bristled brush, preferably a detailing brush, will help reach into grooves. Don’t forget microfiber towels and protective gloves to keep your hands clean and safe.
Prep and Protect Your Workspace
Before diving in, set up a shaded area or use a mobile detailing tent if you’re mobile, to prevent this process from being interrupted by direct sunlight. This reduces water spots and prevents soap residue from drying before removal. Also, lay down absorbent towels or drop cloths to catch drips and keep your vehicle tidy.
Initial Rinse to Loosen Dirt
Begin with a thorough rinse using a pressure washer or a hose with a spray nozzle. Think of this as brushing off the loose dirt before deep cleaning—it’s about removing the surface grime that can turn into scratches later. Focus on the mats’ edges and deep channels. If you have a high-pressure system, set it to a gentle spray to avoid dislodging the rubber or causing damage.
Apply a Specialized Cleaning Solution
Mix your cleaner according to the manufacturer’s instructions. For stubborn stains or embedded grime, it helps to use a product with gum-removing power. Spray generously over the mats, ensuring coverage into the textured surfaces and grooves. Use a microfiber cloth or foam applicator for an even spread. This step is crucial—think of it as giving your mats a proper skincare routine and letting the solution penetrate deep into dirt or grease.
Scrub with Purpose
Using your stiff-bristled brush, scrub the mats in a circular motion. Pay special attention to the grooved areas where dirt gets trapped. Imagine erasing years of stains — this is where good technique matters. For extra stubborn spots, apply a bit of tire shine-type solution or a dedicated rubber cleaner. Pausing to agitate deeply embedded grime prevents it from resettling later.
Rinse Again and Inspect
Once scrubbing feels thorough, rinse the mats again to wash away loosened dirt and soap residue. Use a gentle stream to avoid forcing water into unintended areas like wiring or connectors. After rinsing, inspect for remaining stains or dirt; a second scrub might be necessary if spots persist. Think of this as doing a quick quality check — your goal is a uniformly clean surface.
Dry and Maintain Your Investment
Use a clean microfiber towel to pat the mats dry, removing excess water and preventing mold or mildew. For a professional touch, consider applying a protective coating like a graphene spray, which adds a hydrophobic barrier making future cleanings easier. Remember, regular maintenance keeps your mats looking fresh without the need for harsh chemicals or aggressive scrubbing every time.
Reflecting on my own experience, I once tackled a set of heavily soiled mats after a muddy weekend. The process was messy—soap slung around, mud splattering—but the result was worth it. After drying, those mats looked almost new, and I knew I had mastered a routine that saved me trips to professional detailers. Next, I’ll show how to preserve that clean look with ongoing care techniques.
When it comes to auto detailing, many enthusiasts believe that the most expensive products automatically deliver the best results. But in my experience, this isn’t always true. For example, a high-priced paint protection coating may come with flashy claims, but if applied improperly—such as without the right surface prep—it can do more harm than good, leading to issues like clouding or uneven coverage. The key is understanding the nuances of product application and how different ingredients interact with your vehicle’s surfaces. A lot of detailers overlook the importance of proper surface cleaning before applying products like paint correction compounds, which can result in swirl marks or uneven finish—even when using top-tier supplies. To truly master your craft, it’s crucial to recognize that not all products suit every situation. For instance, some car wash soaps are formulated for specific paint types or levels of contamination, and selecting the wrong one can lead to inefficient cleaning or residue buildup. Curious about the advanced mistakes many make? They often try to DIY their way through complex paint correction without understanding the proper steps, risking permanent damage. An often-hidden detail is how environmental factors, such as coastal humidity, influence product longevity and effectiveness, making the choice of supplies near me like those listed in our top 5 2026 car detailing supplies for coastal humidity essential. Furthermore, misconceptions about the durability of ceramic coatings can lead to improper maintenance routines, causing premature degradation. A common mistake is neglecting to verify whether a product like graphene coatings really offers longer protection than traditional options—sometimes, the difference is subtle but impactful over time. Have you ever fallen into this trap? Let me know in the comments. Mastering the subtleties of product selection and application can elevate your detailing game from amateur to professional, ensuring lasting results and protecting your investment.
Optimizing Your Detailing Arsenal
Investing in the right tools is essential for consistent, professional-level results. Personally, I rely on a dual-action polisher equipped with variable speed settings to perform flawless paint correction. This machine offers controlled, even polish application, reducing the risk of swirl marks, especially on delicate finishes like those loveably found on West Los Angeles vehicles. To keep my polishing process precise, I use a set of foam pads designed for different stages—cutting, polishing, and finishing—each tailored to specific paint types and correction needs. For long-term maintenance, I opt for a variable-speed orbital polisher that minimizes skill barriers while maximizing results.
Beyond polishing, a reliable, high-pressure wash system with adjustable nozzles ensures you remove debris thoroughly without risking damage to delicate coatings. For instance, choosing a model compatible with top-rated high-pressure systems allows for efficient dirt removal, which is crucial before any correction or protection step. Maintaining these tools is equally important; regularly cleaning brushes and replacing worn-out pads extend their lifespan and keep performance at peak levels.
Another game-changer is advanced lighting during paint correction. I swear by portable LED lights with adjustable brightness and color temperature—they help spot imperfections that are hard to see under standard garage lighting. Not only do they improve correction accuracy, but they also save time by preventing missed spots or over-polishing. As trends lean toward smarter, app-controlled systems, I anticipate future tools will integrate AI features for even more precise corrections and surface analysis.
How do I preserve my tools over time?
Proper storage and routine maintenance are vital. After each session, I thoroughly clean my polisher’s pads and store everything in a dedicated, dust-free cabinet. Using protective sprays on metal parts prevents corrosion, and lubricating moving components extends their life. For tools exposed to coastal humidity, like those in West LA, investing in dehumidifying cabinets or silica gel packs helps prevent rust and mold. Staying ahead of tool maintenance not only ensures optimal performance but also saves money in the long run, avoiding costly replacements.
In my experience, combining quality equipment with meticulous upkeep forms the backbone of successful detailing. Think of your tools as an extension of your skills—maintain them well, and you’ll see consistent, professional results. For those interested in scaling their operation, consider the benefits of integrating mobile detailing equipment like a dedicated water tank system or portable steamers, which simplify the process and expand your service offerings—check out this guide on water tanks for mobile setups.
Next, try implementing an advanced polishing technique using a dual-action polisher with variable speed settings. This not only improves the quality of your paint correction but also minimizes the risk of damaging the clear coat. Mastering this tool will elevate your skills and deliver longer-lasting, professional results every time.
The Hidden Pitfalls of DIY Detailing Lessons
One of the biggest lessons I learned was that rushing through the process often leads to missed spots and uneven finishes. Patience truly pays off, especially when working with delicate coatings or intricate textures. Cutting corners might seem tempting to save time, but it backfires when stubborn streaks or scratches appear—trust me, I’ve been there. Taking the time to properly prep and carefully execute each step ensures your results are professional-grade and long-lasting.
Another insight was realizing that not every product on the shelf is suitable for every job. For example, using a high-alkaline soap on a freshly applied ceramic layer can compromise its integrity. Knowing which products to pair and when to use them stems from experience and understanding your supplies, like the top-rated [2026 car wash supplies for high-pressure systems](https://cardetailingservicesupplies.com/top-5-2026-car-wash-supplies-for-high-pressure-systems).
Lastly, the importance of environmental conditions cannot be overstated. Humidity, temperature, and sunlight affect drying times and product performance. During humid days, I learned to use tools like a mobile detailing tent to maintain ideal conditions, ensuring my work cures properly. These nuanced considerations often make the difference between a good job and a perfect finish.
Cultivating a Pro-Level Toolkit with Thoughtful Choices
Building an effective detailing arsenal involves more than accumulating random tools. I recommend investing in a dual-action polisher with adjustable speeds, such as those featured in our [best 2026 mobile detailing equipment](https://cardetailingservicesupplies.com/mobile-detailing-equipment-2026-best-water-tanks). The right foam pads tailored for specific tasks, like cutting or finishing, help achieve swirl-free paint correction. Complementing this with quality lighting, like portable LED systems, helps spot imperfections early—saving time and reducing errors.
Don’t overlook the value of proper storage and regular maintenance of your tools. Simple steps like cleaning pads after each use, applying corrosion inhibitors in humid environments, or using silica gel packs for tools stored in West LA shield against rust and degradation. When tools are well-maintained, they perform reliably, translating directly into superior results for your clients or personal projects.
Fuel Your Passion with Community and Curiosity
Participating in communities—be it online forums or local detailing meetups—exposes you to diverse techniques and product recommendations. For instance, engaging with seasoned detailers who have experience with coastal conditions can inform your choice of long-lasting coatings or waterless wash techniques. Reading reviews, like those on trusted blogs or product pages, often uncovers hidden gems and traps to avoid, such as scams highlighted in our [paint correction scams in 2026](https://cardetailingservicesupplies.com/paint-correction-scams-to-avoid-in-2026).
Continuous learning keeps your skills sharp. I found that experimenting with new products or tools, like applying a graphene spray from the [2026 guide to best protection sprays](https://cardetailingservicesupplies.com/how-to-use-2026-graphene-sprays-for-6-month-protection), broadens my capabilities and ensures I stay ahead of emerging trends. Remember, every mistake is a step toward mastery—embrace it and improve.
Your Turn to Elevate Your Detailing Game
With these personal insights and carefully curated resources, you’re well on your way to transforming your car care routine into a professional craft. The real secret lies in attention to detail, consistency, and a willingness to learn from every session. Trust your process and stay curious about new products, techniques, and environmental considerations—your vehicle will thank you.
What’s the next step you’re excited to try in your auto detailing journey? Drop your thoughts or questions below—let’s elevate our skills together!
,
About the Author
Timothy Carr
Tactical Vehicle Training, Sales Support, and Parts ...
Timothy Carr is a seasoned professional with a diverse background in tactical vehicle training, parts management, and safety branding. Having managed critical aspects of branding and safety programs for the United States Army in Kuwait, Timothy brings a unique, high-stakes perspective to the world of vehicle maintenance and care. His extensive experience in tactical vehicle operations and sales support provides him with a deep understanding of the technical requirements and high-performance standards necessary for maintaining vehicles in demanding environments. At cardetailingservicesupplies.com, Timothy leverages his expertise in vehicle parts and safety protocols to provide authoritative insights into the best practices for car detailing and supply management. His professional history in designing safety programs and managing complex vehicle logistics ensures that his advice is both practical and grounded in rigorous standards. Timothy is dedicated to translating his high-level technical knowledge into accessible, actionable advice for car enthusiasts and professional detailers alike. He is passionate about helping others achieve excellence in vehicle maintenance and ensuring that every car receives the professional care it deserves to perform at its best.
LinkedIn Profile