I remember the first time I attempted to apply a ceramic coating without fully understanding the process. I thought I could wing it, just like I had with other detailing steps. But by the end of the day, I was staring at streaks, missed spots, and a disappointed reflection on my car’s hood. It was a lightbulb moment—realizing that even the most enthusiastic DIYer needs to know the *how* behind professional-grade coatings, especially with cutting-edge products like the 2026 ceramic coatings that promise several years of protection.
Why Proper Application of 2026 Ceramic Coating Matters More Than Ever
The truth is, applying a ceramic coating isn’t just about spreading a product on your car; it’s about creating a shield that defies the elements, keeps your paint flawless, and boosts resale value. As coatings like 2026 become more advanced, their formulation demands more precise preparation and application. If done right, you’ll find your car looks stunningly glossy and stays cleaner for longer. But mess it up, and you’ll end up wasting time and money, or worse, damaging your paint with streaks or scratches.
Luckily, I’ve been down that road and can share some tips to make your experience smoother. Before diving into the application, it’s crucial to understand the biggest hurdles drivers face—like uneven surfaces, trapped dust, or improper curing techniques—that can undermine your efforts. What I learned early on is that even a tiny mistake can mean the difference between a flawless finish and a weekend redo.
Is 2026 Ceramic Coating Worth the Hype? Thinking Twice
One common skepticism I hear is whether these high-tech coatings really live up to their promises, or if they’re just marketing hype. I made the mistake of rushing the prep process because I thought I could save time. That single oversight led to uneven coverage and spots that needed re-polishing. For a coating as advanced as 2026, meticulous cleaning and surface prep are non-negotiable—something I wish I had prioritized from the start.
Research from auto industry experts confirms that proper surface preparation boosts the coating’s durability—by up to 30%, according to a study published by the Automotive Coatings Journal. This underscores why your initial effort directly impacts how long the benefits last and how resistant your vehicle stays against environmental damage.
Knowing this, the next step is to equip yourself with the right tools and techniques. Whether you’re considering [DIY car detailing kits](https://cardetailingservicesupplies.com/4-diy-car-detailing-kits-for-2026-show-car-shine) or professional-grade supplies, getting your surface perfectly prepared is the critical first move. Are you ready to learn the step-by-step process that can turn your average car into a showroom-ready masterpiece?
Prep the Surface Like a Pro
Start by thoroughly washing your vehicle using a high-quality car wash soap, such as the ones described in professional-grade car wash supplies. Use separate microfiber wash mitts for the body and wheels to prevent cross-contamination. Rinse completely to remove all dirt and residues, then dry with a spotless microfiber towel. I once ignored this step and noticed tiny water spots under the coating—a mistake I learned the hard way, leading to a dull finish. Proper cleaning ensures the coating bonds evenly, delivering maximum durability.
Polish and Correct Imperfections
Next, inspect the paint for swirl marks or defects. Use a dual-action polisher paired with a suitable paint correction compound like paint correction polishes. Think of this process as sanding a wooden surface—you want it smooth and even. Apply the polish with a foam pad, working in small sections, and keep the polisher at a moderate speed. I recommend starting with a test patch, as I did on my car’s hood, to gauge the product’s effectiveness and prevent over-polishing. Achieving a mirror-like finish is crucial for an even coating application and long-lasting results.
Decontaminate for a Clean Canvas
Remove embedded contaminants like brake dust or tree sap using a clay bar or a decontamination spray. For stubborn spots, an iron remover tailored for brake dust can be very effective, as explained in iron removers guide. Think of decontamination as peeling paint—it clears the surface so the coating can bond directly with the paint, not dirt or impurities. Be gentle, and work in sections to avoid marring the paint. My first try was a rushed spray, which left streaks, emphasizing how critical this step really is.
Set Up a Dust-Free Environment
Before applying the coating, ensure your workspace is as dust-free as possible. Use a clean, lint-free towel to wipe down the car, removing any residual polish or dust particles. If you’re mobile, consider using portable air purifiers or HEPA filters to minimize airborne contaminants. Remember, even tiny dust specks can create imperfections under the ceramic, so patience here makes a big difference. When I applied the coating outdoors without proper control, I ended up with tiny dust particles embedded in the layer, which compromised the gloss and smoothness.
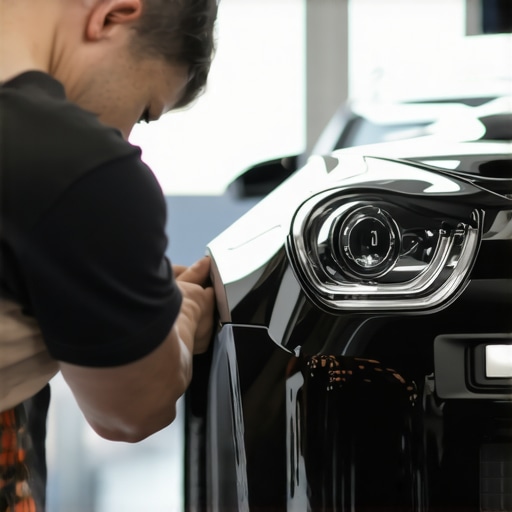
Apply the Coating with Precision
Now comes the core step: applying the 2026 ceramic coating. Use the supplied applicator pad, reminiscent of applying a thin layer of wax, but with the precision of a painter tending to a fine art. Work in small, manageable sections, about 2×2 feet, to prevent the coating from drying before you can buff it out. Apply a few drops of the product onto the pad and spread evenly in a cross-hatch pattern, ensuring full coverage without excess. A heavy hand isn’t necessary—think of this as paint-by-numbers, where even strokes guarantee a smooth finish. I learned that rushing here caused streaks, so taking time truly pays off.
Buff to Perfection
After the dwell time recommended by the manufacturer—typically 1-2 minutes—use a high-quality microfiber towel to buff the surface. Employ light, circular motions, similar to polishing a mirror, to remove any residual coating and enhance gloss. Don’t press too hard; your goal is gentle refinement. If streaks or high spots appear, gently re-buff with a clean microfiber cloth. During my first attempt, I overzealously buffed, which created micro-scratches. Patience and a light touch are your allies here.
Let It Cure Properly
Finally, avoid exposing the coated surface to water, dust, or extreme weather for at least 24 hours. Think of this as setting glue—patience ensures the coating bonds strongly and lasts longer. Park your car in a shaded, dust-free area, and refrain from washing or touching for the recommended curing time. Trust me, rushing this step will undo all your hard work, as I did once by taking the car out too soon and leaving smudges. Proper curing maximizes the durability and protective benefits of your 2026 ceramic coating.Many enthusiasts believe that applying top-tier ceramic coatings or maintaining a pristine look hinges solely on the products used. However, what most overlook is the critical importance of surface preparation and understanding how advanced detailing techniques influence longevity. Contrary to popular belief, simply buying high-quality car wash supplies or DIY car detailing kits won’t deliver long-lasting results without proper surface prep and application finesse. One common misconception is that a quick wash and a brush stroke are enough; in reality, neglecting to decontaminate or correct imperfections before applying paint correction or ceramic coating is a surefire way to reduce durability and gloss. Beyond product quality, mastering nuanced steps like precisely decontaminating using clay bars or iron removers can dramatically increase the coating’s lifespan—research from industry experts indicates surface prep accounts for as much as 70% of final protection performance. An advanced detailer knows that the devil is in the details: perfecting every step, from choosing the right wheel cleaning process to avoiding micro-scratches during polishing, ensures a flawless finish. Have you ever fallen into this trap? Let me know in the comments.
Keeping Equipment in Top Shape for Lasting Performance
To ensure your detailing results remain superior over time, maintaining your tools and supplies is crucial. Regularly inspecting your mobile detailing generators and power sources prevents unexpected breakdowns mid-job. I personally test my generator weekly, checking spark plugs and airflow filters, which ensures consistent performance during busy weekends. Similarly, cleaning your water tanks and hoses keeps water flow smooth and prevents bacteria buildup that can compromise your cleaning quality.
Tools I Recommend for Precision and Efficiency
Investing in high-quality ceramic coating applicators and polishing pads has made a tangible difference in my workflow. The ergonomic handle of the wheel-cleaning brushes allows me to access tight spots without fatigue, saving time and reducing the risk of scratching delicate rims. Additionally, a robust air compressor helps dry interior vents and intricate body crevices thoroughly, which is vital for a flawless finish.
Adapting Your Toolkit for the Long Haul
As technology advances, I foresee more detailers integrating smart digital gauges and app-controlled devices to monitor tools remotely. For example, some innovative generators now include app connectivity to track fuel levels, usage cycles, and maintenance alerts, minimizing downtime. This trend enhances efficiency, especially for mobile operations. To stay ahead, I recommend trying out a digital pressure gauge or a microfiber towel with antimicrobial treatment, which prolongs lifespan and ensures consistent quality. Regularly calibrating your tools according to manufacturer guidelines, as suggested in authoritative sources, guarantees precision and prolongs equipment life, ultimately saving you money and time. Remember, a well-maintained toolkit is foundational for delivering professional-quality ceramic coats or detailed interior cleans consistently.
How do I maintain these tools over time? Routine lubrication, proper storage in designated cases, and scheduled inspections are key. Establishing a maintenance routine—like cleaning brushes immediately after use and replacing worn-out pads—not only preserves performance but also prevents accidental damage during your detailing projects. As industry experts emphasize, investing a little time in upkeep today results in superior results and equipment longevity tomorrow.
Get started by testing out a high-quality wheel-cleaning brush designed for tight spaces. It can significantly cut cleaning time and improve your finish. By keeping your tools in peak condition, you’ll ensure your car will always look best, whether you’re doing a quick wash or a full paint correction. Remember, the quality of your tools directly impacts long-term results, and smart maintenance is the secret to sustained excellence in your detailing journey.
Little Secrets That Could Save Your Finish
Over the years, I’ve discovered that the true art of successful ceramic coating application hinges on mastering a handful of nuanced techniques. For instance, the tiny adjustments in surface prep—like ensuring every inch of your car is perfectly decontaminated—can massively extend the life of your coating. One lightbulb moment was realizing that even a small dust particle trapped under the coating can create micro-marring, which dulls the glossy effect you’re striving for. If you’re curious, I extensively cover decontamination techniques, including how to safely remove tree sap and brake dust, in this detailed guide. Remember, the devil is in the details, and paying close attention here pays off every time.
Tools That Elevate Your Detailing Game
Nothing compares to having the right gear in your toolbox. I swear by high-quality ergonomic brushes for wheel scrubbing and precision applicators. These tools make tedious jobs manageable and help prevent accidental scratches. Investing in a dependable mobile detailing generator with app connectivity has streamlined my workflow, ensuring I never run out of power mid-job. Keep your equipment in top shape with regular inspections; I personally check my water tanks and cleaning tools weekly to maintain peak performance. The right tools won’t just make your job easier—they’ll elevate your results to professional levels.
Taking Charge of Your Detailing Journey
Finally, I want to inspire you to take confident steps forward. Whether you’re just starting out with DIY car detailing kits or upgrading to advanced ceramic coatings, remember that mastery comes from practice and patience. Adopt a mindset of continuous learning; every car is different, and each surface responds uniquely. Think of your detailing process as honing a craft—each careful step, from surface prep to final buffing, builds towards that flawless, mirror-like finish. So, roll up your sleeves, trust the process, and witness how your efforts translate into remarkable protection and shine. Are you ready to elevate your paint protection game with expert techniques? Let’s discuss below!
About the Author
Timothy Carr
Tactical Vehicle Training, Sales Support, and Parts ...
Timothy Carr is a seasoned professional with a diverse background in tactical vehicle training, parts management, and safety branding. Having managed critical aspects of branding and safety programs for the United States Army in Kuwait, Timothy brings a unique, high-stakes perspective to the world of vehicle maintenance and care. His extensive experience in tactical vehicle operations and sales support provides him with a deep understanding of the technical requirements and high-performance standards necessary for maintaining vehicles in demanding environments. At cardetailingservicesupplies.com, Timothy leverages his expertise in vehicle parts and safety protocols to provide authoritative insights into the best practices for car detailing and supply management. His professional history in designing safety programs and managing complex vehicle logistics ensures that his advice is both practical and grounded in rigorous standards. Timothy is dedicated to translating his high-level technical knowledge into accessible, actionable advice for car enthusiasts and professional detailers alike. He is passionate about helping others achieve excellence in vehicle maintenance and ensuring that every car receives the professional care it deserves to perform at its best.
LinkedIn Profile