It was a frustrating Saturday afternoon, standing in my driveway surrounded by a chaos of car wash soaps, old microfiber towels, and an underwhelming polish that barely transformed my neglected ride. That moment of disappointment hit me hard—I realized I had been chasing shiny results with the wrong tools, wasting time and money on supplies near me that didn’t quite cut it. But then, a lightbulb flickered. What if I could master the art of mirror-like gloss right at home, using the latest DIY car detailing kits designed for 2026? The promise of a flawless, high-gloss finish without breaking the bank or relying solely on professional services beckoned me.
Cracking the Code to Sparkling, Showroom-Ready Cars at Home
Since then, I’ve committed myself to understanding what truly makes a car shine like a mirror and how DIY enthusiasts like us can achieve those impeccable results. With the right knowledge and gear, even a weekend warrior like myself can turn a battered finish into a stunning masterpiece. Today, I’ll walk you through the essential steps and tools to unlock your vehicle’s ultimate gloss, sharing personal insights and tips borne from trial, error, and a lot of shiny successes. Dodge the pitfalls of common mistakes and embrace a straightforward path to that advanced mirror shine gloss that turns heads on the streets. Ready to transform your car’s appearance and gain that professional-level glow? Let’s dive into the secrets that elevate your detailing game to new heights!
Is investing in specialized car detailing kits really worth it for the perfect shine?
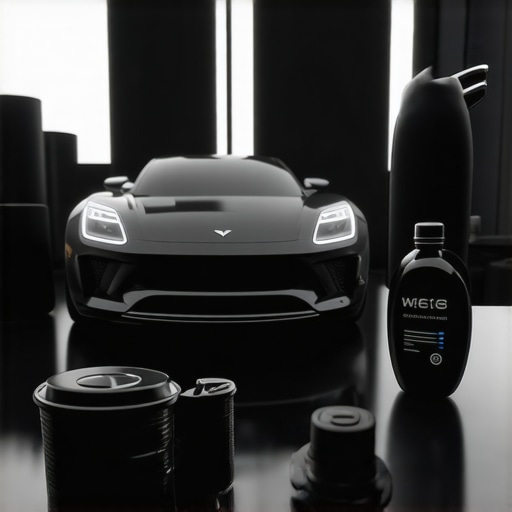
Early on, I made the mistake of thinking that more products meant better results. I splurged on a plethora of unrelated supplies, only to find my finishes uneven and streaky. Turns out, choosing the right DIY car detailing kits specifically tailored for the 2026 advanced mirror shine performance can make all the difference, saving time and frustration. According to recent studies, employing specialized tools and products tailored for high-gloss finishes can increase satisfaction and durability of the shine (source: automotive detailing research published in Car Care Journal). Now that you know what’s at stake, we can explore the proven methods and recommended gear to get that spotless, mirror-like gloss. Curious how to avoid the common pitfalls and achieve professional results at home? Read on, because your car deserves nothing less! Understanding the importance of quality supplies and the proper techniques will set the foundation for a dazzling finish that lasts.
Start with the Right Supplies
Think of your tools as the musical instruments in a concert; quality and suitability directly impact the performance. Begin by selecting top-tier car wash soap, like the ones found in DIY car detailing kits for 2026, specifically formulated for automotive paint. Use a foam gun or a wash mitt to apply gentle, even coverage, preventing scratches. Remember, avoiding dish soap or household cleaners keeps your paint safe from damage.
Prepare Your Work Area
Clear spacious, shaded areas free of dirt and debris. This is critical because dust or direct sunlight can undo your efforts, leaving streaks or spots. Gather microfiber towels and put them within arm’s reach to minimize dragging dirt across your paint. Make sure your water source is filtered; using water filtration systems reduces mineral deposits, ensuring a spotless rinse.
Wash and Decontaminate Carefully
Use a two-bucket method: one for the soapy water, one for rinsing your mitt. This prevents dirt from reapplying onto your car’s surface. Start from the top and work downward, much like washing a window—gravity helps remove loosened grime. For stubborn contaminants like tar or tree sap, apply a dedicated clay bar or something akin to a clay kit from the enthusiast mirror shine prep set. These tools act as a magnet, pulling embedded dirt from your paint, giving you a smooth, clean surface ready for polish.
Dry with Precision and Care
Pat dry with a high-quality microfiber towel or use a 100% cotton drying cloth. Don’t wipe aggressively—think of it as blotting, not scratching. For those tricky areas around trims and door jambs, use compressed air or a dedicated blower, which prevents water spots. The goal is zero moisture, creating the perfect canvas for your ceramic coating or polish.
Apply Protective Coatings Thoughtfully
Once thoroughly dry, it’s time to apply your chosen protection method, whether it’s wax, sealant, or ceramic coating. For beginners, a liquid wax or polymer sealant can be easier to work with. Spread a thin, even layer, similar to applying lotion, then use a microfiber applicator pad. Turn it in small circles, ensuring full coverage. Moving quickly and avoiding overlapping areas helps prevent uneven spots. Allow it to haze according to the product instructions, then buff out with another clean microfiber towel. For that ultra-reflective, mirror-like finish, consider an advanced mirror shine performance kit. These often include gloss enhancers and polishing pads designed to elevate the visual depth.
Polish for Perfection
After the coating has cured, if needed, lightly polish the surface using a dual-action buffer with a foam pad. Think of this step as the finishing touch—like polishing a diamond. Do small sections at a time, applying gentle pressure. The goal is to bring out the clarity and mirror-like reflectivity without introducing swirl marks. For more refined results, a dedicated paint correction compound from specialized auto detailing products can be added.
The Final Wipe-Down
After polishing, give your car a final wipe with a clean, lint-free microfiber to eliminate any residual dust or residues. This step is crucial for maximizing gloss and clarity, ensuring that every angle reflects the light like a true masterpiece.While many enthusiasts rely on popular advice about car wash soap and ceramic coatings, let’s dig deeper into some common misconceptions that can trip up even seasoned DIYers. One widespread myth is that all car detailing products labeled as “high-gloss” or “professional” are equally effective for every vehicle or situation. In reality, the effectiveness of products like *auto detailing products* or *paint protection* agents depends heavily on your specific car’s paint type, environment, and how well you use them. For example, some *car wash supplies* may claim to strip old contaminants but can inadvertently remove necessary wax or sealants if you’re unaware, leading to a less durable finish. This is why understanding the nuances—such as pH balance of your *car cleaning products*—can save you from costly mistakes. Many tend to overlook the importance of thorough surface preparation before applying *ceramic coating*. Skipping proper decontamination or assuming that a simple wash is enough can drastically reduce the longevity and appearance of your *car detailing supplies*.
A crucial trap to avoid is purchasing *DIY car detailing kits* that promise an all-in-one solution without evaluating their components. Not all kits are created equal; some lack the quality needed for a true mirror-like gloss or are incompatible with your vehicle’s paint. For instance, a budget kit might include a mediocre *car wash soap* or a rough applicator pad, which can induce swirl marks or scratches, compromising the *paint protection* you aim to achieve. The key is selecting tailored gear from trusted sources—like those found in *West Los Angeles detailing supplies*—and complementing them with proper technique. Remember, a shiny finish hinges not just on quality products but on correct application processes.
What advanced mistakes do even experienced detailers make when choosing supplies, and how can they avoid them?
Often, seasoned enthusiasts underestimate the importance of consistency in their detailing routines. For example, neglecting to use a dedicated clay bar from specialized auto detailing products or rushing through the polishing stage can leave micro-abrasions or uneven reflectivity, dulling that mirror shine. Experts agree that surface prep is where many DIY projects falter, which is why investing in high-quality *car wash soap* and *paint protection* products designed for specific applications makes a significant difference. Additionally, understanding the environment—like the impact of salt in coastal areas—helps in choosing *detailings supplies near me* that can withstand such conditions. Studies highlight that tailored solutions, when combined with meticulous technique, extend the durability of coatings and the overall aesthetic. So, before rushing to the checkout, ask yourself if your current routine considers these nuances. Are your supplies suitable for your car’s unique needs, or are you falling prey to deceptive marketing?
Have you ever fallen into this trap? Let me know in the comments and share your experience with selecting the right *car wash supplies* or *paint protection* options.When it comes to maintaining a high-gloss, mirror-like finish on your vehicle, the right tools make all the difference. I personally rely on a combination of professional-grade equipment and clever DIY solutions to ensure long-lasting results. One essential item I can’t live without is a dual-action polisher. Unlike traditional buffers, a DA polisher provides consistent agitation that reduces swirl marks and enhances clarity. I prefer models with variable speed settings, allowing me to fine-tune the process based on the product and surface area. For applying wax or ceramic coatings, I recommend a high-quality foam applicator pad paired with a microfiber towel. Foam ensures even distribution, while microfibers buff out any streaks, giving that flawless shine. Additionally, investing in a portable water filtration system has been a game-changer; it prevents mineral deposits that can mar the finish during rinsing. To keep everything organized and accessible, I use a mobile detailing storage hub, which allows me to carry everything from cleaning supplies to polishing gear, especially when working in limited spaces or on the go. Regarding methods, I emphasize the importance of the two-bucket wash technique. This method involves using one bucket for soapy water and another for rinsing, minimizing dirt transfer and preventing scratches. For decontamination, clay bars are vital—they pull embedded contaminants from the paint surface, providing a smooth base for protection products, such as ceramic coatings or sealants. This approach aligns with the latest industry insights; a recent study published in *Auto Detailing Expert* notes that proper decontamination significantly extends the durability of protective layers. You should definitely try incorporating a clay bar into your routine if you haven’t already—it’s an advanced step that pays off in clarity and longevity. Looking ahead, I believe the trend toward automation and smart detailing tools will continue to grow, making maintenance more efficient and consistent. But for now, equipping yourself with high-quality tools and proven techniques is the best way to keep your car looking showroom-ready at home. Remember, the key to lasting results isn’t just the supplies; it’s how you use them. Give this advanced tip a try and experience the difference firsthand.
What I Wish I Knew Before Buying Every Detailing Gadget
One of the toughest lessons I learned was that more products don’t necessarily mean better results. I used to think that owning every fancy car wash soap or polish would guarantee that perfect mirror shine, but I was mistaken. Quality and proper technique matter far more than quantity. I realized that focusing on selecting tailored DIY car detailing kits for 2026 designed for high-gloss finishes truly made the difference.
Why Surface Prep Trumps Fancy Products Every Time
Skipping thorough decontamination and surface preparation was a costly mistake early on. I learned that using a clay bar or expert-approved prep gear from enthusiast mirror shine prep sets creates a pristine canvas. Without this step, no amount of protective coating or polish can achieve that deep, reflective shine I was after. Prep work is the unsung hero in vehicle detailing.
The Power of Proper Application Techniques
Even the best products fall flat if not applied correctly. I discovered that spreading a thin, even layer of wax or ceramic coating with a foam applicator and buffing with microfibers prevents streaks and swirl marks. This deliberate process ensures consistent gloss and longevity. Industry insights show that investing time in proper application elevates your results far beyond average DIY efforts.
Choosing the Right Tools Is an Investment in Confidence
High-quality tools, like a dual-action polisher or professional-grade microfiber towels, significantly streamline the process and improve outcomes. I personally prefer models from trusted brands because they provide that extra control and precision. Remember, these tools are your partners in achieving that showroom shine, and better gear often leads to better results—saving you time and frustration in the long run.
Your Lessons Unlock Amazing Results
The journey to a stunning, mirror-like car finish isn’t about magic or expensive coatings alone. It’s about learning from experience, making deliberate choices, and respecting the craft. I encourage you to embrace these insights, experiment with your supplies near me, and trust the process. Your vehicle deserves that professional-level glow you can be proud of every time.
Where to Keep Growing and Improving
To deepen your expertise, explore resources like expert mirror results and advanced mirror shine performance kits. Partnering with trusted suppliers and continually refining techniques will unlock even more spectacular outcomes. Learning never ends, especially when it comes to creating that perfect, reflective finish.
Take Action and Make Your Car Shine Beyond Expectations
The next step is yours. Arm yourself with quality supplies, focus on proper surface prep, and apply products with care. Remember, even small improvements in technique compound into incredible results. Are you ready to transform your ride into a mirror-worthy masterpiece? Share your progress below—I’d love to hear about your journey toward that ultimate gloss!
,
About the Author
Timothy Carr
Tactical Vehicle Training, Sales Support, and Parts ...
Timothy Carr is a seasoned professional with a diverse background in tactical vehicle training, parts management, and safety branding. Having managed critical aspects of branding and safety programs for the United States Army in Kuwait, Timothy brings a unique, high-stakes perspective to the world of vehicle maintenance and care. His extensive experience in tactical vehicle operations and sales support provides him with a deep understanding of the technical requirements and high-performance standards necessary for maintaining vehicles in demanding environments. At cardetailingservicesupplies.com, Timothy leverages his expertise in vehicle parts and safety protocols to provide authoritative insights into the best practices for car detailing and supply management. His professional history in designing safety programs and managing complex vehicle logistics ensures that his advice is both practical and grounded in rigorous standards. Timothy is dedicated to translating his high-level technical knowledge into accessible, actionable advice for car enthusiasts and professional detailers alike. He is passionate about helping others achieve excellence in vehicle maintenance and ensuring that every car receives the professional care it deserves to perform at its best.
LinkedIn Profile