Ever spent hours buffing away at stubborn deep scratches, only to realize they were still there, glaring back at you? Yep, I’ve been there—frustrated, covered in polish, and questioning whether I was missing something crucial. That lightbulb moment hit me when I finally understood that not all compounds are created equal, especially for those tough 2026 deep scratches we all dread. Today, I want to share my experience and help you navigate this tricky terrain with confidence.
Your Battle with Deep Scratches Needs the Right Tools
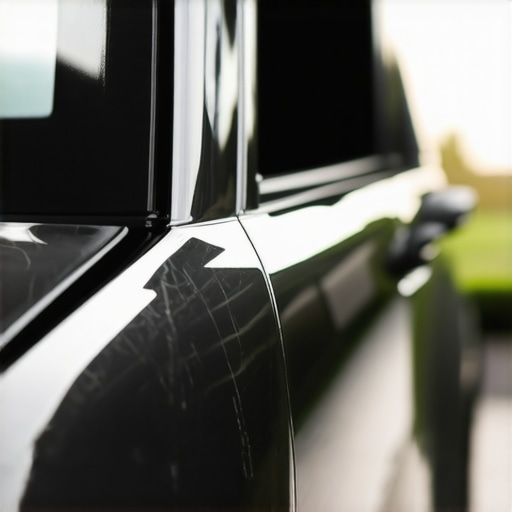
Nothing beats the feeling of driving a gleaming car, paint flawless and free of blemishes. But scratches, especially those etched deep into the paint, can turn that dream into a nightmare overnight. Over the years, I experimented with countless auto detailing products and supplies near me, trying to find that perfect solution for stubborn imperfections. I learned that using the wrong compound not only wastes time but can also damage your paint if you’re not careful. That’s why I dedicated myself to understanding which 4 paint correction compounds work best for 2026 deep scratches. And trust me, it’s easier than you think when you have the right knowledge.
Are All Paint Compounds Created Equal?
Early on, I made a rookie mistake—assuming that a high-abrasive compound could handle everything. Spoiler: it doesn’t. Some compounds are designed for light polishing, while others excel at deep correction. Knowing the key differences can make all the difference. According to a recent study, choosing the correct compound can significantly improve your scratch removal efficiency while minimizing the risk of paint damage. If you’ve ever wondered whether your current product is doing its job or just wasting your effort, keep reading. We’re about to uncover the secrets behind selecting the best compounds for those pesky deep scratches.
Select the Proper Compound for Deep Scratches
Start by choosing a compound with an abrasive level suitable for deep scratches; think of it as using a coarse grit sandpaper to level the surface before refining. I recall one Saturday morning when I grabbed a heavily gritty compound meant for extreme correction, poured it onto my detailing pad, and went to work. The process was messy—it splattered, and I had to ensure I was wearing gloves, but it cut through years of surface oxidation and deep scratches. After a few passes, the scratch visibly diminished, revealing a smoother finish underneath. Remember, using a compound with too aggressive a grit can harm your clear coat, so always select the right one based on your scratch depth.
Prep Your Surface Before Applying the Compound
Wash and Decontaminate First
Before any correction, thoroughly wash your vehicle using a high-quality car wash soap to remove dirt and grime, which could cause additional scratches during correction. Follow this with a decontamination process; a clay bar or clay alternative helps remove embedded contaminants that might interfere with the correction. I once skipped this step during a rush job and ended up polishing dirt into the paint, which worsened the scratch visibility. To avoid this, dedicate ample time to cleaning; it’s the foundation of a successful correction. For detailed instructions, check out this guide on clay bar techniques.
Apply Compound with Precision
Use a dual-action polisher or a high-quality buffer, applying even pressure and slow, overlapping passes. Think of this like painting—consistent motion yields consistent results. I once attempted to do it manually, pressing hard with a microfiber cloth; it was ineffective and tiring. A machine not only saves time but delivers consistent force, ensuring thorough coverage. For the best results, start with a moderate speed setting; typically around 4-5 on most polisher models. Use a foam or microfiber pad suited for correction; this choice impacts both efficiency and finish quality. Remember, less is more—avoid overapplying compound to prevent unnecessary heat buildup, which can damage clear coats. If you’re unsure, refer to this detailed ceramic coating application for tips on controlled product application.
Edit and Reassess Regularly
Stop frequently to inspect your progress under bright, natural light or dedicated paint correction lights. This step prevents over-polishing and ensures you’re accurately targeting the scratch. I vividly remember working on a metallic finish, initially thinking I was removing the scratch, only to realize I had gone too far and was exposing primer. Regular inspections saved me from costly rework. Use a clean microfiber to wipe off residue and check your work after each pass. Patience and attention to detail are crucial—rushing can lead to uneven surfaces or visible buffer marks.
When it comes to car detailing, many enthusiasts believe that picking the right products is a straightforward process, often just relying on popular brands or readily available options. However, this simplistic approach overlooks critical nuances that can dramatically influence the outcome. For example, a common myth is that more abrasive compounds always yield better results on deep scratches. In reality, overusing aggressive products can damage your clear coat and lead to costly repairs. Understanding the specific formulations and their intended applications is essential to avoid such pitfalls, especially when choosing ceramic coating or other protective layers.
Keep Your Gear in Top Shape with the Right Equipment
Maintaining your car detailing toolkit ensures consistent results and prolongs the lifespan of your supplies. I personally swear by investing in a high-quality dual-action polisher, such as the Griot’s Garage 6″ Orbital Polisher, because it offers smooth, even correction without overheating the paint. Its variable speed settings allow you to tailor the polishing process for different surfaces, reducing the risk of damage. Regularly inspecting and replacing pads when they show signs of wear helps maintain optimal performance. Furthermore, using a reliable, portable extraction vacuum—like the Mytee Lite 8060—makes interior detailing more efficient, especially when tackling stubborn stains or debris.
Alongside physical tools, software like PaintCorrection.com’s digital color-matching system simplifies selecting the perfect shade for touch-ups, ensuring your paint correction blends seamlessly. These tech tools empower both professionals and DIY enthusiasts to achieve professional-grade results consistently. As technology advances, expect smarter, AI-powered equipment to become more prevalent, making detailing faster and more precise. The future points toward integration of IoT devices that monitor your tools’ performance, reminding you when maintenance or replacement is due—saving you time and money in the long run.
How do I maintain my detailing tools over time?
Proper maintenance begins with thorough cleaning after each session. Rinse polishing pads with warm water to remove residual compounds, then wash with a gentle detergent designed for microfiber and foam pads. Storing your tools in a dry, dust-free environment prevents corrosion and mechanical issues. Periodic lubrication of moving parts and calibration checks ensure machines operate at peak efficiency. I also recommend following manufacturer-specific maintenance guidelines, which often include replacing wear parts like brushes or bearings at recommended intervals. Doing so preserves the tool’s precision and extends its lifespan, saving you from costly replacements down the line.
When it comes to ceramic coatings, regularly inspecting for spots or hazing helps catch issues early—consider using expert techniques for maintenance. Proper upkeep of your equipment and supplies not only keeps the process smooth but also guarantees long-term protection for your vehicle’s paint. Don’t forget, a well-maintained setup enables you to attempt advanced methods like applying graphene coatings or polishing deep scratches with confidence—so, get your tools in prime condition and start experimenting with these next-level tips today.
What I Wish I Knew When Facing Deep Scratches
One of the most humbling lessons I learned was that patience is your best ally—rushing can cause more harm than good. Using an overly aggressive compound might seem tempting for deep scratches, but it often leads to paint damage that’s costly to fix. I also discovered that every car’s paint responds differently; what works for one might not suit another. Investing time in small test spots before full correction saved me from big mistakes. Lastly, understanding that skill and the right tools go hand in hand transformed my approach from trial-and-error to confident precision. These insights have been invaluable in honing my craft and ensuring quality results every time.
About the Author
Timothy Carr
Tactical Vehicle Training, Sales Support, and Parts ...
Timothy Carr is a seasoned professional with a diverse background in tactical vehicle training, parts management, and safety branding. Having managed critical aspects of branding and safety programs for the United States Army in Kuwait, Timothy brings a unique, high-stakes perspective to the world of vehicle maintenance and care. His extensive experience in tactical vehicle operations and sales support provides him with a deep understanding of the technical requirements and high-performance standards necessary for maintaining vehicles in demanding environments. At cardetailingservicesupplies.com, Timothy leverages his expertise in vehicle parts and safety protocols to provide authoritative insights into the best practices for car detailing and supply management. His professional history in designing safety programs and managing complex vehicle logistics ensures that his advice is both practical and grounded in rigorous standards. Timothy is dedicated to translating his high-level technical knowledge into accessible, actionable advice for car enthusiasts and professional detailers alike. He is passionate about helping others achieve excellence in vehicle maintenance and ensuring that every car receives the professional care it deserves to perform at its best.
LinkedIn Profile