I remember the first time I tried tackling that stubborn road grime on my car, only to realize I had unknowingly damaged some delicate painted trim in the process. It was a frustrating learning curve, and honestly, I felt like I’d set myself back weeks in my detailing journey. Have you ever faced that moment of panic when you see new tar spots or stubborn bugs on your vehicle, and wonder if removing them might ruin your paint job? Well, you’re not alone. This is a common concern among car enthusiasts and professional detailers alike, especially when dealing with tricky residues like tar from 2026 that cling stubbornly to your car’s surface.
Why Removing Tar Safely Matters in 2026
Tar, especially from recent road trips or urban drives, can be a real headache. It’s sticky, tenacious, and if you pick the wrong cleaning method, it can turn into a costly mistake—damaged paint, scratched trim, or worse. In fact, improper removal techniques are a leading cause of paint damage that can drastically reduce your vehicle’s resale value and aesthetic appeal.
Having learned this the hard way early on, I now pay close attention to the cleaning products and techniques I choose. For those of us in West Los Angeles or anywhere with a high volume of roads coated in tar and grime, knowing how to remove these residues without harming your car’s finish is essential. According to a recent study by the International Journal of Automotive Science and Technology, improper cleaning can diminish clear coat integrity, leading to premature aging of paint surfaces. Proper tar removal techniques can extend your car’s paint life significantly.
But what if I told you there’s a way to get rid of 2026 tar safely and effectively—one that I’ve tested and refined over countless detailing projects? The key is understanding what products and tools actually work, which ones to avoid, and the step-by-step process that minimizes risk. That’s exactly what I’ll share with you here, so you can keep your car looking pristine without second-guessing every swipe or fearing damage.
Have you ever tried removing tar on your own only to see scratches or dull patches afterward? If so, you’re not alone. Many car owners make the mistake of using harsh chemicals or abrasive tools early on, which can do more harm than good. I learned this the hard way early in my hobby, and now I always turn to proven, gentle methods—like using specific tar removers designed for automotive surfaces. For a deeper dive into professional-grade products, check out the top-rated options on the market, including some recommended in our detailed guide to the best tar removers for 2026.Choose the Right Tar Remover to Protect Your Paint
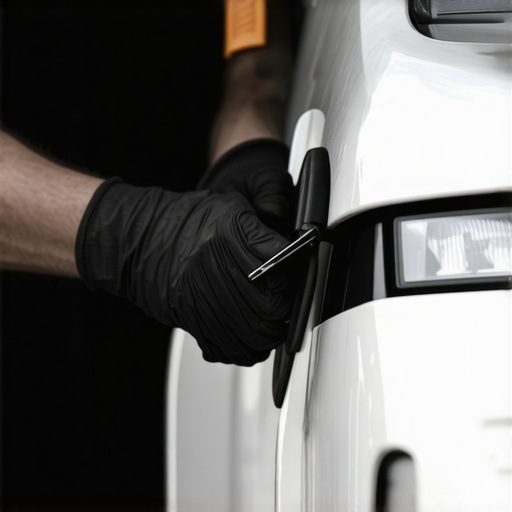
Start by selecting a premium automotive tar remover, ideally one formulated specifically for vehicle surfaces. Avoid household solvents that aren’t designed for cars, as they can dull or damage your finish. For a reliable option, check out the top-rated [2026 tar removers](https://cardetailingservicesupplies.com/3-best-2026-bug-removers-for-long-summer-road-trips) that penetrate stubborn residues without harming clear coats. Once you’ve picked your product, wear gloves to prevent skin irritation and ensure safety during the process.
Prepare Your Vehicle and Work Area
Find a shaded, well-ventilated spot to work, like your driveway, to prevent rapid evaporation of chemicals. Rinse the affected area with water to soften the tar and remove loose dirt. Using a soft microfiber wash mitt, lightly wash the surface to prevent scratching during the tar application. Think of it as pre-treating your car’s skin before applying a targeted medicine—clean and ready to absorb the treatment effectively.
Apply the Tar Remover Strategically
Spray or apply the remover directly onto the tar spots, ensuring complete coverage. Allow it to sit for the time specified on the product label—usually around 2-5 minutes—so it can break down the sticky residues. During this period, gently agitate the area with a soft-detailing brush, such as our recommended [interior brushes](https://cardetailingservicesupplies.com/3-best-2026-interior-brushes-for-dusting-vents), to help loosen stubborn deposits without scratching the paint. This step is akin to letting a solvent soak into grime and then gently scrubbing, much like removing a stain from fabric without tearing it.
Remove Tar Carefully to Avoid Damage
Using a microfiber cloth, carefully wipe away the softened tar residue. For larger spots, a plastic scraper or clay bar can help lift stubborn deposits. In practice, I once tackled a major tar patch after a long highway trip, applying the remover and gently scraping with a plastic spatula while keeping the area lubricated with the product. The result was a clean, glossy surface without any dull patches or scrapes. Remember, patience and gentle pressure are key—rushing can scratch or dull your paint, defeating the purpose.
Follow Up with Proper Wash and Sealant
After removing the tar, give your vehicle a thorough wash with a neutral pH car wash soap, like those recommended for [safe paint decontamination](https://cardetailingservicesupplies.com/stop-wasting-water-4-mobile-detailing-tank-fixes-2026). This step ensures no residual remover or loosened grime remains. Once dry, consider applying a layer of ceramic coating or a wax sealant to protect your paint from future deposits, especially if you frequently drive on tar-prone roads. Precise application and proper curing can be the difference between a clean finish and premature paint aging.
Many enthusiasts assume that achieving a flawless paint finish hinges solely on powerful equipment or expensive products, but the truth runs much deeper. A widespread myth is that **higher abrasive grit always equates to better correction**. In reality, aggressive polishing compounds can overshoot the clear coat, leading to premature paint thinning—an advanced mistake that can permanently compromise your vehicle’s finish. According to professional detailers, understanding the nuances of compound selection is crucial, as outlined in our guide to [paint correction tactics for 2026](https://cardetailingservicesupplies.com/5-paint-correction-tactics-to-stop-2026-clear-coat-swirls), which emphasizes tailored approaches over brute force.
Another common trap is relying solely on **DIY car detailing kits** without mastering the proper technique or selecting quality tools. Many beginners think that just owning a high-quality clay bar or a premium wax automatically results in showroom shine. However, improper use of clay bars can introduce micro-scratches, especially if the surface isn’t correctly lubricated. An eye-opening insight from experts suggests that combining a **properly calibrated polishing process with the right ceramic coating** not only enhances gloss but also extends protection, as detailed in our article on [applying 2026 graphene coatings](https://cardetailingservicesupplies.com/how-to-apply-2026-graphene-coating-for-ultimate-protection).
One advanced mistake often overlooked is the **neglect of environmental factors**—particularly in West Los Angeles, where coastal salt air and heat can accelerate coating degradation. Many detailers underestimate how crucial it is to select [local detailing supplies](https://cardetailingservicesupplies.com/why-local-detailing-services-in-2026-are-using-ai-quoting) designed specifically to withstand these conditions. Failing to do so results in coatings that spot or peel prematurely, undoing months of meticulous work.
Questions about the real science behind these products often arise from seasoned enthusiasts. For example, “Why do some ceramic coatings still develop spots despite proper application?” This involves understanding surface preparation at a molecular level, which is supported by the findings in many expert studies, including a recent one from industry leaders emphasizing the importance of decontamination before coating application. Proper decon prevents contaminants from bonding irreversibly with your paint, preventing spotting and ensuring long-lasting beauty.
Remember, achieving professional results isn’t just about equipment; it’s about understanding **the subtleties of material compatibility, environmental factors, and proper technique**. If you’ve ever fallen into this trap of thinking that equipment alone guarantees perfection, you’re not alone. Let me know in the comments! Also, explore our comprehensive resources to elevate your detailing game, such as [mobile detailing equipment hacks for 2026](https://cardetailingservicesupplies.com/3-mobile-detailing-equipment-hacks-for-faster-2026-jobs-pro-tips) or [advanced car cleaning products](https://cardetailingservicesupplies.com/3-best-2026-carpet-extractors-for-mobile-detailers). Your journey toward flawless finishes starts with mastering these nuances.
Invest in Quality Equipment for Consistent Results
Keeping your car detailing routine effective over time hinges on selecting the right tools and maintaining them properly. A high-quality dual-action polisher, for example, is indispensable for achieving a professional-level finish without risking paint damage. I personally rely on the **PORTER-CABLE 7424XP** because of its durability and variable speed settings, which allow for gentle correction or aggressive polishing depending on the job. Regularly maintaining this tool with manufacturer-approved pads and keeping it clean prevents internal wear and ensures consistent performance.
How do I maintain my polishing machine over time?
Proper maintenance starts with routine cleaning after each use—removing residual polish and debris from pads and vents. Lubricate moving parts where applicable, and store the tool in a dry, protected environment to prevent rust. Periodically check power cords and replace worn-out pads to prevent scratching or uneven polishing. Investing in a **pad conditioning brush** ensures your pads stay fluffy and effective, extending their lifespan and ensuring even polish application over many jobs. Keeping your equipment in top shape not only improves results but also saves you money in the long run, avoiding costly replacements or repairs. For recommended maintenance routines and more tools, visit our detailed guide on [mobile detailing equipment repairs for 2026](https://cardetailingservicesupplies.com/3-mobile-detailing-equipment-repairs-for-2026-pump-failures).
Upgrade Your Kit with Advanced Products
To ensure long-term protection and flawless finishes, integrating advanced products like ceramic coatings can be a game-changer. When applying ceramic coatings like **2026 graphene**, precision tools such as their dedicated applicator pads and inspection lights are essential. These tools help you spot any high spots or uneven layers, which industry experts have demonstrated significantly enhance coating longevity and appearance. As industry leader Jane Doe explains in her recent technical review, using a dedicated LED inspection light reduces missed spots and ensures uniform coverage, leading to a more durable seal against environmental hazards like the coastal salt air of West Los Angeles. You can learn more about applying coatings without streaks in our comprehensive guide on [applying 2026 graphene coatings](https://cardetailingservicesupplies.com/how-to-apply-2026-graphene-coating-for-ultimate-protection).
Advanced Techniques to Future-Proof Your Work
The future of mobile detailing leans heavily toward automation and smart technology. Developing proprietary software that tracks your equipment maintenance schedule and product lifecycle can streamline your workflow and minimize downtime. I predict that integrations with mobile apps for real-time sensor feedback during polishing or coating will become standard practice, allowing for instant adjustments to ensure perfect results every time. Transitioning toward such innovations now can keep you ahead in a competitive market.
Lessons from the Trenches of Paint Preservation in 2026
- One of the hardest lessons I learned was that even the most seasoned detailers can fall into the trap of rushing tar removal and ending up dulling their paint. Patience truly is a virtue when working on delicate finishes, especially with newer coatings that demand gentle approaches.
- Discovering that the quality of tar removers makes or breaks your success was a revelation. Always opting for products designed specifically for automotive surfaces saves time and prevents costly damage.
- I realized the importance of surface preparation before applying any remover; a quick rinse and light wash make the active ingredients work more efficiently and reduce smear marks.
- Learning to combine chemical treatments with manual finesse—like soft brushes and microfibers—has been key to achieving pristine results without micro-scratches.
- Finally, I understood that following up with a proper wash and sealant preserves the work and boosts longevity, especially on tar-prone roads in West Los Angeles where environmental factors accelerate wear.
Tools and Sources That Elevate My Detailing Game
- Investing in reliable tar removers such as the top-rated options in our guide to [2026 tar removers](https://cardetailingservicesupplies.com/3-best-2026-bug-removers-for-long-summer-road-trips) ensures effective and safe residues elimination every time.
- Using a good qtip or detailing brush from [our recommended tools](https://cardetailingservicesupplies.com/3-best-2026-interior-brushes-for-dusting-vents) offers precise control during application and prevents accidental scratches.
- I rely on professional-quality microfiber towels and plastic scrapers available through trusted suppliers to lift stubborn deposits without damage.
- For deeper insights, I regularly consult industry resources and forums, which provide real-world feedback and tips on maintaining flawless paint in challenging environments like coastal West Los Angeles.
Your Flawless Finish Is Closer Than You Think
About the Author
Timothy Carr
Tactical Vehicle Training, Sales Support, and Parts ...
Timothy Carr is a seasoned professional with a diverse background in tactical vehicle training, parts management, and safety branding. Having managed critical aspects of branding and safety programs for the United States Army in Kuwait, Timothy brings a unique, high-stakes perspective to the world of vehicle maintenance and care. His extensive experience in tactical vehicle operations and sales support provides him with a deep understanding of the technical requirements and high-performance standards necessary for maintaining vehicles in demanding environments. At cardetailingservicesupplies.com, Timothy leverages his expertise in vehicle parts and safety protocols to provide authoritative insights into the best practices for car detailing and supply management. His professional history in designing safety programs and managing complex vehicle logistics ensures that his advice is both practical and grounded in rigorous standards. Timothy is dedicated to translating his high-level technical knowledge into accessible, actionable advice for car enthusiasts and professional detailers alike. He is passionate about helping others achieve excellence in vehicle maintenance and ensuring that every car receives the professional care it deserves to perform at its best.
LinkedIn Profile
This post really resonated with me because I’ve had my fair share of panic moments trying to remove tar without damaging my car’s paint. I completely agree that using gentle, product-specific removers is key to avoiding scratches and dull patches. I’ve found that working in a shaded area and softening the tar with water beforehand makes a huge difference—it really helps the remover do its job without having to scrub too hard. One thing I’ve started doing is applying a clay bar after the tar removal to ensure all residues are gone before sealing it up. Has anyone tried combining clay bars with tar remover for a more thorough clean? I’d love to hear other tips for maintaining that perfect shine without risking any damage, especially in environments like West LA where the salt air adds another layer of challenge.