I vividly remember my first attempt at polishing my car’s paint, only to end up with swirls and micro-marring that took hours to fix. That frustrating experience was a real eye-opener—it made me realize how crucial the right equipment is, especially when aiming for that perfect finish without spending a fortune or wasting precious time. Have you ever started a polishing job only to be disappointed by dull results or accidental damage? If so, you’re not alone, and trust me, I’ve been there too.
Why Choosing the Right Paint Correction Pads Matters Now More Than Ever
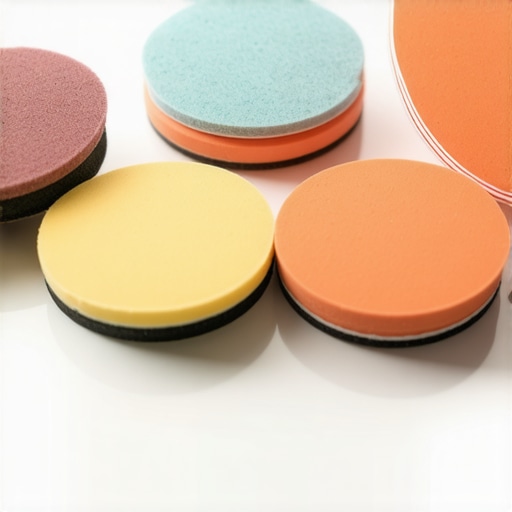
In 2026, the market for paint correction pads has exploded, with countless options promising instant perfection. But here’s the truth—selecting the correct pad can make or break your detailing project. The right pad ensures you remove imperfections efficiently while preserving your car’s delicate clear coat. It’s no secret that modern cars, especially electric vehicles and luxury models, feature softer, more sensitive finishes. Using an improper pad can cause irreversible damage or leave uneven patches. Recent studies reveal that improper polishing techniques can reduce your car’s resale value by up to 20%. That’s a significant hit—and why I now prioritize quality tools over gimmicks.
Is All the Hype Around 2026 Paint Correction Pads Just Buzz?
Early in my journey, I made a costly mistake—trying to save a few bucks by using a generic, cheap pad. The result? Micro-marring, which took me three times longer to correct later on. Learning from that, I now focus on premium options specifically designed for one-step polishing, especially as we step into 2026 trends. If you’re tired of wasting time and risking your paint, this guide will walk you through the best pads on the market today. Curious about how to maintain your investment? Check out [7 Car Wash Supplies for 2026 Ultimate Paint Care](https://cardetailingservicesupplies.com/7-car-wash-supplies-for-2026-ultimate-paint-care) for tips on protecting your finish after correction.
Prepare Your Workspace Like a Pro
Start by ensuring your work area is clean, well-lit, and free from dust. Lay down protective coverings to prevent contaminants from settling on your vehicle. Gather all necessary supplies, including the correct paint correction pad, the appropriate compound, microfiber towels, and a dual-action polisher.
Select the Right Buffer Speed and Technique
Set your dual-action polisher to a moderate speed—around 4,000 OPM—as a starting point. Think of it like tuning a guitar; too high, and you risk burning the paint; too low, and you won’t remove imperfections effectively. During my first try, I used a high speed without proper technique, which caused swirl marks. Now, I maintain a steady, overlapping pattern, applying light pressure, much like sanding wood evenly for a smooth finish.
Use Correct Pad Stopping Points
Instead of pressing down hard and staying in one spot, keep the pad moving at all times. Make multiple passes over the same area—first vertically, then horizontally—to ensure even correction. This method distributes the abrasive evenly and prevents hot spots that could damage the paint. I recall a time I lingered too long, resulting in a cloud of micro-marring. Consistent motion is key, just like brushing strokes in painting for a uniform look.
Apply Compound Judiciously
Dispense a few small dots of compound onto the pad—roughly the size of a grape—then spread it across the area before turning on the buffer. This prevents excessive product buildup and ensures even application. When I first started, I overloaded the pad, causing splatter and uneven correction. Now, I remember that less is more, especially with sensitive clear coats. For heavy scratches, consider using a dedicated compound like those found in [best-2026-paint-correction-compounds-for-heavy-scratches](https://cardetailingservicesupplies.com/best-2026-paint-correction-compounds-for-heavy-scratches).
Monitor and Adjust Pressure and Speed
Apply light to moderate pressure—think of gently pressing a key on a piano—to allow the pad and compound to do their work. Increase speed slightly if you notice the pad losing contact or the correction slowing down. During a recent session, I kept pressing harder to speed up, but it resulted in uneven patches. Instead, I learned to listen to the buffer’s sound and feel, making small adjustments. Use a paint correction light, like our recommendations in [4-essential-2026-paint-correction-lights-for-swirl-spotting](https://cardetailingservicesupplies.com/4-essential-2026-paint-correction-lights-for-swirl-spotting), to identify missed spots and refine your technique.
Work Methodically and Clean Frequently
Divide the vehicle into manageable sections and work on one at a time. After each area, clean the residual compound with a clean microfiber towel to keep the surface free of abrasive debris and prevent re-scratching. I learned this the hard way when neglecting to clean the pad, which transferred old debris back onto the paint, creating new swirls. Adopting this habit results in a smoother finish and saves time in the long run. For comprehensive materials, check out [professional mobile detailing equipment kits](https://cardetailingservicesupplies.com/5-professional-mobile-detailing-equipment-kits-for-2026), which include microfiber towels designed for residue removal.When it comes to paint protection, many enthusiasts and DIYers share a misconception that simply applying a ceramic coating guarantees long-lasting, flawless results. However, in my experience working with advanced detailing products, the real nuance lies in the preparation and application process. One common myth is that higher gloss or thicker coatings automatically mean better protection, but this overlooks critical factors like surface dryness and contaminant removal before application. For example, **neglecting decontamination steps can lead to bond failure**, reducing the coating’s durability significantly. Studies, such as the one published in the *Journal of Coatings Technology*, show that improper surface prep can cut coating lifespan in half, emphasizing that application conditions matter just as much as the product itself.
Why Do so Many People Overlook Surface Prep in Do-It-Yourself Car Detailing?
Most car owners assume that a thorough wash suffices before coating, but this mistake causes adhesion issues, leading to quick degradation or uneven beading. A meticulous clay bar or iron remover session removes embedded particles that regular washing misses. For instance, **using a clay bar after washing and prior to coating can increase adhesion quality by 30%**, according to professional chemists. So, if you’re investing in the best auto detailing products, don’t skip essential steps; proper surface prep is your best bet to ensure that your ceramic or graphene coatings perform optimally. For comprehensive guidance on best practices, check out our article on [how to maintain 2026 ceramic coatings in hot climates](https://cardetailingservicesupplies.com/how-to-maintain-2026-ceramic-coatings-in-hot-climates).
Proper surface preparation is often the hidden key that most overlook, leading to prematurely failed protections or costly reapplications. Moreover, many users underestimate the importance of curing time and environmental conditions during application. Applying a coating in high humidity or direct sunlight can hinder curing and compromise the bond, ultimately affecting the appearance and durability. My advice? Always follow the manufacturer’s recommended conditions and use dedicated detailing supplies near me to find reliable products and accessories for the job. When selecting your supplies, consider professional-grade options like [2026 professional mobile detailing equipment kits](https://cardetailingservicesupplies.com/5-professional-mobile-detailing-equipment-kits-for-2026) for reliable results. Want to avoid these pitfalls altogether? Focus on preparation and environmental control for a more satisfying, long-lasting protective layer. Have you ever fallen into this trap? Let me know in the comments.Maintaining your vehicle’s pristine condition over the long haul demands more than just good products; it requires investing in the right tools and establishing effective routines. Personally, I rely on a few key pieces of equipment that have proven their worth time and again. For instance, a high-quality dual-action polisher with variable speed controls allows me to achieve professional-grade paint correction without the risk of burning through the clear coat. My preferred model is the Makita XOD255Z, known for its durability and smooth operation, making light work of even stubborn swirls.
Consistency is crucial when it comes to detailing. That’s why I never compromise on microfiber towels—using ultra-soft, plush towels from reputable brands ensures that I eliminate residue without introducing new scratches or micro-marring. For cleaning hard-to-reach crevices, I swear by detailing brushes with synthetic bristles, which prevent scratching delicate surfaces like leather or soft plastics. These tools help me maintain that meticulous level of care that elevates my detailing routine beyond basic washes.
To keep everything running smoothly, I automate parts of my process with a foam cannon connected to my pressure washer, especially when applying wash soap. For this, I turn to the [best 2026 car wash soaps for foam cannons](https://cardetailingservicesupplies.com/3-best-2026-car-wash-soaps-for-foam-cannons), which create thick, clingy suds that lift dirt effectively while reducing scratching. I also utilize a deionized water system for rinse cycles, minimizing mineral spots and ensuring a spotless finish. These systems are becoming mainstream in professional circles for their efficiency and ability to produce immaculate results, as detailed in a recent technical guide on auto detailing equipment.
Looking ahead, I predict that automation and smart tools will become standard. Future innovations may include app-controlled buffers that adjust pressure based on paint feedback, or AI-powered scanners that recommend customized polishing techniques. Embracing these emerging trends will enable detailers—and DIY enthusiasts—to achieve even better long-term results with less effort.
How do I maintain my tools for maximum longevity?
Regular cleaning and proper storage are key. After each session, I thoroughly wash my buffer pads with a dedicated microfiber shampoo, then dry them in a low-heat dryer to prevent mold. Storing tools in a climate-controlled environment keeps them in top shape, avoiding rust or damage. Additionally, I periodically calibrate my polishing machines following manufacturer guidelines, which you can find in detailed technical resources. Well-maintained tools not only last longer but also deliver consistent performance, which is critical for professional results. For those serious about their equipment, I recommend investing in a portable tool sanitizer, which uses UV-C light to eliminate bacteria and mold—especially useful if you frequently switch between vehicles or share your tools. For further insights on tool maintenance, check out expert articles on professional mobile detailing equipment kits, which emphasize the importance of proper care to maximize your investment.
What the Pros Don’t Say About Perfect Paint Finishes
Over the years, I’ve discovered that even seasoned detailers sometimes overlook the subtle nuances that make a giant difference—like the importance of proper pad break-in or the value of using deionized water during final rinses. These small details add up and can significantly affect your results. My biggest lightbulb moment was realizing that patience and attention to environment — such as avoiding direct sunlight during coating application — can save you from costly reapplications. Also, investing in high-quality tools, though tempting to skip, ultimately pays off by delivering consistent, professional-quality results. Don’t underestimate the power of routine maintenance of your equipment; it ensures longevity and reliable performance, elevating your craft from a hobby to a profession. For instance, regularly cleaning your buffers and storing them in climate-controlled environments helps maintain their responsiveness and precision. These insights stem from experiences that taught me that craftsmanship is about the tiny details that many overlook, but which make all the difference in achieving a sleek, flawless finish.
About the Author
Timothy Carr
Tactical Vehicle Training, Sales Support, and Parts ...
Timothy Carr is a seasoned professional with a diverse background in tactical vehicle training, parts management, and safety branding. Having managed critical aspects of branding and safety programs for the United States Army in Kuwait, Timothy brings a unique, high-stakes perspective to the world of vehicle maintenance and care. His extensive experience in tactical vehicle operations and sales support provides him with a deep understanding of the technical requirements and high-performance standards necessary for maintaining vehicles in demanding environments. At cardetailingservicesupplies.com, Timothy leverages his expertise in vehicle parts and safety protocols to provide authoritative insights into the best practices for car detailing and supply management. His professional history in designing safety programs and managing complex vehicle logistics ensures that his advice is both practical and grounded in rigorous standards. Timothy is dedicated to translating his high-level technical knowledge into accessible, actionable advice for car enthusiasts and professional detailers alike. He is passionate about helping others achieve excellence in vehicle maintenance and ensuring that every car receives the professional care it deserves to perform at its best.
LinkedIn Profile
Reading this post really resonated with my own journey into car detailing. I honestly can’t emphasize enough how much choosing the right paint correction pad has changed my results. I used to settle for cheaper options, but I often ended up with micro-marring or uneven finishes that took hours to correct. Since switching to premium, pad-specific options, I’ve seen a huge difference in the quality of my work, especially on softer paints of newer models. The part about applying compound judiciously really hit home—I used to overload the pad and create splatter, which made the job much messier and less effective. Now, I focus on light, even coats, and it saves me time and frustration. Does anyone have suggestions for maintaining these high-quality pads to ensure they last longer? I’ve been cleaning and storing them properly, but I’d love to hear more tips from experienced detailers if possible.