It was a frustrating Saturday morning, and I was battling another round of stubborn dirt embedded deep in my car’s paint. Despite using my trusted traditional clay bars, I noticed those tiny scratches and dull patches creeping in. That’s when I had my lightbulb moment—could there be a better way to decontaminate and prepare my car’s surface?
Why Car Enthusiasts Can’t Ignore the 2026 Clay Mitts Revolution
Traditional clay bars have been a staple in auto detailing for decades. But with the emergence of innovative tools like the 2026 Clay Mitts, everything is shifting. I’ve realized that choosing the right decontamination method isn’t just about removing dirt; it’s about safeguarding your car’s finish and achieving that mirror-like shine you crave. If you’re like me, tired of ineffective techniques and worried about scratching your paint, understanding these pro tips can change how you approach detailing.
Did you know that improper use of traditional clay bars can lead to micro-scratches and paint damage? A study published by Auto Express found that careless clay application might actually cause more harm than good, especially for delicate finishes. This was a wake-up call for me, prompting a reassessment of my detailing routine.
So, what makes the 2026 Clay Mitts stand out, and how can mastering their use elevate your results? By following these expert tips, you’ll not only improve your car’s appearance but also extend the lifespan of its paintwork. Ready to ditch old habits and embrace the future of detailing? Let’s dive into the top strategies that will set you apart.
To get started, I recommend checking out our comprehensive guide on [how to use 2026 clay bars for maximum gloss](https://cardetailingservicesupplies.com/how-to-use-2026-clay-bars-for-maximum-gloss). This resource will give you foundational knowledge before we proceed to the more advanced techniques that guarantee professional results.
Prep Your Workspace and Gather Supplies
Start by parking your car in a shaded, dust-free area to prevent water spots and debris settling during cleaning. Gather your essential supplies: a high-quality car wash soap, microfiber towels, clean water buckets, and the innovative 2026 Clay Mitts. Having everything within arm’s reach streamlines the process and prevents interruptions. Remember, a well-organized workspace enhances safety and efficiency.
Wash the Car Thoroughly Before Decontamination
Before tackling embedded contaminants, rinse the vehicle thoroughly with plenty of water to remove loose dirt. Use a two-bucket system with a dedicated wash mitt—one for soapy water and one for rinsing—to avoid reapplying dirt onto the surface. This initial step reduces the risk of scratching during clay application. Think of it like pre-washing dishes to get rid of loose debris before scrubbing stubborn stains.
Inspect and Identify Contaminants
Dry the car with a clean microfiber towel and inspect the paint surface under good lighting. Look for embedded iron particles, tar spots, or stubborn fallout. This step helps determine if you need specific products, such as iron removers, or if a simple clay process suffices. Use a detailing spray to lubricate areas, making the decontamination smoother and safer. Identifying contaminants early guides your approach effectively.
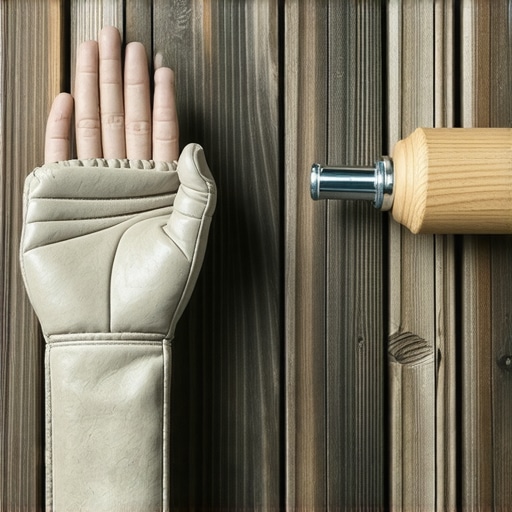
Apply the 2026 Clay Mitt Correctly
Moisten the clay mitt with a generous amount of detailing lubricant or clay bar lubricant. The key here is to keep the surface well-lubricated—think of it like slipping on a silk glove to glide smoothly over rough skin. Gently knead the mitt as it collects dirt, exposing a clean surface for continued use. Focus on small sections—about 2×2 feet—to maintain control and prevent marring. During my first attempt, I once forgot to use enough lubricant, which caused micro-scratches; lesson learned, always keep it slick.
Use Light, Even Pressure for Best Results
Press lightly and move the mitt in a consistent back-and-forth motion. Do not press hard; aggressive pressure can embed contaminants deeper or scratch the finish. Imagine polishing a vintage camera lens; gentle, deliberate strokes achieve clarity without damage. Regularly inspect the mitt and fold it to reveal a fresh, contaminant-free surface. This technique ensures thorough decontamination without harming your paintwork.
Rinse and Repeat as Needed
After completing each section, rinse off residual debris from the mitt and your vehicle. Reapply lubricant to dull spots or stubborn areas. If contaminants persist, repeat the process—don’t be tempted to skip or force through. Patience is crucial; rushing can negate your efforts. Remember, this step is about precision and preservation, not speed.
Final Wash and Inspection
Once the entire vehicle has been decontaminated, give it a thorough rinse to wash away leftover residues. Dry the surface completely with clean microfiber towels, then inspect again under good lighting. Now, your paint should be smooth and glossy, ready for polishing or ceramic coating. At this stage, you might consider [paint correction strategies](https://cardetailingservicesupplies.com/4-paint-correction-strategies-for-2026-expert-metallic-shine) to enhance the finish further.
Many car enthusiasts believe that using the latest, most expensive detailing products automatically guarantees a pristine finish. However, this misconception overlooks the crucial role of correct application methods and an understanding of material nuances. For instance, novice detailers often assume that applying thicker layers of ceramic coating will provide better protection, but in reality, excess product can lead to uneven coverage and diminished durability. Proper surface prep, like thorough decontamination using the right tools such as 2026 clay bars or clay mitts, is often neglected, causing poor adhesion and compromised results. It’s also common to see DIY kits prioritized over professional-grade mobile detailing equipment without appreciating that equipment quality directly affects the efficiency and safety of the process. Additionally, many overlook that car wash soap selection should complement the vehicle’s finish—harsh soaps can strip wax and degrade paint over time, despite their cleaning power. When addressing paint correction, using inappropriate compounds or buffing pads can create micro-marring, which is often mistaken for dirt or minor scratches. Advanced techniques demand understanding material interactions; for example, applying ceramic coating on glass requires a different approach than on paint, yet many try a one-size-fits-all method. Don’t forget that DIY car detailing kits may be appealing, but they rarely include equipment calibrated for professional standards, leading to subpar finishes. Recognizing these nuanced differences is what separates an amateur from a true detailing expert.
Why do so many overlook surface preparation in favor of flashy products, and what’s the real impact?
Experts emphasize that prepping the surface properly can boost the effectiveness of even modest products, preventing issues like swirls or uneven coatings. In a study by detailing industry leaders, it’s shown that improper prep accounts for 80% of finish defects, underscoring the importance of foundational steps. So, before investing in the latest ceramic coatings, get your prep right. Remember, quality supplies combined with expert application practices lead to lasting, professional results. Have you ever fallen into this trap? Let me know in the comments.
Investing in high-quality, durable equipment is essential for maintaining exceptional car detailing results over time. Personally, I rely on premium mobile detailing pressure nozzles that deliver consistent water flow and temperature control, ensuring thorough cleaning without risking damage to delicate surfaces. These nozzles are built to withstand frequent use, resist corrosion, and provide an adjustable spray pattern, making them indispensable for both professional and DIY enthusiasts. Additionally, I swear by mobile detailing water pumps with variable pressure settings, which allow me to adapt to different cleaning tasks, from soft rinses to powerful pre-washes. Regular maintenance of these tools, like flushing with clean water and inspecting for clogs, extends their lifespan and guarantees optimal performance. Looking ahead, I predict that automation and smart technology will increasingly integrate with mobile detailing equipment, providing real-time diagnostics and feedback for better results. To keep your gear functioning flawlessly, I recommend establishing a routine checklist—cleaning, lubrication, and calibration—to prevent unexpected breakdowns and ensure consistent quality.
How do I keep my detailing tools in top shape?
Adopting meticulous maintenance routines is key. For example, after each session, rinse out nozzles and pumps thoroughly, removing any residual dirt or mineral buildup. Regularly inspect seals and connections for wear, replacing parts before they fail. Using specialized lubricants for moving parts can prevent corrosion and jammed components. Also, storing equipment in climate-controlled environments reduces exposure to environmental elements that accelerate deterioration. Investing in protective covers or cases further shields your tools from dust and impact damage. By treating your equipment well, you’ll enjoy consistent results and save money in the long run, reducing the need for costly replacements. For tips on enhancing your kit, consider consulting detailed guides like how to prevent mobile detailing equipment corrosion. Keep your gear running smoothly, and you’ll guarantee professional-level results every time.
Why maintaining your kit now sets you up for future success
Maintaining your detailing tools isn’t just about longevity; it directly impacts the quality of your work. Worn or poorly maintained equipment can lead to inconsistent spray patterns, inadequate cleaning, or surface damage. Adopting proactive maintenance routines ensures your tools perform optimally, helping you achieve flawless finishes every round. Moreover, staying updated on latest technologies—like high-efficiency water pumps and smart washing systems—can give you a competitive edge. When your equipment works seamlessly, you spend less time troubleshooting and more time perfecting your craft. Remember, the investment in proper care today will pay off with superior results, satisfied clients, and a reputation for excellence in the long run. Don’t forget to try adopting maintenance practices endorsed by leading industry experts, such as those outlined in professional maintenance protocols for mobile detailing gear. Start with one advanced tip today, like regularly calibrating your spray pattern, to elevate your detailing game.
The Hidden Wisdom in My Detailing Journey
One unexpected lesson I learned was how crucial proper lubrication is when using innovative tools like the 2026 Clay Mitts. I once applied too little lubricant, which led to micro-marrings that took hours to correct. Now, I always keep the surface slick, almost like glazing a cake—delicately and evenly. Another insight was realizing that not all contaminants are visible without close inspection; investing in a quality detailing light saved me from missing stubborn fallout that could cause long-term damage. Lastly, I discovered the importance of dedicated, well-maintained equipment—skimping on maintenance now can make your tools less effective and risk your vehicle’s finish. Embracing these lessons transformed my approach from amateur to confident professional, proving that mastery is built on attention to detail and continuous learning.
About the Author
Timothy Carr
Tactical Vehicle Training, Sales Support, and Parts ...
Timothy Carr is a seasoned professional with a diverse background in tactical vehicle training, parts management, and safety branding. Having managed critical aspects of branding and safety programs for the United States Army in Kuwait, Timothy brings a unique, high-stakes perspective to the world of vehicle maintenance and care. His extensive experience in tactical vehicle operations and sales support provides him with a deep understanding of the technical requirements and high-performance standards necessary for maintaining vehicles in demanding environments. At cardetailingservicesupplies.com, Timothy leverages his expertise in vehicle parts and safety protocols to provide authoritative insights into the best practices for car detailing and supply management. His professional history in designing safety programs and managing complex vehicle logistics ensures that his advice is both practical and grounded in rigorous standards. Timothy is dedicated to translating his high-level technical knowledge into accessible, actionable advice for car enthusiasts and professional detailers alike. He is passionate about helping others achieve excellence in vehicle maintenance and ensuring that every car receives the professional care it deserves to perform at its best.
LinkedIn Profile
Reading this, I can relate to the initial frustration of battling stubborn dirt and micro-scratches despite using traditional clay bars. I recently switched to the 2026 Clay Mitts after hearing positive reviews, and I must say, the difference in surface safety and ease of use is noticeable. The tip about keeping the surface well-lubricated really resonated with me—I once caused micro-marring by applying too little lubricant, and it took hours to fix. Regularly inspecting and folding the mitt during decontamination ensures you don’t transfer dirt back onto the paint. I’ve found that using a dedicated detailing spray for lubrication and focusing on small sections helps prevent accidental damage. I’m curious, how do others handle stubborn iron particles or tar spots that seem resistant even after clay decontamination? Do you prefer chemical decontaminants beforehand or rely solely on clay mitts for such contaminants? Overall, this article reinforces the importance of proper technique over just having the latest tools—something I’ve learned the hard way.
This post really highlights some crucial points I’ve experienced firsthand. I completely agree that surface preparation is often underestimated. During my own detailing journey, I used to dive straight into polishing without thorough decontamination, only to find that micro-etchings and stubborn fallout would still tarnish the finish. Switching to proper clay mitt application, especially with high-quality lubricants, definitely improved my results. The insight about folding the mitt and inspecting it frequently is something I wish I’d known earlier—prevents reapplying dirt and reduces the risk of scratches significantly. I do wonder, for those tackling persistent contaminants like iron particles, do you tend to use chemical decontaminants first, or do you rely solely on clay mitts? Sometimes, I find that a quick iron remover spray, followed by clay, works best. Also, with the rise of such innovative tools like the 2026 Clay Mitts, I’m curious how others balance their use with traditional methods. What combination has worked best for your detailing routine?