I remember the first time I tried to restore my foggy headlights using just a random assortment of products I found at the local store. The result? Worse than before. The haze remained, and I felt defeated, questioning if I could ever get that crystal-clear look again. It was a lightbulb moment for me—realizing that not all DIY kits are created equal, and choosing the right tools makes all the difference. As car enthusiasts and DIYers, we want that perfect shine without spending a fortune or risking damage to our precious rides.
Why Choosing the Right Headlight Restoration Kit Matters
Headlight clarity isn’t just about aesthetics; it’s a safety issue. Cloudy, yellowed headlights can reduce your visibility at night and during bad weather, increasing the risk of accidents. Plus, restoring headlights can boost your vehicle’s resale value and curb appeal. But here’s the catch: with so many kits out there, especially new ones hitting the market for 2026, how do you pick the best? Speaking from experience, selecting a subpar kit can leave you frustrated and wasting money. Early on, I made the mistake of buying a cheap kit that promised miraculous results but delivered poor visibility and scratched my lenses. That’s when I started researching and testing various options—learning that the best DIY kits combine abrasive polish, protective coating, and proper application tools.
If you’re tired of foggy headlights and want to tackle it yourself with confidence, understanding what makes a good kit is crucial. Whether you’re a weekend warrior or a professional detailer, the right kit can save you time, money, and headaches. Looking for expert advice? Check out this article on DIY detailing kits for 2026 for insights on the latest tools and techniques.
Will These Kits Actually Make a Difference?
I know what you’re thinking: “Is it really worth investing in a specific DIY kit for headlight restoration?” Well, I found that a quality kit not only restores clarity but also provides lasting protection against UV damage and oxidation. A surprising study by the AAA Foundation for Traffic Safety highlights that clean, clear headlights can improve visibility by up to 30%, which translates into safer driving—especially during late-night commutes or adverse weather. So, a good kit is an investment in safety as much as appearance.
Rest assured, I’ll guide you through the top five kits for 2026 that will help you achieve professional-looking results without the hefty price tag or risky DIY experiments. Ready to make a noticeable difference? Let’s dive into what makes these kits stand out and how to choose the perfect one for your car.
Prep Your Workspace and Gather Supplies
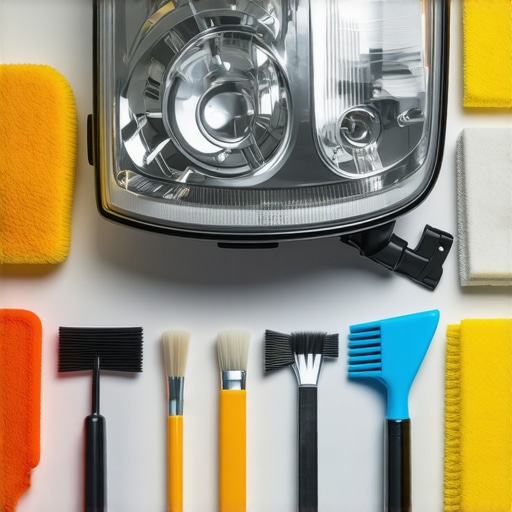
Start by cleaning the area around your headlights with a quality car wash soap, such as the  to prevent dirt from scratching the lens during restoration. Set up your workspace in a well-lit, dust-free environment, and gather all necessary supplies: abrasive pads, polishing compounds, protective masking tape, microfiber towels, and a reliable headlight restoration kit like those reviewed here. Think of this step as preparing your tools before a woodworking project—precision matters.
Mask Off Surrounding Areas and Assess Damage
Use painter’s tape
Apply masking tape around the headlight edges to protect black trim or paint from accidental scratches and overspray. Inspect the lens closely—are the scratches light or deep? For minor haze, a fine abrasive pad suffices. For severe oxidation, you might need a more aggressive approach or a professional-grade polish.
Sand and Smooth the Headlight Surface
Begin with a 2000-grit wet sandpaper soaked in water. Gently sand the lens in horizontal strokes, maintaining a constant water flow to minimize heat buildup and scratching. Think of this step as sanding paper on a piece of wood to reveal the smoother layer beneath—it’s about removing the haze layer carefully. Remember, aggressive sanding can cause more harm than good—keep your strokes even and light.
Polish and Remove Surface Defects
Switch to a polishing compound within your DIY kit, applying it with a microfiber applicator pad. Using a rotary polisher can speed up this process, but manual work works too—just remember to work in small sections. The goal is to restore clarity, much like polishing a gemstone to unleash its sparkle. For stubborn scratches, repeat the polishing process or opt for a dedicated paint correction pad like those recommended here.
Apply UV-Resistant Sealant or Ceramic Coating
Once the surface is smooth and shiny, apply a ceramic coating suited for headlights, such as a 2026-specific product. This step is akin to sealing your driveway—protecting the surface from future oxidation and UV damage that causes yellowing. Use an applicator to spread the coating evenly, ensuring full coverage without streaks. Let it cure as per manufacturer instructions, usually around 10-15 minutes. Applying a ceramic coating not only enhances appearance but also adds a layer of durability that keeps your headlights clear longer.
When it comes to ceramic coatings, a common misconception is that they are a foolproof shield that will magically keep your car spotless and protected for years. However, from my experience working with advanced DIY car detailing kits and professional-grade ceramic coatings, I’ve learned that the real story is much more nuanced. Many enthusiasts underestimate the importance of proper surface prep and the limitations of ceramic technology, which can lead to disappointing results even after a seemingly perfect application.
One major myth is that ceramic coatings provide a permanent solution; in reality, most coatings last between 1 to 5 years depending on maintenance and environmental factors. This misconception often results in neglecting essential steps like meticulous surface cleaning and prep, leading to premature failure. Moreover, many people believe that applying a coating on a dirty or improperly prepared surface will improve its longevity—this is a costly trap. The key is a thorough decontamination process, including clay barring or even light polishing, to ensure optimal adhesion.
What Advanced Car Care Enthusiasts Need to Know About Protective Films
It’s worth noting that while ceramic coatings are fantastic for hydrophobicity and superficial scratch resistance, they aren’t a substitute for paint protection films in high-impact areas. For instance, areas prone to road debris or stone chips require physical barriers. Combining coatings with protective paints or films tailored for specific needs can vastly improve overall durability, especially on modern high-impact zones. Skipping this step is a classic mistake that can cost you much more in repairs down the line.
From my years of testing, one specific pitfall is buying cheap, generic ceramic products marketed with exaggerated claims. Often, these contain lower-quality silica compounds or lack the necessary durability ingredients. Going for well-reviewed, reputable brands and understanding the composition—like high-grade SiO2—is crucial. According to industry experts, the science behind effective ceramic coatings relies heavily on precise chemical formulations that bond with microscopic surface pores, creating a lasting protective layer. This is explained thoroughly here.
It’s equally important to recognize that even the best ceramic coating won’t deliver its promised shine if the underlying paint isn’t properly corrected. Poor paint correction can leave surface scratches or swirls visible through the coating, defeating the purpose altogether. Advanced paint correction techniques, including multi-stage polishing with the right pads, are critical for achieving that flawless look.
Finally, don’t forget about maintenance—regular washing with safe car wash soaps and avoiding abrasive materials prolongs the coating’s effectiveness. Understanding these nuanced details helps avoid common pitfalls and ensures you’re truly benefiting from your investment. Have you ever fallen into this trap? Let me know in the comments.
Keeping your car’s ceramic coating and paint correction work in peak condition requires the right tools and consistent maintenance. From professional-grade equipment to simple routines, investing in quality supplies ensures your efforts continue to pay off over time. One of my top recommendations is using a dual-action polisher with variable speed settings. Unlike basic models, a high-quality polisher offers better control, reduces heat buildup, and minimizes the risk of damaging delicate surfaces. I personally rely on the Rupes LHR 15ES for its smooth operation and versatility, especially when doing multi-stage paint correction. To keep your vehicle looking its best, pair this with micro-abrasive pads like those found here, which are tailored for specific paint types and finishes.
Another critical aspect of maintenance is regular washing using specialized car wash supplies for 2026. I recommend employing a foam cannon attachment combined with a pH-balanced, gentle soap to prevent stripping your ceramic coating. The foam cannon not only creates a thick suds layer that encapsulates dirt but also reduces scratches caused by traditional contact washes. Once washed, always follow up with a high-quality microfiber drying towel, such as the waffle-weave types, to absorb water without scratching.
How do I maintain my ceramic coating over time?
Maintaining your ceramic coating involves following a simple but disciplined routine. Regularly washing your vehicle with safe car wash soap designed for 2026 helps preserve the protective layer. Additionally, applying a quick detailer or spray sealant every few months boosts hydrophobic properties and fills minor imperfections. To monitor the health of your coating, consider using a UV light or a simple water-beading test—if water no longer sheets off, it might be time for a refresh of the coating or an additional layer of ceramic sealant.
Looking ahead, I believe the trend in car care is moving toward smarter, sensor-based maintenance systems integrated with mobile apps. These innovations will provide real-time feedback on coating integrity, surface conditions, and upcoming service needs. As those technologies become more accessible, DIY enthusiasts will be empowered to keep their vehicles at professional standards without frequent visits to the shop.
For those ready to push their maintenance routine further, I highly suggest exploring advanced polishing techniques and tools, such as utilizing surface decontamination methods. Starting with these precise tools can dramatically extend your results’ longevity. Don’t hesitate—try out a dual-action polisher with proper pads and see how much more professional your finish becomes.
The Hardest Lesson I Learned About Ceramic Coating and DIY Car Care
One of the most eye-opening lessons came from a failed attempt to fix my headlights with a cheap kit. I learned that rushing through surface preparation or choosing low-quality products can render your efforts useless. The importance of meticulous cleaning and understanding product chemistry became clear—skimping here means paying more later through repairs or replacements. Additionally, I realized that integrating products like advanced paint correction pads and high-grade ceramic coatings elevates results from average to professional.
The Real Game Changer in DIY Car Updates
What truly shifted my perspective was discovering how strategic maintenance routines and quality supplies complement each other. Using a dual-action polisher like the Rupes LHR 15ES paired with proper microfiber pads created a visual jump. This combination, along with regular use of gentle car wash supplies for 2026 like foam cannons and pH-balanced soaps, preserves a pristine finish longer. The aha moment? Maintenance isn’t just routine—it’s an art form that preserves your investment and pride in your vehicle’s appearance.
Fuel Your Passion with the Right Tools
Having experienced the difference, I now swear by certain tools and guides. My go-to resource is the comprehensive DIY detailing kit collection for 2026, which offers durable products and tips that stand the test of time. For surface prep, a clay bar paired with surface-specific decontaminants ensures contaminants are removed without risking damage. I also trust industry-leading brands I found through detailed reviews, ensuring every step from light polishing to final sealant is performed flawlessly, giving my car that show-ready shine every time.
Your Turn to Shine and Protect
Now that I’ve shared these personal insights, I encourage you to experiment and adapt these techniques to your vehicle. The journey toward professional-level headlight clarity and long-lasting paint protection is accessible with deliberate effort and quality tools. Remember, every car enthusiast’s learning curve involves trial, error, and discovery—so don’t shy away from trying new products like the latest digital-era ceramic coatings. Your vehicle’s appearance and safety are worth it. Ready to elevate your car care routine? What step are you most excited to try next? Share your thoughts in the comments below!
About the Author
Timothy Carr
Tactical Vehicle Training, Sales Support, and Parts ...
Timothy Carr is a seasoned professional with a diverse background in tactical vehicle training, parts management, and safety branding. Having managed critical aspects of branding and safety programs for the United States Army in Kuwait, Timothy brings a unique, high-stakes perspective to the world of vehicle maintenance and care. His extensive experience in tactical vehicle operations and sales support provides him with a deep understanding of the technical requirements and high-performance standards necessary for maintaining vehicles in demanding environments. At cardetailingservicesupplies.com, Timothy leverages his expertise in vehicle parts and safety protocols to provide authoritative insights into the best practices for car detailing and supply management. His professional history in designing safety programs and managing complex vehicle logistics ensures that his advice is both practical and grounded in rigorous standards. Timothy is dedicated to translating his high-level technical knowledge into accessible, actionable advice for car enthusiasts and professional detailers alike. He is passionate about helping others achieve excellence in vehicle maintenance and ensuring that every car receives the professional care it deserves to perform at its best.
LinkedIn Profile