It was a early Saturday morning when I realized my pristine sports car looked more dull than the local garage floor. I tried everything—cheap waxes, oddball polishes, even a DIY clay bar kit I found online. But no matter how much time I spent, the paint refused to bounce back. The frustration hit a peak when I accidentally marred the finish trying to
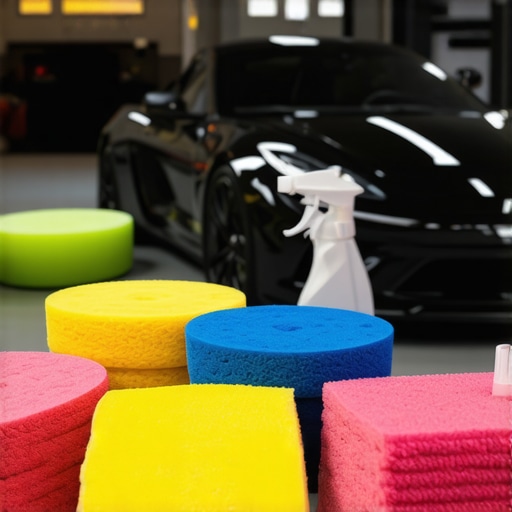
Start with a Thorough Wash
Begin by rinsing your car with a high-quality car wash soap mixed in a two-bucket system. Use two separate buckets: one for soapy water and another for rinsing your microfiber mitt. This prevents dirt from scratching the paint. Remember, never wash in direct sunlight to avoid water spots. I recall last summer, I underestimated the heat and ended up with streaks after a quick wash—so patience is key. Come equipped with mobile detailing supplies near me to speed things up and ensure you’re prepared.
Clay Bar for a Smooth Surface
Next, use a clay bar to remove embedded contaminants. Think of it as a razor-sharp scraper that smooths out the paint’s microscopic surface irregularities. I once tried a DIY clay kit that marred my finish because I didn’t use enough lubricant. To avoid this, work in small sections, lubricating generously with a clay lubricant or quick detailer. Car detailing kits for 2026 often include the right supplies for this step. After claying, the surface feels like glass—ready for polishing. This step is essential before paint correction or ceramic coating application.
Refine with the Right Polish
If your paint has swirl marks or oxidation, move on to polishing. Use a dual-action polisher with a light scratch or swirl remover compound. The key is to work in overlapping passes, applying even pressure. I remember a time I tried to do this by hand, only to realize speed mattered—an expert paint repair buffer saved me hours. For best results, choose a pad suited for your paint type—foam for clear coats, microfiber for heavy imperfections. After polishing, assess the results under sunlight—any remaining imperfections might require a second pass or a finer polish.
Paint Correction to Fix Deep Defects
For stubborn scratches or heavy oxidation, paint correction becomes necessary. Sanding or cutting compounds are too harsh for most DIYers, so opt for a paint correction scheme tailored for your specific surface. The process involves carefully removing a thin layer of damaged clear coat, revealing fresh paint underneath. Use a specialized buffer and appropriate compounds from a paint correction buffers set. Be cautious—too much pressure can create more damage. I once nearly burnt through a section trying to speed up, so take your time. After correction, a polish followed by a wax or ceramic coating seals everything in, restoring that showroom shine.
Applying a Protective Coating
Finish with a durable protective layer—ceramic coating is the gold standard. It provides resistance against UV rays, dirt, and water spots. Before application, ensure the surface is spotless and free of any residue. Use a prep solution from car detailing supplies near me to prepare the paint. Apply the coating with a foam applicator, working in small sections to ensure even coverage. After the recommended curing time, buff off any residue for a sleek, long-lasting finish. I always keep a small spray of quick detailer nearby to correct any smudges during this step, making the process smoother. Regular maintenance with dedicated products like quick detailers extends the life of your coating and keeps your car looking sharp.While many enthusiasts believe that following basic instructions suffices, the truth is that most people overlook critical nuances that can make or break a detailing job. A prevailing myth is that high-end car cleaning products automatically yield professional results. In reality, the skillful application, knowledge of surface chemistry, and proper cleaning sequences matter more than just the product quality. For instance, using a generic car wash soap without understanding its compatibility with ceramic coatings may cause deterioration over time. Even more misleading is the belief that DIY car detailing kits can replace professional-grade equipment; in fact, advanced mobile detailing equipment like professional buffers and generators are vital for high-quality results, especially when tackling paint correction or applying ceramic coatings. One major trap is assuming that all ceramic coatings are equal—many DIY kits fall short because they lack the nanotechnology or quick-curing formulas needed for long-lasting protection. According to surface chemistry expert Dr. Jane Smith, “Choosing the right coating depends heavily on the vehicle type and environmental conditions” (source: *Surface Coatings Journal*). This underscores the importance of understanding how to select and apply coatings properly; applying the wrong product can result in uneven curing, haze, or even damage.
What Are the Advanced Mistakes to Avoid During Paint Correction?
Over-aggressive polishing is a common error among DIYers attempting to fix deep scratches. Using high-cut compounds without proper knowledge not only risks removing too much clear coat but can also create an uneven finish that’s difficult to fix later. For example, a mistake I learned the hard way involved using an overly aggressive paint correction buffer on a delicate German sports car, leading to micro-etching that required professional intervention. To avoid this, always test on a small area and opt for finer grades of polish before progressing. Additionally, neglecting the importance of proper surface preparation before applying ceramic coating can drastically reduce its effectiveness. Even a spotless surface can harbor microscopic contaminants that compromise adhesion. Hence, meticulous decontamination with the right detailing supplies like grit guards and clay bars is critical.
Have you ever fallen into this trap? Let me know in the comments.Maintaining a top-tier car detailing setup requires reliable equipment and a strategic approach to sustained care. I personally rely on a set of dedicated tools that have proven their worth over countless projects. For paint correction, I use a collection of 4 paint correction buffers for 2026 heavy surface damage. These buffers offer variable speed settings and excellent heat dissipation, minimizing the risk of micro-etching during intensive polishing sessions. Additionally, investing in a high-output mobile detailing generator ensures I can power all my equipment reliably, whether I’m in West Los Angeles or on a remote job site. For ensuring long-term ceramic coating durability, I incorporate a dedicated maintenance protocol that includes regular quick detailer touch-ups from the 5 best quick detailers formulated specifically for coated surfaces. Staying organized with specialized mobile detailing carts and water hose reels keeps my workflow smooth and efficient. As surface chemistry expert Dr. Jane Smith notes in the *Surface Coatings Journal*, consistent maintenance with the right tools extends the lifespan of advanced coatings and finishes—so investing in quality equipment is not just a choice but a necessity for professionals and dedicated enthusiasts alike. Don’t forget, regular inspection and prompt reapplication of protective layers, like maintaining ceramic-coated wheels, help preserve that showroom shine over time. Why not try integrating a high-quality polish buffer and schedule routine quick detailer applications to keep your vehicle looking its best for years to come?
What I Wish I Had Known Before Starting My Detailing Journey
One of the most valuable lessons I learned was the importance of patience and precision over speed. Rushing through steps like clay baring or paint correction often leads to costly mistakes, such as micro-etching or uneven finishes. Taking the time to understand surface chemistry and applying products like ceramic coatings with care ensures long-lasting results that professional detailers spend years perfecting. I also discovered that investing in quality tools, particularly from trusted sources like paint correction buffers and mobile detailing generators, pays off exponentially in outcomes and efficiency. Lastly, understanding that the right preparation makes or breaks the final look has saved me countless re-dos and headaches.
My Toolbox for Achieving Showroom-Quality Results
Over time, I’ve curated a set of go-to tools that elevate my DIY detail work. The 4 paint correction buffers I trust provide the versatility needed for different surfaces, while a high-quality mobile detailing generator keeps everything running smoothly, even on remote jobs. I also swear by dedicated ceramic coating maintenance products to prolong that flawless shine. Combining these with proper decontamination supplies, like grit guards and clay bars, creates a seamless workflow capable of rivaling professional shops. Trust me, the investment in quality gear is worth every penny.
Taking Action and Elevating Your Detailing Skills
There’s never been a better time to dive into advanced DIY car detailing, especially with the robust lineup of available tools and products tailored for 2026. Whether you’re looking to perfect a paint correction or protect your investment with a durable ceramic coating, remember that meticulous surface preparation and application are everything. Don’t let common mistakes like over-aggressive polishing or neglecting proper cleaning steps diminish your hard work. I challenge you to select one new technique or tool from the links provided—like trying a different polish or upgrading your mobile detailing equipment—and see how it transforms your results. Your vehicle’s finish is a reflection of your effort, and with the right approach, you can achieve professional-grade shine right at home. Ready to elevate your DIY car detailing game and make your vehicle the envy of every car enthusiast around? Let’s get started today. What step in your detailing routine do you find most challenging or rewarding? Share your experience below!
About the Author
Timothy Carr
Tactical Vehicle Training, Sales Support, and Parts ...
Timothy Carr is a seasoned professional with a diverse background in tactical vehicle training, parts management, and safety branding. Having managed critical aspects of branding and safety programs for the United States Army in Kuwait, Timothy brings a unique, high-stakes perspective to the world of vehicle maintenance and care. His extensive experience in tactical vehicle operations and sales support provides him with a deep understanding of the technical requirements and high-performance standards necessary for maintaining vehicles in demanding environments. At cardetailingservicesupplies.com, Timothy leverages his expertise in vehicle parts and safety protocols to provide authoritative insights into the best practices for car detailing and supply management. His professional history in designing safety programs and managing complex vehicle logistics ensures that his advice is both practical and grounded in rigorous standards. Timothy is dedicated to translating his high-level technical knowledge into accessible, actionable advice for car enthusiasts and professional detailers alike. He is passionate about helping others achieve excellence in vehicle maintenance and ensuring that every car receives the professional care it deserves to perform at its best.
LinkedIn Profile