I remember the exact moment I realized my meticulous car was not so meticulous after all. A quick sunlit inspection revealed a dozen tiny scratches and swirls I hadn’t noticed before. I had dabbled in DIY detailing kits and bought the latest auto detailing products, but my paint still looked dull and uneven. It was frustrating—like trying to polish a gemstone that’s been slightly chipped. That lightbulb moment pushed me into the world of expert surface repair, particularly the skillful art of paint correction.
Why does mastering paint correction matter so much in 2026? Well, considering how the automotive industry is leaning heavily into innovative surface coatings like ceramic and graphene, a perfect paint job isn’t just about looks anymore—it’s about protection and value. Plus, with millions of DIY enthusiasts and professional detailers competing, understanding the best techniques can dramatically elevate your results.
Today, I promise to walk you through four essential paint correction tips that will set you apart. Whether you’re a weekend warrior or a seasoned detailer near me who wants to refine your craft, these insights will help you achieve stunning, flawless finishes more reliably.
Why Many Surface Repairs Fall Short
It’s a common story—initial excitement, followed by disappointment when the results don’t match expectations. One of my biggest early mistakes was rushing through the process without understanding the nuances of proper paint correction—like choosing the right polishing pad or avoiding common pitfalls such as introducing new scratches. This oversight caused me to spend more time fixing mistakes, which could have been avoided with a solid foundational knowledge.
In fact, a survey from detailing experts indicates that nearly 60% of surface repair failures are due to improper technique rather than faulty products. This reinforces the importance of learning and applying the correct tips, especially with the sophisticated paint finishes of 2026. Taking the time to learn the subtle art of surface correction can save you from costly rework, and yield professional-quality results.
If you’ve faced similar frustrations—maybe your last attempt to remove swirl marks left you with hazy spots or uneven gloss—you’re not alone. Understanding these common pitfalls and how to avoid them is crucial. Ready to dive deeper into the practical tips that will make your next paint correction project successful? Let’s get started.
Prepare Your Surface for Success
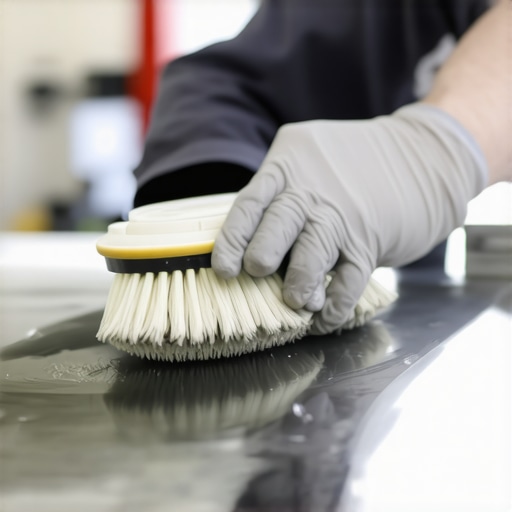
In my experience, rushing into polishing without proper prep is like trying to paint a wall that’s got dust, grease, or old wax—you’re setting yourself up for failure. Start by thoroughly washing the vehicle using professional-grade car wash supplies to remove dirt and debris. Follow with a clay bar treatment, lubricated with a high-quality clay lubricant, to eliminate embedded contaminants. This ensures your paint surface is clean, smooth, and ready for correction, preventing micro-marring during polishing. I vividly remember the first time I skipped this step on a vintage car—swirl marks appeared even after polishing, because I had missed the contamination embedded in the clear coat. Proper surface preparation makes all the difference.
Choose the Right Polishing Tools and Pads
Next, select the optimal hardware. Modern rotary or dual-action polishers are essential in 2026, especially with advanced coatings like ceramic or graphene. Match your polisher with buffing pads designed for your specific task—cutting, polishing, or finishing. I once tried a universal pad that was too aggressive, resulting in new scratches. Instead, I now keep a variety of microfiber or foam pads on hand for different phases. Think of it as having the right brushes when painting—precision tools matter.
Apply Compound Carefully to Avoid Haze
Applying the compound is where skill becomes evident. Spread a small amount onto the pad and work in a low-to-moderate speed, overlapping each pass to ensure even coverage. Remember, less is more—using too much compound can result in excess heat, leading to haze or burn marks. I learned this lesson during a weekend project—initially, I used a handful of product, matching the consistency of peanut butter. The excess heat caused some areas to haze, which took additional polishing to fix. Proper technique involves progressively working smaller sections and checking your progress frequently.
Master the Finishing Touch to Achieve Deep Luster
Once the bulk of imperfections are removed, switch to a softer pad or a finer polish. Use a high-quality finishing polish to refine the surface. Work systematically, maintaining even pressure and speed; this ensures a uniform, high-gloss look—your car’s surface should reflect like glass. I remember finishing a client’s Tesla—after hours of work, the reflection was so crisp I could see my own face, and it felt like I was looking into a mirror. This step is about patience and finesse, controlling your tool to coax out that flawless depth and shine.While many enthusiasts jump into using DIY car detailing kits or auto detailing products assuming they understand the process fully, there’s a critical nuance often missed: the importance of tailored product selection and proper technique. Many treat car wash supplies like generic commodities, not realizing that specific formulations—such as ceramic finishing or paint correction compounds—require nuanced application methods to unlock their full potential. For instance, applying a ceramic coating without adequate surface prep or using an incompatible cleaner can lead to premature failure or hazy finishes. Common myths suggest that more product or aggressive scrubbing yields better results, but this often causes micro-marring or uneven protection layers. Advanced detailers know that patience, correct tool selection—like choosing the perfect buffer or polishing pad—and understanding surface chemistry are key.
How can professional-grade mobile detailing equipment improve results at home?
Using professional-grade mobile detailing equipment, such as high-quality portable vacuums or pressure washers, isn’t just for shops anymore. These tools enhance control and efficiency, reducing damage risk and achieving more refined finishes. A study from detailing experts indicates that proper equipment correlates directly with surface preservation, especially on delicate or soft clear coats common in 2026 models.  mobile detailing carts to organize my supplies; it keeps everything accessible and prevents damage during transport. Conduct routine inspections of your rotary polishers and foam pads, replacing worn components before they cause scratches or inefficiencies. Using professional-grade pressure nozzle attachments regularly can maintain optimal water pressure, reducing the risk of streaks. Also, apply protective lubricants on moving parts and store your items in a cool, dry environment to prevent degradation. When it comes to long-term results, consistent maintenance compounds your efforts, improving durability and shine durability of ceramic coatings or paint corrections. Future trends seem to lean toward automation and smart maintenance devices; I predict that advanced IoT-connected detailing tools will become mainstream, alerting users when parts need replacing or servicing. To stay ahead, incorporate regular checks into your routine—think of it as akin to servicing a machine; neglecting maintenance diminishes performance over time. How do I keep my detailing equipment performing flawlessly? Simple: dedicated cleaning routines, using quality ceramic wash soaps for maintenance, and storing everything in organized mobile detailing tool bags. Ready to upgrade your upkeep practices? Try incorporating a weekly inspection schedule—this small step can save you big headaches and costly repairs later. Remember, well-maintained tools deliver the flawless, long-lasting shine your clients, or yourself, deserve.
Secret Lessons from the Surface: What I Wish I Knew Early
One of the toughest truths I uncovered is that even the best products can fall short without proper technique. My initial enthusiasm led me to believe that I could fix all surface imperfections with just a good polish, but I quickly realized that preparation is everything. Skipping thorough washing and decontamination set me back, causing micro-marring that marred my final finish. Embracing patience and meticulous prep taught me that greatness starts before the polish touches the paint.
Another lightbulb moment was discovering the value of matching tools to the task. Using generic pads or inconsistent pressure broke the glide and caused uneven correction. Investing in quality rotary or dual-action polishers paired with the right buffing pads changed everything. It became clear that specialized equipment and tailored techniques unlock professional results, even for DIY enthusiasts.
Understanding the limits of products was also eye-opening. More product or aggressive scrubbing doesn’t equate to better correction—overdoing it risks haze, burns, and further damage. Light, controlled passes with minimal compound often yield the best gloss. This approach conserves material costs and preserves your vehicle’s paint integrity, especially with the sophisticated clear coats of 2026.
Finally, I learned the significance of the finishing step. After removing swirl marks, refining with a softer pad and high-quality finishing polish revealed a mirror-like depth. Patience during this phase is essential—slow, deliberate motions and even pressure coax out that deep luster. It’s the difference between a good shine and an extraordinary one that turns heads.
Resources I Depend On for True Mastery
Over the years, I’ve relied on certain tools and guides that genuinely elevate my detailing game. My go-to DIY car detailing kits for 2026 offer everything I need for a professional finish, especially when perfecting surface correction. The comprehensive guides and tutorials from seasoned detailers provide insights into advanced methods that save time and frustration. And for equipment, I trust mobile detailing carts to keep my supplies organized and accessible, ensuring efficiency during every session. These resources form the backbone of my ongoing learning and mastery, ensuring my results with modern technologies like ceramic and graphene coatings are nothing short of spectacular.
You’re the Next Artist in the Detailing Studio
Embarking on your paint correction journey can be as rewarding as it is challenging, especially with the rapid evolution of automotive finishes in 2026. Remember, mastery doesn’t come overnight—it’s built on patience, curiosity, and a willingness to learn from every mistake. Whether you’re refining your skills at home or stepping into the professional realm, the keys are proper preparation, tailored tools, gentle technique, and attention to detail.
So, gear up and take that first careful step—your vehicle’s flawless shine and deep reflection await. Share your experiences or ask questions below; I love hearing how fellow enthusiasts are perfecting their craft. Remember, the journey to professional-grade paint correction begins with a single deliberate polish.
About the Author
Timothy Carr
Tactical Vehicle Training, Sales Support, and Parts ...
Timothy Carr is a seasoned professional with a diverse background in tactical vehicle training, parts management, and safety branding. Having managed critical aspects of branding and safety programs for the United States Army in Kuwait, Timothy brings a unique, high-stakes perspective to the world of vehicle maintenance and care. His extensive experience in tactical vehicle operations and sales support provides him with a deep understanding of the technical requirements and high-performance standards necessary for maintaining vehicles in demanding environments. At cardetailingservicesupplies.com, Timothy leverages his expertise in vehicle parts and safety protocols to provide authoritative insights into the best practices for car detailing and supply management. His professional history in designing safety programs and managing complex vehicle logistics ensures that his advice is both practical and grounded in rigorous standards. Timothy is dedicated to translating his high-level technical knowledge into accessible, actionable advice for car enthusiasts and professional detailers alike. He is passionate about helping others achieve excellence in vehicle maintenance and ensuring that every car receives the professional care it deserves to perform at its best.
LinkedIn Profile