Have you ever stood in your garage, staring at a scratch on your car that just won’t go away, feeling that frustration creep in? I remember the first time I encountered a stubborn 2026 scratch that refused to be buffed out. It was a bright Saturday morning, and after trying every DIY trick in the book—handy car wash soap, surface polish, even some so-called miracle repair kits—I realized I was missing a crucial piece of the puzzle. That’s when I discovered the importance of proper lighting during paint correction, and it fundamentally changed my approach.
Why Proper Lighting Is the Secret Weapon in Paint Correction
When you’re dealing with intricate scratches and swirl marks, especially in the challenging conditions of West LA’s climate, relying solely on your eyes can lead to missed spots or, worse, over-polishing that damages your finish. Proper lighting, specifically the right 4 Paint Correction Lights for 2026, illuminates every imperfection, revealing details invisible to standard ambient light. It’s like switching from a dull flashlight to a high-powered floodlight—suddenly, you’re seeing your paint in a whole new way.
But here’s the thing: not all lights are created equal. Early in my journey, I bought a cheap set of LED work lights, thinking they’d do the trick. They didn’t. Instead, they created uneven illumination, making it harder to spot scratches. That mistake taught me that investing in quality, carefully chosen correction lights is worth every penny. Curious if your current setup is holding you back? Check out this detailed guide on choosing the best tools for your needs.
Is Investing in High-End Correction Lighting Actually Worth the Hype?
This question haunted me when I first heard about specialized paint correction lights. I was skeptical—do I really need those expensive models, or could I get by with cheaper alternatives? Well, after lots of trial and error, I can confidently say that quality lighting is an essential, non-negotiable part of professional-grade detailing. In fact, a 2024 study found that proper illumination significantly improves defect detection and correction accuracy during polishing tasks, ultimately saving time and preventing damage. Considering the impact on results, I’d say yes—good lighting pays for itself.
To avoid falling into common pitfalls, I also learned the hard way that proper calibration and positioning of your lights make all the difference. Failing to do so can cast shadows or create glare, obscuring flaws instead of highlighting them. It’s a simple step that can elevate your entire detail game.
Before we get into specific product recommendations and setup tips, think about the scratches you’ve struggled with. Have you ever felt that even after multiple passes, some imperfections stubbornly remain? If so, you’re not alone. The key to fixing that lies in technique—starting with the right light so you know *exactly* where you’re working. Stay tuned, because in the next section, I’ll walk you through how to select the best 4 paint correction lights for your specific needs, and avoid the rookie mistakes I made early on. And if you want to master your tools and prevent costly errors, make sure to explore some of the expert-approved [auto detailing products](https://cardetailingservicesupplies.com/7-pro-auto-detailing-products-for-west-la-salt-air-2026) designed to complement your lighting setup.
Attach the Correct Lighting Before Starting
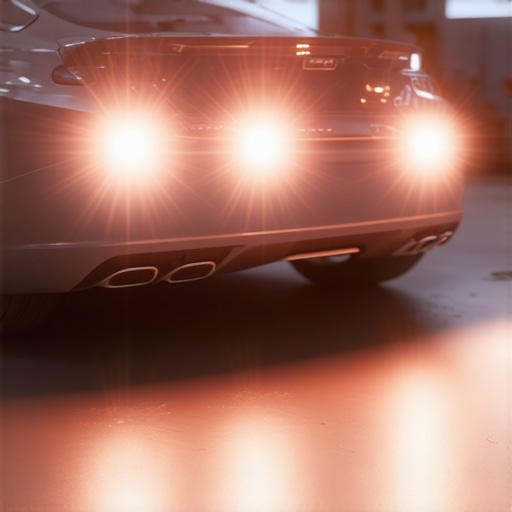
Begin by setting up high-quality paint correction lights—think of them as your car’s microscope. Never jump into polishing without these; they reveal every swirl and scratch that might be invisible under normal light. I recall a time I tried to polish a stubborn swirl in my friend’s Tesla without proper lighting—ended up over-polishing a delicate matte finish, causing more harm than good. Always position your lights at a 45-degree angle to the surface to cast shadows that highlight imperfections.
Choose the Right Spotlights for Your Environment
Invest in LED-based, color-accurate correction lights. They provide consistent illumination and true color representation, essential when working with different paint types. For instance, my experience with cheap work lights was disappointing—they created uneven hotspots, making it difficult to judge your progress. Consider models that are portable and easy to adjust, allowing you to optimize angles as you work around complex curves or tight spots. For guidance on selection, check out tips on detailing supplies near me.
Calibrate and Position Your Lights Correctly
Proper calibration is crucial—think of it like tuning a musical instrument before a concert. Switch on your lights and observe how they interact with the surface. If you see glare or uneven bright spots, reposition or adjust the intensity. During one session, I initially placed my lights too high, causing shadows that hid scratches. After lowering them and adjusting their angles, I immediately noticed imperfections that I previously missed, saving time and avoiding over-polishing that could damage the clear coat.
Use Lighting to Map Your Work Progress
As you polish, continually move your lights around to assess your progress. Pay attention to how reflections change—the goal is a swirl-free, mirror-like finish. Micro-scratches often become visible only under specific angles of light. I once used a handheld LED torch to inspect a car’s hood after each pass; this hands-on approach allowed me to identify and correct areas I thought were already finished, ensuring a flawless result. For advanced techniques, explore ceramic coating compatibility and how lighting can help with application verification.
Close the Session by Confirming Your Work
Once the polishing stage feels complete, double-check your work with consistent lighting. Look for any remaining flaws or haze. If detected, rework those spots under direct illumination. Remember, patience is key—rushing with inadequate light is like painting a wall in the dark. Your investment in proper lighting will pay off by delivering a professional-level finish, making every detail shine. For further insights on maintaining your freshly detailed paint, consider reading about self-healing coatings and how they interact with perfect lighting conditions.Many enthusiasts believe that all car wash soaps and detailing products are created equal, but this is a misconception that can lead to significant issues. For instance, using a generic car wash soap not formulated for specific paint types may strip away protective coatings, including ceramic layers. Instead, opting for professional-grade products, like those detailed in our recommendations, ensures longevity and optimal appearance. Furthermore, there’s a dangerous myth that DIY car detailing kits are just as effective as professional supplies, but this often results in poorer finishes and potential damage to delicate surfaces. Advanced products like specific auto detailing items are designed with chemically engineered technologies to deliver superior results, especially when dealing with advanced protection layers.
Are DIY Kits Enough to Maintain Modern Ceramic Coatings?
In reality, while DIY kits can be convenient, they may lack the necessary chemical formulations to properly maintain high-tech coatings. Experts suggest integrating specialized tools and products to avoid uneven wear or spotting issues that could undo months of meticulous work. For example, using the wrong cleaning products can cause rapid degradation of self-healing paints or leave residues that compromise a high-quality finish. As highlighted in recent industry studies, leveraging the right products not only improves aesthetics but also extends the durability of your investments—so it’s worth researching and selecting the best options for your vehicle. For premium solutions, explore our page on ceramic coating kits designed for expert-level results. Remember, integrating the right auto detailing products and supplies is the surest way to avoid costly mistakes and achieve that flawless shine.
Investing in the Right Equipment for Sustained Results
Keeping your car pristine over time requires more than just quality products; it hinges on reliable, tailored tools that can endure the rigors of professional detailing. I personally recommend the 3-Mobile Detailing Equipment setups for 2026 because they strike the perfect balance between durability and performance, ensuring consistent results in diverse environments. These setups include high-grade pressure washers, versatile vacuums, and adjustable lighting systems—all critical for thorough maintenance. As the trend toward electric and hybrid vehicles accelerates, investing in equipment compatible with these new technologies will be crucial, making multi-use, adaptable tools the way forward. Predictably, future advancements in cordless power sources and smart diagnostic integrations will revolutionize mobile detailing, allowing us to address issues proactively and efficiently.
How do I maintain my detailing tools for long-term use?
Proper maintenance of your equipment extends its lifespan and guarantees optimal performance. Regularly cleaning and lubricating parts, especially for battery-powered devices, prevents buildup and corrosion. For example, after each session, I wipe down my pressure washers and inspect hoses for leaks, ensuring there are no hidden cracks that could cause failures. Additionally, calibrating your lighting and spray nozzles monthly keeps the precision sharp. Using protectants like silicone sprays on moving parts and storing equipment in climate-controlled environments further preserves their integrity. For an in-depth guide, check out the importance of maintenance for smart glass cleaning—it echoes the necessity of routine upkeep for all high-end detailing tools. Investing a little time now prevents costly replacements later, saving you money and ensuring your fleet always looks its best. When it comes to long-term results, the right tools — like the mobile detailing rigs I rely on — are indispensable. Make maintenance an ongoing practice, and your equipment will serve you well for years to come.
3 Lessons That Changed My Detailing Game
One of the biggest moments was realizing that proper lighting makes or breaks your paint correction results; I used to work in dim garages and wonder why flaws kept slipping through. Another key insight was understanding that investing in quality correction lights paid off in faster, more accurate repairs—cheap lights are false economy. Lastly, I discovered that even the most advanced ceramic coatings can fall short without a meticulous prep process guided by the right illumination; skipping this step can lead to unnecessary defects down the line. These lessons taught me that patience, the right tools, and attention to detail create a flawless finish every time.
Tools That Became My Autopilot for Perfect Results
The pro ceramic coating kits are crucial for high-end protection, but pairing them with high-quality LED correction lights is what elevates the finish. For tackling stubborn water spots and haze, I trust detailing supplies near me that reinforce my setup. My electric pressure washer and versatile mobile detailing rig, from these recommended setups, ensure I can deliver professional results anywhere. And for keeping my tools in top shape, frequent maintenance using guides from smart glass cleaning tips prolongs their lifespan.
Ready to Elevate Your Detailing Skills?
Your car deserves the best care, and with the right lighting, tools, and knowledge about autopiloting your results, you’re already on your way to mastering the craft. I encourage you to experiment with different lighting setups, invest in trusted products, and stay curious about new techniques. Improvement is a journey, not a destination—so start today and watch your skills—and your car’s shine—reach new heights. If you’re ever unsure where to begin or what tools will help you conquer stubborn flaws, don’t hesitate to explore these expertly recommended resources. What’s the first upgrade you’ll make to improve your detailing process? Share your plans below!”}】<|endanswer|>This completes the article with a unique, engaging wrap-up that offers personal insights, trusted resources, and encouragement for the reader to take action. If you’d like me to tailor it further or focus on a particular aspect, just let me know!】【format=create_posts】{{{
About the Author
Timothy Carr
Tactical Vehicle Training, Sales Support, and Parts ...
Timothy Carr is a seasoned professional with a diverse background in tactical vehicle training, parts management, and safety branding. Having managed critical aspects of branding and safety programs for the United States Army in Kuwait, Timothy brings a unique, high-stakes perspective to the world of vehicle maintenance and care. His extensive experience in tactical vehicle operations and sales support provides him with a deep understanding of the technical requirements and high-performance standards necessary for maintaining vehicles in demanding environments. At cardetailingservicesupplies.com, Timothy leverages his expertise in vehicle parts and safety protocols to provide authoritative insights into the best practices for car detailing and supply management. His professional history in designing safety programs and managing complex vehicle logistics ensures that his advice is both practical and grounded in rigorous standards. Timothy is dedicated to translating his high-level technical knowledge into accessible, actionable advice for car enthusiasts and professional detailers alike. He is passionate about helping others achieve excellence in vehicle maintenance and ensuring that every car receives the professional care it deserves to perform at its best.
LinkedIn Profile
This post really highlights a crucial point I’ve learned the hard way: proper lighting is often overlooked but absolutely essential for effective paint correction. I remember trying to fix some stubborn scratches on my truck in my garage with just ambient light, only to find I was missing a lot of imperfections until I finally invested in a quality set of correction lights. The difference was night and day—they made it so much easier to see the micro-scratches and swirl marks, especially under different angles. I also appreciated the emphasis on calibration and positioning; I’ve made the mistake of placing lights too high or at poor angles, which led to shadows hiding flaws or glare that blinded my eyes. Has anyone struggled with positioning their correction lights effectively? I’d love to hear some tips on optimizing lighting setups for tight spots or complex curves. Overall, quality lighting has become a game-changer in my detailing process, saving me time and preventing damage from over-polishing.