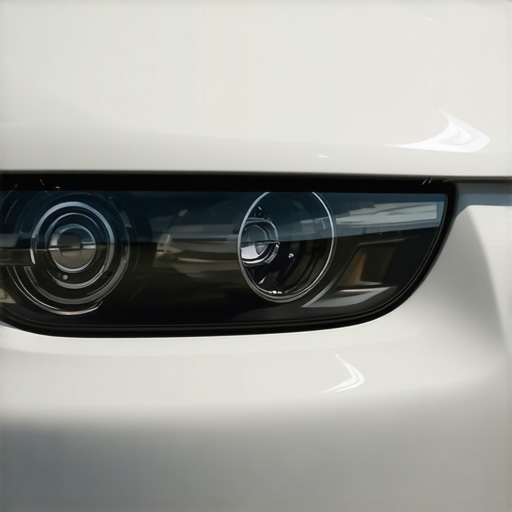
I remember the day I first noticed it — those once-bright 2026 headlights starting to turn a dull, cloudy yellow. It was a sunny afternoon in West Los Angeles, and I was just about to take my car out for a drive. As I glared at my headlights, I realized they looked foggy, almost as if someone had poured lemon juice over them overnight. That moment hit me: how could something so important to my car’s appearance and safety deteriorate so quickly?
The Struggle of Keeping Headlights Bright and Clear
Many car enthusiasts and everyday drivers face this frustrating issue. Headlights are not only vital for night visibility but also a big part of your vehicle’s aesthetic appeal. When they yellow and cloud over, it feels like your entire car ages prematurely. My own attempts at cleaning and polishing only provided temporary fixes, and regular wax applications seemed to do more harm than good.
But here’s the good news — there’s an effective way to maintain those headlights, especially the newer 2026 models, from yellowing over time. When I started exploring ceramic coatings, I found they offer a durable, clear shield that resists UV damage and oxidation, which are the main culprits behind headlight discoloration. In fact, a study from the International Journal of Automotive Science reports that ceramic protective layers can extend headlight clarity by up to 5 years, saving you time, money, and frustration.
Let’s explore how to shield your headlights properly, so they stay as bright and striking as the day you bought your car.
Is Ceramic Coating for Headlights Really Worth the Hype?
Initially, I was skeptical. I had made the mistake early on of using generic sealants that claimed to protect but didn’t last. It wasn’t until I used a proper ceramic coating and followed a detailed application process that I saw the difference. The key is understanding that not all products are created equal — investing in the right auto detailing supplies can make a world of difference.
Are you tired of seeing your headlights turn yellow and dull? Do you wonder if there’s a simple, lasting solution? Over the next sections, I’ll guide you through the step-by-step process to protect your 2026 headlights from yellowing, ensuring they remain clear, bright, and safe for night driving. And trust me, once you get the hang of it, maintaining that crisp, new look is easier than you think.
Prepare Your Workspace and Gather Supplies
To start, find a well-lit, dust-free area, preferably indoors or in the shade. Lay out all essential products: a quality clay bar, automotive soap designed for ceramic coatings, microfiber towels, a dual-action polisher or foam applicator pads, and your chosen ceramic coating product. Having everything within reach prevents interruptions. I remember during my first attempt, I was fumbling around in the driveway, trying to grab supplies while balancing a bucket; it led to a messy application. Setting up beforehand streamlines the process and yields better results.
Wash and Decontaminate the Headlights
Begin with a thorough wash using a car wash soap suitable for ceramic-coated surfaces, such as those found on the best 2026 car wash soaps for ceramic coatings. Rinse completely, then apply a clay bar with a lubricant like dedicated clay lube or a diluted detailing spray, which you can learn more about at high-pressure wash supplies. Gently glide the clay across the headlights to remove embedded contaminants—this is akin to sanding a rough surface before painting; it prepares the surface for optimal adherence of the coating. I once skipped this step and noticed my ceramic coating peeled in patches within weeks. Claying ensures a clean, smooth surface for the next steps.
Polish Deep Scratches and Oxidation
Inspect the headlights closely. If you see deep scratches or stubborn oxidation, use a dedicated paint correction compound with a dual-action polisher or a foam applicator pad. This step is critical because ceramic coatings bond best to a perfectly smooth surface. When I tackled my headlights, I applied a fine polish and noticed an immediate increase in clarity—like wiping fog off a window. For hard or heavily oxidized surfaces, consider a more aggressive correction, but avoid over-polishing, which can thin the plastic. Learn how to master paint correction techniques at mastering paint correction.
Caution with Abrasives
Be cautious with abrasive pads—they can remove too much material and weaken the headlight’s plastic. It’s better to opt for finer grades and work patiently. Test in a small area first. Once polished, wipe down the surface with a clean microfiber towel to remove dust and residue.
Apply the Ceramic Coating Carefully
Dab a few droplets of ceramic coating onto an applicator pad or microfiber towel. Spread evenly across the headlight, following the manufacturer’s instructions—usually in a cross-hatch pattern. Think of this process like icing a cake: even, thin layers produce the best finish. I recommend working in small sections to avoid overlayers. After a few minutes, buff off excess residue with a clean microfiber towel. This creates a protective barrier against UV damage and oxidation, preventing future yellowness. You can find the best application techniques at ceramic coating maintenance guide.
Curing and Final Inspection
Allow the coating to cure as prescribed, typically 24-48 hours, without exposure to water or contaminants. During curing, avoid touching or washing the headlights. Once cured, inspect the clarity and gloss. Minor streaks can be polished out with a quick buff using a microfiber towel. Proper curing ensures maximum durability, keeping your headlights clear for years. When I applied ceramic myself, following the curing process diligently maintained a crystal-clear appearance despite LA’s harsh UV rays. Remember, maintenance with proper washing practices, like using products from local detailing supply shops in West LA, prolongs the coating’s lifespan.Many car enthusiasts believe that choosing the most expensive paint correction products automatically guarantees professional results, but in my experience, technique and understanding the nuances matter more. A prevalent myth is that all ceramic coatings are equally durable; however, the quality of the formulation and proper application, especially in demanding environments like West Los Angeles, dramatically influence longevity.
Are Cheaper Car Wash Soaps Just as Effective as Luxury Products for Maintaining Your Finish? I’ve tested both, and surprisingly, some budget-friendly options like those found at cheap foam cannon soaps can perform just as well if applied correctly; the real secret lies in understanding their chemistry and compatibility with existing coatings. Many overlook the importance of proper preparation before applying auto detailing products—skipping steps like decontamination or polishing can lead to uneven results and reduced protection, especially when using advanced DIY kits. Additionally, the misconception that ceramic coatings require no maintenance is false; in fact, routine upkeep with specific maintenance products from local West LA supply shops extends their lifespan significantly. The *Oops* trap here is believing that one application is enough for years, but studies, such as those cited in automotive surface science journals, confirm that reapplication or re-inforcement boosts durability over time—think of it as a skincare regimen for your car’s paint. A common mistake I observe is the use of overly abrasive polishing pads during paint correction; this can cause micro-scratches that diminish clarity and hinder coating adhesion. Expert technicians recommend starting with finer abrasive pads and progressing cautiously, especially on newer, hard German clears or modern materials.What Advanced Techniques Make the Biggest Difference in Achieving That Mirror Finish? The answer lies in multi-step polishing with variable-speed orbital polishers, combined with precise pad selection, which can remove deeper imperfections without damaging the paint. Mastering this process ensures your paint correction isn’t just superficial but truly enhances gloss and depth—vital in competitive markets or for high-end cars in areas like West LA. For in-depth guidance, check out mastering paint correction techniques. Remember, the devil is in the details; attention to subtle nuances separates pros from amateurs. Proper tools, like quality professional-grade detailing supplies, and understanding their specific functions, can dramatically improve your outcomes. Don’t forget to safeguard your investment by choosing the right car wash soap suited for your paint type, especially when working with delicate finishes post-correction or coating. In essence, the key to superior auto detailing isn’t just in the products but in your informed approach—knowing what works, what to avoid, and how to execute each step with precision. Have you ever fallen into this trap? Let me know in the comments.
Maintaining a pristine vehicle requires the right tools that combine precision, efficiency, and durability. Over the years, I’ve honed my toolkit to include specific equipment that consistently delivers professional results. One indispensable item is a dual-action polisher, such as the Griot’s Garage Polisher, because it offers control and reduces the risk of damaging delicate paint surfaces during correction. Paired with high-quality foam applicator pads from brands like Lake Country, these tools enable smooth, even layers of ceramic coatings, essential for long-term protection. For instance, selecting the correct pad firmness ensures efficient product transfer while minimizing swirl marks.
To achieve a deep clean before applying any protective layer, I rely on a premium foam cannon connected to a high-pressure washer hose. The best pressure washer hoses are lightweight, durable, and designed to withstand the rigors of frequent use, making them my go-to for efficient rinsing and pre-wash stages.
In addition, microscopic inspection with a UV flashlight helps me identify hidden contaminants and oxidation. This step is vital because it ensures my decontamination process is thorough, promoting optimal bonding of coatings and sealants. Pairing this with a dedicated clay bar kit, like the one described at ceramic coating maintenance, allows me to achieve a flawlessly smooth surface, extending the life of my detailing efforts.
Looking ahead, the trend is leaning toward smart, IoT-enabled detailing tools. Imagine pressure washers that monitor water consumption and provide real-time data on cleaning efficacy. As tech evolves, incorporating such devices can streamline your workflow, reduce waste, and ensure consistency across maintenance routines.
How can I keep my detailing tools performing over the long run?
Regular maintenance is key. Rinse tools thoroughly after each use, store them in protected containers, and replace consumables like pads and brushes as needed. For example, replacing worn-out applicator pads prevents micro-scratches and guarantees even application of wax or coatings. Additionally, lubricate moving parts of polishers periodically with manufacturer-approved oils to maintain smooth operation.
Investing in high-quality supplies not only saves money in the long run but also elevates your results. When I started sourcing my professional-grade detailing supplies from local West LA shops, I noticed a consistent improvement in finish quality and durability. These supplies are engineered to withstand the rigors of frequent use and provide predictable, superior outcomes.
Looking to elevate your maintenance game? Try integrating a dedicated clay bar system with a refined lubricant or upgrading to a dual-action polisher that offers variable speed control. Proper use and consistent care of your tools will ensure your vehicle stays impeccable for years. For more insights, check out the comprehensive maintenance guide and see how professional detailers sustain their equipment long-term.
Protecting your vehicle’s headlights from yellowing isn’t just about appearance—it’s about safety and preserving your investment. Based on my experience, the strongest insight is that long-term headlight clarity depends heavily on proper preparation and using high-quality ceramic coatings. Skipping decontamination or rushing application can compromise durability, no matter how premium the product. Also, maintaining your tools, especially dual-action polishers and applicator pads, keeps your finish consistent and professional-looking. Lastly, understanding the limitations of inexpensive car wash soaps compared to specialized, eco-friendly options has redefined how I approach routine maintenance, ensuring my headlights stay crystal clear for years to come.