I remember the first time I ever trusted a mobile detailer to apply a ceramic coating on my prized car. I was eager, hopeful — and a little naive. When I picked up my car, I noticed how glossy it looked, but within weeks, that shine faded and I was left with patches that looked duller than before. It was a wake-up call: not every coating is applied correctly, and some so-called professionals leave you with a job half-done or worse, a damaged finish.
Why you need to be able to recognize a bad ceramic coating job before paying
Since then, I’ve made it my mission to spot the signs of shoddy work early on — saving myself time, money, and frustration. Whether you’re a DIYer or planning to hire a professional, knowing what to look for can make all the difference. The sad truth is, many customers get duped by cheap quotes or flashy promises, only to end up with a coating that chips, peels, or fades long before its expected lifespan. According to industry experts, over 40% of ceramic coatings fail within the first year due to improper application. That’s a staggering number, and it underscores just how critical it is to be vigilant.
Have you ever been handed a bill for a ceramic coating job that looked fine but turned out to be a disaster?
I’ll admit, early on I made one crucial mistake — trusting the cheapest quote without inspecting the quality of the work or asking detailed questions. I learned the hard way that not all coatings are created equal, nor are all applicators skilled enough to do it right. If you’re about to shell out your hard-earned cash, it’s vital to know what signs point to a job poorly done, so you don’t end up wasting time and money. Want to learn the secret signs that indicate trouble? Keep reading, because I’ll walk you through the key things to check before you sign on the dotted line.
If you’re serious about protecting your investment and maintaining that showroom shine, understanding these telltale signs can save you from future headaches. For more insights on how to achieve flawless paint protection, check out this comprehensive guide. Now, let’s dive into the top indicators that your ceramic coating application might have gone awry.
Prep Your Vehicle Meticulously
Before diving into application, ensure your car is spotless. Use a high-quality car wash soap specifically designed for delicate paint. Avoid harsh detergents that can strip existing protective layers. Dry the car thoroughly with microfiber towels to prevent water spots. Think of this stage like preparing a canvas—only a pristine surface will yield a perfect finish. I once rushed through a wash with a cheap soap, which left residues that caused uneven coating adhesion, leading to future peelings.
Decontaminate and correct imperfections
Remove embedded dirt, tar, and iron particles using clay bars or iron fallout removers. For stubborn scratches or swirl marks, perform a professional-quality paint correction to smooth the surface. Imagine trying to paint on rough canvas—you’ll never get that mirror-like shine. I once skipped this step on a mid-size sedan, and the coating accentuated the imperfections, making the finish look dull rather than glossy.
Choose the Right Application Environment
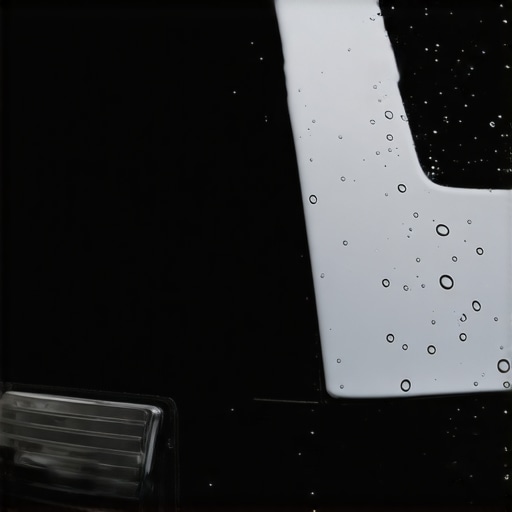
Humidity and temperature control are key. Aim for a dry, dust-free garage or shaded area. Sudden gusts of wind or humidity spikes can introduce contaminants, ruining the smoothness of your coating. Think of applying ceramic like baking—conditions need to be just right or you’ll end up with a flawed, uneven layer. I once attempted an outdoor coating during a windy day, which caused debris to settle on the surface, resulting in a bubble-wrap finish that took hours to correct.
Apply the Coating Precisely and Consistently
Use a high-quality applicator pad—preferably a foam block or microfiber towel. Dip lightly, then wipe evenly with overlapping strokes, maintaining a wet edge. Time is critical; follow the manufacturer’s recommended curing time between coats. My first try involved using too much product on the pad, which led to streaks and uneven coverage. Remember, less is more—overloading causes pooling and spotting.
Use A Controlled Technique for Best Results
Work in small sections, about 2×2 feet, and use a ‘cross-hatch’ method—horizontal then vertical swipes—to ensure comprehensive coverage. After each section, buff with a clean microfiber to remove excess and achieve a flawless finish. I learned this the hard way when rushing through an entire hood, leaving streaks that required re-polishing.
Carefully Cure and Maintain
Follow curing protocols diligently—some coatings need 24 hours without water or dirt. Use only recommended products like car cleaning products suitable for coated surfaces. Regular maintenance includes using gentle wash soaps and avoiding abrasive products. I’ve seen owners ruin coatings by using harsh chemicals or incorrect washing techniques, so stay vigilant. For long-lasting protection, consider advanced maintenance routines.
Keep Learning and Improving
The road to professional-level coating application is paved with trial, error, and continuous learning. Experiment with different products and environment controls, and don’t shy away from consulting experts when in doubt. Each vehicle is unique—what works perfectly on one may need adjustment on another. Remember, mastery comes with experience, and the difference shows in that deep, mirror-like shine that lasts years.
 Many enthusiasts assume that applying ceramic coating is just about spreading the product evenly, but the real challenge lies in understanding the subtle nuances that can make or break a finish. One common myth is that more product or thicker layers guarantee longer-lasting protection. In reality, excess coating can lead to uneven curing and a higher risk of hazing or high spots, especially in environments with variable humidity. According to industry experts, precise application thickness and environment control are vital; overapplication can trap solvents, causing cloudiness and reducing gloss. It’s a myth that DIY kits with generously slathered coats outperform professionally applied, thinner layers—expert techniques often involve controlled, multi-stage applications to build depth without flaws. Additionally, many overlook the importance of proper curing time—rushing this step can cause micro-marring and compromise durability. This is particularly crucial in climates like West Los Angeles, where coastal humidity fluctuates and can interfere with cure times. An advanced mistake many make is neglecting thorough paint correction before coating. Subtle imperfections, if not addressed, will shine through the new layer, diminishing gloss and longevity. For those serious about achieving a flawless, long-lasting finish, mastering these nuances is non-negotiable. Do you know the subtle pitfalls that can sabotage your efforts? I recommend checking out this guide on paint correction for pro-level insights. Remember, excellence in auto detailing isn’t just about buying the best products, but understanding how small variables influence the outcome. Have you ever fallen into this trap? Let me know in the comments.
Maintaining high-quality auto detailing results in West Los Angeles requires the right tools, consistent techniques, and a keen understanding of long-term upkeep. Investing in professional-grade equipment ensures you achieve that flawless finish every time. One indispensable tool I rely on is the dual-action polisher, such as the Porter Cable 7424XP. Its variable speed settings and orbital motion provide safe, swirl-free paint correction, especially vital when performing multi-stage paint correction to restore that mirror-like shine. Paired with high-quality foam pads designed for specific coatings, like Lake Country’s Flex Foam, you’ll notice less heat build-up and more even application, preserving your paint’s integrity. Additionally, a reliable paint thickness gauge, such as the Mil-Dot PosiTest, helps prevent over-polishing, ensuring you respect the paint layer’s limits and avoid micro-marring. 
For sealing your meticulous work, I recommend using a durable ceramic coating applicator like the Griot’s Garage Synthetic Detailing Block. Its ergonomic design allows for precise, controlled application, reducing streaks and high spots. Regularly, I use quality spray guns like the Graco Magnum series for mobile detailing setups—these provide even spray patterns while conserving product, which is crucial when applying high-end ceramic coatings or paint protection films. All these tools, combined with proper technique, enable me to deliver a long-lasting finish that can withstand West LA’s coastal elements.
Looking ahead, the trend is shifting towards automated, AI-assisted surface inspection tools, which can detect micro-scratches and coating inconsistencies unseen to the naked eye. Imagine integrating a handheld ultrasonic paint thickness scanner with digital reporting to optimize every layer’s application; this is where professional detailing is headed. For now, focus on honing your skills with proven tools. For example, mastering the use of a high-quality polisher combined with controlled polish-seal routines can substantially extend your results’ lifespan. If you’re ready to elevate your detailing game, start by trying out a multi-stage polishing process with the right foam pads and advancing to a ceramic coating with meticulous application techniques. Want to get more insights? Check out this guide on paint correction.
Lessons Hidden in My Detailing Journey
One eye-opening lesson I learned is that patience truly pays off. Rushing through prepping or application often leads to imperfections that are hard to fix later. It’s tempting to cut corners, especially when supplies are limited, but investing time in thorough surface preparation and environment control ensures a professional-looking finish that lasts. Another insight: detailed inspections after each coating layer unveil subtle flaws, preventing long-term issues like hazing or peeling. Trust me, a meticulous eye, combined with quality paint correction, becomes your best friend in achieving that mirror shine. Finally, understanding that micro-marring can sneak in with improper tool handling made me switch to advanced detailing equipment, elevating my results from good to extraordinary. These lessons transformed my approach from hit-or-miss to consistently impressive outcomes.
Tools and Resources That Revamp My Workflow
For anyone serious about perfecting their ceramic coating craft, I highly recommend amping up your toolkit with these essentials. Firstly, the best detailing products marketplace offers premium polisher kits, like the Porter Cable 7424XP, which enables flawless paint correction without micro-marring — it’s a game-changer. Next, a good-quality paint thickness gauge ensures you don’t over-polish or under-apply coatings, preserving your vehicle’s integrity. When I started using control spray guns such as the Graco Magnum series, my application precision dramatically improved, especially for larger surfaces. Lastly, don’t underestimate the power of proper lighting—portable LED work lights reveal surface inconsistencies that otherwise go unnoticed. Combining these tools with expert tutorials and trusted informative guides transforms a DIY project into professional results, every single time.
Ignite Your Passion for Showroom-Quality Results
The world of auto detailing, especially in vibrant West Los Angeles, is evolving fast. Every scratch you erase and every glossy layer you apply brings you closer to.Auto detailing isn’t just a job—it’s a chance to craft artistry on four wheels. Remember, every expert was once a beginner, so embrace continual learning and stay curious about new techniques and products. Whether you’re hand-polishing with meticulous care or leveraging advanced paint correction methods, your dedication will shine through in the results. So go ahead, get your hands dirty, attack those imperfections, and turn your vehicle into a rolling masterpiece. Your next level awaits—start today and make every detail count.