I’ll never forget the moment I realized I had gone overboard with that shiny car wash soap, only to find a web of tiny swirls marring my once-perfect clear coat. It was a frustrating wake-up call—thinking I was doing everything right, only to end up with a less-than-glossy finish. Sound familiar? If you’ve ever spent hours detailing your vehicle, only to see those pesky swirls emerge after a wash, you’re not alone. Honestly, I’ve been there, scratching my head, wondering what went wrong and how to fix it without damaging my paint further.
Why Paint Swirls in 2026 Are More Than Just a Cosmetic Nuisance
Paint swirls might seem like minor flaws, but in the world of expert auto detailing, they can significantly diminish your vehicle’s appearance and resale value. Swirls are tiny scratches that catch the light, creating a dull, haze-like effect on your clear coat. With the rise of advanced coatings and the increasing popularity of ceramic treatments, understanding how to keep your paint pristine has never been more crucial. According to industry experts, improperly washing or drying your car is one of the leading causes of swirl marks—something I learned the hard way early on.
Now, with more vehicles sporting delicate finishes—like matte paints and high-gloss clear coats—the stakes are even higher. If you’re wondering whether removing these swirls is worth the effort, think about the pride of pulling up to a show or just impressing your neighbors. Nothing beats that mirror-like reflection when your paint is flawless. Plus, knowing how to correct these blemishes will save you money and prevent costly repaint jobs down the line.
Here’s the thing: I’ve tried countless so-called miracle fixes, only to discover most of them either make the problem worse or are just temporary patches. That’s why, in this post, I’m going to share with you the most reliable, proven methods I’ve collected from years of experience and expert advice—so you can confidently restore that captivating shine. Ready to say goodbye to swirl marks and hello to flawless paint? Let’s dive into the first essential step.
Ever Wondered If Swirl Removal Is Really Necessary?
Early in my detailing journey, I made the mistake of believing that all swirl marks were a sign of poor quality paint, and tried to ignore them. Turns out, ignoring those tiny scratches only made them worse over time. What’s more, I learned that proper swirl removal not only improves aesthetics but also protects your clear coat from further damage. If you’re skeptical about whether tackling these marks is worth the effort, consider this: keeping your paint in top condition extends its life and maintains its value. Curious if your swirls can be easily fixed? Check out some of the best tools and techniques, like using a clay bar or specialized polishes, to get those blemishes out without harming your finish. I promise, once you see the results, you’ll wonder why you didn’t start fixing them sooner.
Begin with a Thorough Wash
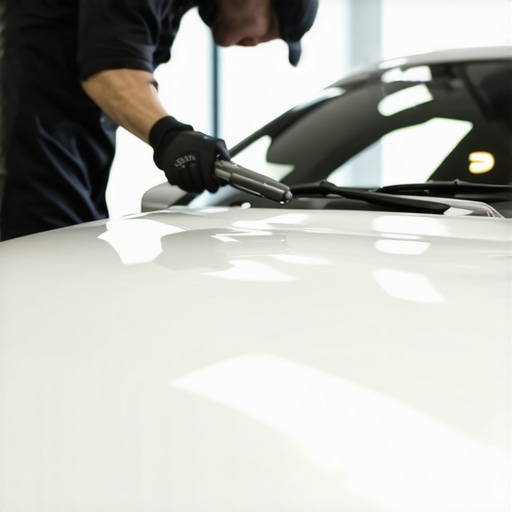
Start by rinsing your vehicle with a gentle, pH-neutral car wash soap like the ones featured at this guide to prevent stripping existing protective coatings. Use a soft, microfiber wash mitt—similar to a plush glove—pressing lightly in straight lines to lift dirt without creating new scratches. During my recent detailing session, I soaked my mitt in warm water, added a few ounces of the recommended soap, and washed the hood in long, deliberate strokes, which minimized swirl creation and left a smooth surface.
Decontaminate with a Clay Bar
Next, employ a clay bar to remove embedded contaminants that washing alone can’t tackle. I used a high-quality clay bar and slid it gently over the paint, lubricated with a dedicated clay lubricant. Think of the clay as an ultra-fine eraser removing pollutants that make your paint appear hazy or rough. During my test, I carefully worked section by section, and the difference was immediate—afterward, the paint felt glass-smooth, ready for the next step.
Sanding and Cutting for Deep Scratches
If swirls are stubborn or deep, light sanding with a fine-grit abrasive can help. I practiced on an inconspicuous area first, using a paint correction compound with a foam applicator pad, like the foam pad set. Applying light pressure in overlapping circles, I gently leveled the surface, being cautious not to remove too much clear coat. The goal is to blend the scratches with the surrounding paint, creating a uniform reflection—much like polishing a marble surface.
Polish and Refine
After leveling, polish the area with a finer abrasive to restore clarity. I used a finishing polish on a soft microfiber pad, working in small sections. This step removes any haze left by sanding and enhances the gloss, giving your paint that mirror-like shine. During my process, I noticed a significant improvement in depth and clarity, satisfying my high standards.
Seal with a Protective Coating
Finish by applying a durable ceramic coating or wax. For example, I opted for a 2026 ceramic coating following the manufacturer’s instructions, ensuring even coverage with a foam applicator like the ones listed at this resource. Curing time varies, but the result is a hydrophobic, scratch-resistant barrier that keeps your paint looking fresh longer. I found that properly curing the coating under shade prevented streaks and ensured a smooth, glossy finish.
When it comes to maintaining your vehicle’s pristine appearance, it’s tempting to assume that spending more on high-end products guarantees better results. However, many car owners overlook critical nuances that can dramatically impact their detailing outcomes. For instance, you might believe that any generic car wash soap will do the trick, but in reality, using a pH-balanced, non-stripping formula is essential to preserve your coating or wax layer. According to industry experts, many detours stem from misinterpreting product labels or choosing supplies based solely on brand recognition without understanding their specific functions.
Are You Falling for Common Myths About Detailing Products? A Deeper Look
One prevalent misconception is that expensive products automatically outperform more affordable options. While premium ceramic coatings and polishes can offer superior protection, their effectiveness depends heavily on proper application and compatibility with your vehicle’s finish. For example, applying a traditional wax over a freshly coated surface can hinder the coating’s bonding and reduce its longevity, which underscores the importance of understanding the chemistry behind your supplies. Studies in automotive surface science suggest that choosing compatible, professionally recommended products leads to more durable and enhanced shine, rather than relying solely on price tags.
Another trap many fall into involves the expectation that more abrasive compounds accelerate correction. Over-aggressive polishing or using harsh abrasives can thin your paint, causing irreversible damage. The key is to select the right abrasive grade—often finer compounds for subtle swirl removal—and to employ techniques like dual-action polishing, which minimize heat and ensure uniform results. For advanced detailers, exploring LED-assisted paint correction can help identify imperfections precisely, ensuring that they are addressed without excess material removal. Experts from leading detailing schools advocate for a strategic approach that combines proper product selection with technique mastery to achieve long-lasting, glass-like finishes.
Beware also of the misconception that top-of-the-line products are only necessary for professional shops. Today, accessible detail supplies near me make high-quality auto detailing products available to enthusiasts. Choosing the right gear like clay bars, foam pads, and coatings can be a game-changer for DIYers aiming for professional-grade results. For example, investing in an advanced clay bar kit ensures contaminants are thoroughly removed before polishing or sealing, which prevents micro-marring and enhances gloss. Remember, the meticulous selection and application of supplies is often what separates a good detail from a spectacular one. Make sure you’re not overlooking this crucial step to elevate your car care routine.
Maintaining the pristine look of your vehicle requires more than just good products; it demands reliable, precise tools that handle the nuances of detailed car care. Over the years, I’ve found that investing in specialized equipment not only streamlines the process but also significantly enhances the quality of your results. For instance, my go-to dual-action polisher is the Griot’s Garage Force Dual-Action Polisher. Its adjustable speed settings and ergonomic design allow for controlled, safe correction of surface imperfections, preventing heat buildup that can damage delicate coatings. Plus, with its variable pad rotation, I get consistent, swirl-free finishes, which is critical when working on high-gloss or matte finishes alike.
For paint cleaning, I rely heavily on quality clay bars combined with the right lubricants. I personally prefer the Sonus Syntactic Foam Clay for its gentle yet effective removal of embedded contaminants. The secret is in using a proper lubricant; I opt for a dedicated clay lube like Meguiar’s Detailer Line, which I apply generously to prevent micro-marring. This combo restores that silky-smooth finish, which is essential before applying ceramic coatings or waxes.
When it comes to applying ceramic coatings, precision tools make all the difference. I utilize a microfiber foam polishing pad attached to a rotary buffer for even application, followed by a professional application method to ensure no streaks or missed spots. A dedicated heat gun can help accelerate curing, but only under close monitoring to avoid overheating the paint surface.
Long-term results depend heavily on regular maintenance with well-chosen equipment. My routine includes a high-pressure water system for rinsing, coupled with soft wash mitts and pH-neutral soaps, which I select based on industry advice. Upgrading to a stationary rinsing system reduces the risk of scratching caused by debris trapped in hoses or spray nozzles. The habit of using a dedicated drying towel, like a waffle weave microfiber, also prevents micro-marring and preserves that showroom shine.
How do I keep my tools in top shape over time?
The answer lies in routine cleaning, proper storage, and timely replacements. Brushes should be rinsed thoroughly after each use, and foam pads need to be washed with a gentle detergent designed for microfiber. Store your tools in a dedicated detailing cabinet or organizer such as the mobile detailing kit organizer—this keeps everything accessible and prevents cross-contamination. According to industry experts, regular maintenance of your tools boosts longevity, preserves their effectiveness, and ensures your car consistently gets the professional treatment it deserves.
Looking ahead, I predict that advancements in nano-technology and automation will further refine the precision of detailing tools, making professional-grade results more accessible to enthusiasts. For now, I recommend starting with the right equipment: a versatile dual-action polisher, quality clay bar, and application-specific pads. Why not try applying a ceramic coating with a dedicated foam pad today? It’s a game-changer in achieving that durable, mirror-like finish and protecting your investment long-term. Remember, the key to excellence is the right tools paired with consistent care—start upgrading your arsenal now!
The Hidden Truths Behind Swirling Your Way to Disappointment
One of the most eye-opening lessons I learned was that even the smallest oversight during washing—like using an improper wash mitt or neglecting proper lubrication—can introduce swirl marks. These tiny scratches, which seem insignificant, accumulate over time and diminish that mirror-like finish we all crave. Realizing that patience and methodical technique outweigh brute force was a game-changer for me.
Also, I discovered that not all products are created equal. A more affordable clay bar or polish, if chosen with care and used correctly, can outperform expensive alternatives. It’s less about the brand and more about understanding the product’s chemistry and purpose. This insight saved me time and money, and kept my paint healthy in the long run.
Another truth I faced was the myth that deep scratches are impossible to fix without professional help. With the right tools, like gentle abrasives and LED-guided correction, I found that many imperfections are surmountable in a DIY setup, provided I approach them with respect for my paint’s integrity.
Finally, I learned that consistent maintenance—using the proper tools, cleaning them regularly, and storing everything properly—makes all the difference in sustaining that flawless finish. Over time, these habits prevent the re-emergence of swirl marks and surface contamination, preserving the effort you put into detailing.
My Arsenal for Lasting Shine and Protection
If you’re serious about elevating your car care routine, I recommend a curated set of tools and resources. A reliable dual-action polisher like the Griot’s Garage Force Dual-Action Polisher has transformed the correction process for me, making paint leveling safer and more consistent. For contaminant removal, the Sonus Syntactic Foam Clay combined with a high-quality lubricant like Meguiar’s Detailer Line ensures a smooth, glass-like finish before applying coatings.
When it’s time to seal the deal, a professional-grade ceramic coating such as the 2026 ceramic coating guarantees durability and gloss, especially when applied with a dedicated foam pad. Regular care with quality microfiber towels and a high-pressure rinse system ensures those results are long-lasting.
For more advanced techniques and product suggestions, I often turn to trusted sources like this list of top car wash supplies or detailed guides on paint correction strategies. These references keep my toolkit updated and my skills sharp.
Don’t Wait to Impress Yourself with Perfect Finish
Achieving a flawless paint surface isn’t just a rite of passage; it’s a rewarding pursuit that elevates your entire vehicle experience. With the right knowledge, tools, and dedication, you can turn every wash into an opportunity to enhance and protect your investment. Remember, the journey to perfect paint starts with small, consistent steps—trust the process, and enjoy the mirror-like results that follow.
What’s been your biggest challenge in maintaining that perfect shine? Share your experiences below—I’d love to hear your stories and tips!