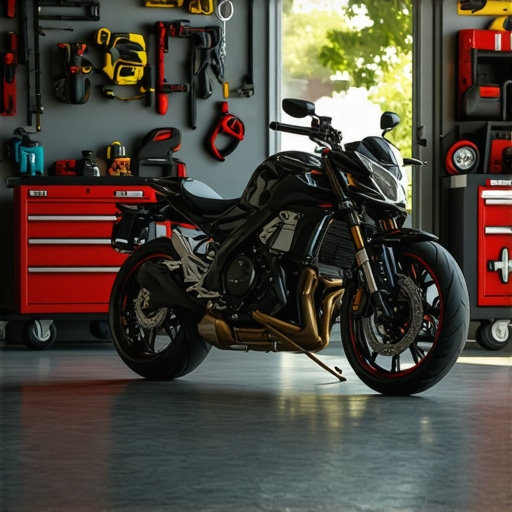
I vividly recall the day I jacked up my motorcycle after a long ride through West Los Angeles, only to be greeted by stubborn dirt and stubborn grime caked in every nook and cranny. No matter how many wash soaps I tried, nothing seemed to restore that shiny, reflective finish I once admired. It was a lightbulb moment for me — I realized that achieving professional-quality results isn’t just about having the right products; it’s about understanding the process and choosing the right DIY car detailing kit for 2026 motorcycle maintenance. If you’ve ever felt this frustration, you’re not alone. Many enthusiasts and first-time owners struggle with transforming their bikes into show-stopping machines without shelling out a fortune or visiting a pricey detailing shop.
Why DIY Car Detailing Kits Will Elevate Your Motorcycle Care Game
In recent years, the market for DIY car detailing kits for 2026 has exploded, offering enthusiasts the tools to deliver professional results right in their garage. The reason? Advances in formulation and technology mean you can now get a mirror-like shine and long-lasting protection without the high price tag. Plus, these kits are tailored specifically for motorcycle surfaces, which often require a gentler touch and specialized products. I started out using generic car wash soaps and quick waxes, only to see my bike’s paint dull within weeks. That’s a mistake I made early on — overlooking the importance of proper preparation and the quality of products used. The good news? By investing in a well-curated modern show-shine kit, I’ve managed to keep my motorcycle looking pristine, even after a dirt-filled weekend ride. Curious if you’re facing similar struggles or doubts about whether these kits really work? Keep reading, because I’ll walk you through exactly what you need to know to jumpstart your DIY motorcycle detailing journey.
Start with a thorough washing session
My first step was giving my motorcycle a deep clean using high-quality car wash soap tailored for motorcycle surfaces. I filled a bucket with water, mixed in a gentle cleaner, and used a microfiber wash mitt, avoiding abrasive materials. I remember pouring water over the bike to loosen dirt, then meticulously washing every nook, paying attention to hard-to-reach areas where grime loves to hide. This initial clean sets the foundation for all subsequent steps, ensuring contaminants don’t scratch the paint during polishing or sealing. Think of it as rinsing the dirt off before polishing a mirror—essential for a flawless finish. After washing, I rinsed thoroughly and dried with a soft microfiber towel, preventing water spots and preparing the surface for protection. Proper cleaning is crucial to avoid trapping dirt under wax or sealant, which can cause swirl marks later.Many enthusiasts believe that simply purchasing premium DIY car detailing kits for 2026 guarantees a flawless finish, but this is a misconception. The truth is, most people overlook the nuanced differences between various car wash supplies and fail to understand how subtle application errors can severely undermine their results. For instance, assuming that all car wash soaps provide equal protection is a myth—specialized formulas are essential, especially when aiming for a high-gloss modern show-shine finish. An advanced mistake often made involves neglecting the importance of pH-balanced auto detailing products. Using alkaline or acidic cleaners can strip protective coatings, leaving your paint vulnerable to environmental hazards. The recommended approach is to opt for pH-neutral professional-grade solutions, which preserve sealants and wax layers, ensuring longevity.
A frequent trap I see in West Los Angeles detailing supplies is relying solely on generic car cleaning products from big-box stores. These often lack the necessary lubricity or lubricants and can scratch surfaces if not used properly. Instead, consider investing in advanced mobile detailing gear that includes pH-balanced shampoos and high-quality microfiber towels. Moreover, many underestimate the importance of correct technique—pressing too hard or using dirty towels can cause swirl marks, even with the best products. Regularly inspect your detailing tools and follow manufacturer instructions meticulously.
For those searching for detailing supplies near me, the quality gap is often stark between local retail options and specialized online providers. While local shops can be convenient, they may not stock the latest auto detailing products designed for high-gloss results. To truly elevate your bike’s finish, consider exploring curated DIY kits for 2026, which are formulated with the latest advancements and expert formulations.
It’s also crucial to avoid the misconception that more product equals better results. Over-application is a common mistake—applying multiple layers of wax or sealant without proper curing time can lead to a cloudy or streaky finish. Instead, focus on correct application techniques and follow recommended curing times, which are often detailed in professional guides. These small but vital details make a significant difference in achieving that mirror-like perfection you aspire to.
Ready to fine-tune your approach? Make sure to double-check your supplies, choose products designed for the specific needs of your motorcycle, and practice proper techniques. Remember, mastering detailing isn’t just about products—it’s about understanding the nuances, avoiding common traps, and executing each step with precision. Have you ever fallen into this trap? Let me know in the comments.
Keep Your Gear in Peak Condition to Sustain Your Shine
Maintaining your car detailing tools is crucial for ensuring consistent, professional results over time. I personally swear by using high-quality microfiber towels, which I wash with gentle, pH-neutral detergents to prevent fibers from breaking down and leaving lint on the paint. For applicators like foam pads and brushes, I recommend inspecting them regularly and replacing worn-out items—using fresh tools prevents swirl marks and scratches caused by trapped dirt. Investing in a dedicated portable work light helps me spot imperfections that might be missed under standard lighting, which is essential for maintaining a flawless finish, especially when working long hours.
For cleaning chemicals, I prefer solvent and wax removers from trusted brands, as these maintain their effectiveness when stored properly—sealed tight and kept in a cool, dry place. Regularly calibrating spray bottles and pressure washers ensures even application and prevents product waste. In my experience, a well-maintained setup reduces the risk of uneven coats or streaks, preserving the integrity of delicate coatings like ceramic seals and paint protection films. To track maintenance schedules, I keep a simple log for each tool, noting cleaning and replacement dates — this small step saves me headaches during a busy detail.
How do I keep my detailing arsenal ready for any challenge?
My secret lies in having a versatile selection of supplies tailored for various surfaces and conditions. For example, I keep a spray-on ceramic coating in my kit for quick touch-ups, which can be applied to paint and plastics for extra protection. Using advanced mirror-shine gear ensures my work remains impeccable even after exposure to elements in West Los Angeles. As auto detailing technology advances, the trend points toward smart, durable coatings that last longer with less upkeep, making my routine faster and more efficient. Incorporating tools like portable steamers and precise water filtration systems also helps keep my environment clean and safe, reducing the buildup of dirt that undermines long-term results.
If you’re looking to elevate your maintenance game, try regularly inspecting and upgrading your tools with models designed for longevity — a small investment that results in significant savings and superior outcomes over time. Remember, a well-kept toolkit isn’t just about appearance; it’s about protecting your investment and ensuring that every car you detail meets the highest standards of quality and durability. Ready to optimize your gear? Start by sharpening your microfiber and applying that advanced ceramic coating on your next session—you’ll notice the difference immediately.
What I Wish I Knew Before Diving into Motorcycle Detailing
One of the most valuable lessons I learned was that patience and attention to detail trump rushing through the process. Early on, I tried to speed up my results by applying multiple coats of wax without proper curing, which actually compromised the finish. Taking the time to follow manufacturer instructions and allowing products to set properly made a noticeable difference. Additionally, I underestimated the importance of specific tools—using old or worn microfiber towels caused micro-scratches that tarnished my bike’s shine. Investing in dedicated, high-quality gear proved to be a game-changer. Lastly, I realized that regular maintenance of my tools—like cleaning and inspecting applicators—was crucial, ensuring every detailing session produced consistent, professional-looking results.