Ever tried to polish and protect your prized leather seats only to end up with streaks, scratches, or worse—completely ruining that once-sleek surface? I remember the frustrating moment when a simple DIY leather cleaning attempt turned into a costly disaster. It hit me then—that I was missing the right tools and knowledge, and my careless approach was doing more harm than good.
Your Vehicle Deserves the Best Care
Some of us are passionate about keeping our cars looking show-room fresh, especially in a city like West Los Angeles where style and image matter. But with so many products claiming to be “the best,” it’s easy to feel overwhelmed or, worse, misled into purchasing the wrong kits. That’s where I learned the value of choosing carefully curated, high-quality DIY car detailing kits for leather—especially ones that actually deliver results without compromising your upholstery’s integrity.
In this post, I’ll share personal insights on what makes a kit truly effective for leather care in 2026, and how to avoid common pitfalls. Whether you’re a car enthusiast or just someone wanting to maintain your daily driver, understanding what to look for can save you time, money, and a whole lot of frustration.
Is DIY Leather Care Actually Worth the Hype?
When I first started out, I made a costly mistake—believing that all leather cleaners are created equal. I used a generic product that was too harsh, leaving my seats dull and cracked. Research shows that using inappropriate cleaning agents can accelerate leather deterioration, especially if the pH balance isn’t right. So, how do you select the perfect kit without falling for marketing tricks? It’s a question I struggled with early on, and I bet many of you have faced the same dilemma. Stay tuned, because I’ll guide you through the essentials for choosing the best DIY kits that actually work, based on real-world experience and expert recommendations.
Preparing Your Workspace and Tools
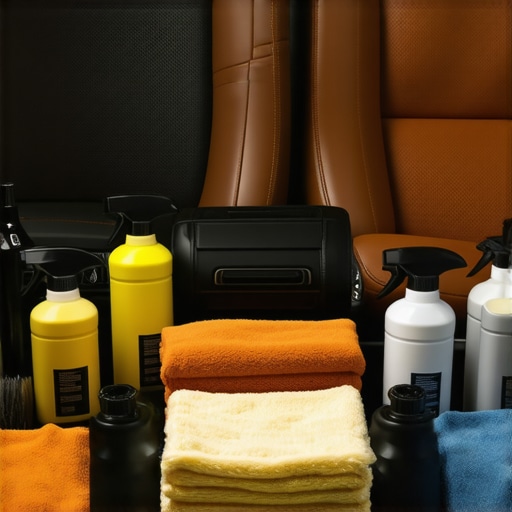
Start by creating a clean, well-lit workspace to avoid dust and debris contaminating your leather. Use a microfiber cloth to remove surface dust gently. Having all your supplies within arm’s reach—leather cleaner, conditioner, a soft-bristled brush, and microfiber towels—prevents unnecessary movement and potential cross-contamination. Remember, just like any precision task, the key is organization.
Choosing the Right Leather Cleaner
Select a pH-balanced, gentle leather cleaner designed specifically for automotive upholstery; avoid harsh soaps that can strip oils. I once experimented with an all-purpose cleaner, but it caused dullness and cracks over time. Instead, opt for products that cut through dirt without damaging leather’s natural oils—check the best DIY kits for leather recommended in 2026.
Applying the Cleaner Effectively
Spray or apply the cleaner onto a microfiber cloth rather than directly onto the leather to prevent oversaturation. Focus on one seat cushion at a time, using gentle, circular motions. I recall a time I over-saturated my seats, and it took days to dry. Keep an eye on the leather’s response—if it feels stiff or sticky afterward, you’re applying too much. Allow the leather to breathe and dry between each step.
Removing Deep Stains or Dirt with Microfiber Mitts
Use a high-quality microfiber mitt to gently lift embedded dirt from pores. Think of it as a soft brush that whispers across the surface, pulling dirt out without abrading the leather. I once used a stiff brush by mistake, which left tiny scratches; switching to a microfiber mitt preserved my seats’ integrity. Focus on consistent, light pressure rather than aggressive scrubbing to prevent damage.
Conditioning for Moisture and Protection
After cleaning, apply a leather conditioner that restores oils and adds a protective barrier. Use a clean microfiber towel to spread the conditioner evenly, working it into the grain. Remember, conditioning isn’t a one-time task; repeat every 3–6 months. I experienced a noticeable difference in suppleness and gloss after conditioning with a product recommended in the 2026 paint correction guide.
Handling Sensitive Areas and Avoiding Mistakes
Be cautious around stitched seams, vents, and edges where leather tends to be thinner. Use a rounded cotton swab dipped in cleaner or conditioner to reach tight spots. In a previous job, I accidentally applied too much conditioner near seams, leading to seepage and sticky residue. Test any new product on a small, hidden area first to prevent uneven results.
Final Touches and Regular Maintenance
Once finished, buff with a soft microfiber cloth to remove any excess and enhance shine. Schedule a quick weekly wipe-down to keep your leather looking fresh. Regular maintenance prevents buildup and prolongs the life of your seats, much like how frequent professional detailing techniques extend vehicle aesthetics.
Many enthusiasts believe that investing in fancy auto detailing products alone guarantees a flawless finish. However, the truth is, most car owners overlook the subtle intricacies that make all the difference—especially when it comes to mobile detailing equipment and DIY car detailing kits. A common misconception is that more expensive tools always lead to better results. While quality matters, understanding the specific nuances—such as choosing the right foam cannon or microfiber towel—can elevate your detailing game significantly.
Let’s challenge a prevalent myth: that standard car wash soap is all you need for a pristine finish. In reality, using the wrong soap, especially those not pH-balanced, can strip protective coatings and weaken your paint’s integrity over time. This is particularly important in West Los Angeles, where environmental factors like coastal humidity and UV exposure demand more tailored paint protection solutions. For instance, opting for a self-healing ceramic coating instead of traditional wax can provide superior durability, but only if applied correctly.
Why DIY Isn’t Always Cheaper—And When It Gets Tricky
Many assume that DIY car detailing is synonymous with saving money. The hidden nuance lies in the advanced mistakes: using improper cleaning agents, neglecting prep work, or underestimating the importance of correct application techniques. For example, applying paint correction compounds without a proper light source like a paint correction light can lead to uneven results or even damage. Overlooking small details, such as cleaning around tight seams with a micro brush, often results in long-term issues. An expert tip: always analyze your process step-by-step, and don’t cut corners just to save time. In fact, rushing through the process can undo the benefits of high-quality DIY kits for ceramic maintenance or paint correction.
Let’s address a question that advanced detailers often ask:
How do I balance product potency with paint safety in complex correction jobs?
Achieving that perfect balance requires understanding the chemical composition of your products and the specific needs of your vehicle’s paint. Using aggressive compounds without proper testing can cause irreversible damage, especially on soft or sensitive clear coats. Regularly inspecting your work under professional-grade paint correction lights can help prevent over-polishing. Additionally, being aware of interactions between chemicals, like how certain polishes react differently on metallic vs. matte finishes, is crucial. For this, consulting detailed guides like paint correction tips for metallic clear coats can be invaluable.
In essence, mastering the nuances—such as understanding the chemistry behind auto detailing products—helps prevent costly mistakes and ensures a professional finish. Remember, successful detailing is as much about precision and patience as it is about quality tools. Have you ever fallen into this trap? Let me know in the comments.
Keeping Equipment in Peak Condition
Investing in quality tools is only half the battle; maintaining them ensures they perform optimally over time. For example, I rely heavily on a dual-action polisher like the Griot’s Garage 6″ Random Orbit polisher, which I personally use for paint correction. Its orbital design minimizes swirl marks and provides a smooth finish, making it a favorite among professionals and amateurs alike. Regularly cleaning the pads and adjusting the polishing speed based on the job at hand prolongs the tool’s lifespan and guarantees consistent results.
When it comes to application, I recommend using a dedicated, high-quality microfibre towel—such as the Chemical Guys Woolly mammoth—that’s designed to withstand frequent washings without losing softness or absorbency. This not only maintains the quality of your finish but also saves you money in the long run by avoiding the need for frequent replacements.
Tools I Recommend for Long-Term Success
For ongoing protection, a high-grade ceramic coating like the self-healing ceramic coatings of 2026 is essential. Applying this with a proper dual-pad process and finishing with a polishing machine such as the Rupes LH19 for precise buffing can significantly enhance durability and gloss. Additionally, for spot paint correction, I prefer a DA polisher with variable speed control, which I set to low for delicate areas and higher for rougher spots.
Another underappreciated tool is a deionized water system, especially in coastal areas like West Los Angeles. It prevents mineral deposits and water spots and extends the life of your equipment—conducting regular maintenance with purified water is a small step that pays dividends. You can learn more about these systems in why professional detailers prefer deionized water.
What about scaling up for larger jobs?
If you’re expanding your operation, investing in portable, high-volume foam cannons with adjustable settings allows you to cover larger surfaces efficiently. I personally use the MTM Hydro Foam Cannon, which produces thick, clingy soap suds—perfect for prepping vehicles before a detailed polish or ceramic application. Pairing it with high-quality car wash soaps, like the ones I recommend for matte finishes, ensures a thorough clean without risking damage or wash marring.
Predicting future trends, I believe that integrated systems combining waterless wash technology with AI-guided detailing processes are on the horizon. This convergence will likely make maintenance more efficient and consistent, especially for mobile operators.
How do I maintain tools and supplies over time?
Routine inspections and proper cleaning after each use are fundamental. Store tools in climate-controlled environments, and replace consumables like pads and mitts when they show signs of wear. Incorporate regular calibration of polishers and sprayers to maintain precision. Remember, a well-maintained toolkit not only extends the lifespan of your equipment but also guarantees top-tier results for every client.
Start by trying one of these advanced maintenance tips, like regularly cleaning your polishing pads with a dedicated pad washer—this small step can dramatically improve the outcomes of your paint correction jobs.
The Hidden Lessons Behind Every Scratch and Glaze
One of the most profound realizations I had in my journey was that mastering car detailing isn’t just about having top-tier equipment or the latest products—it’s about patience, observation, and adapting to your vehicle’s unique needs. I once believed that a shiny finish was purely a matter of product choice, but I learned that consistent technique and understanding your tools can make all the difference. Seeing a once-dull surface transform into a sleek, reflective canvas taught me that attention to detail and a willingness to learn from mistakes are priceless.
Another insight was that even the most expensive paint protection coatings cannot compensate for improper application or neglect. Regular inspections and mindful upkeep preserve that glossy, protective layer for longer. Additionally, I discovered that environmental factors, like West Los Angeles’s coastal humidity, require specific products like deionized water systems, to prevent water spots and mineral deposits, prolonging the life of your detailing efforts.
Perhaps most importantly, I learned that the true value of a well-curated DIY car detailing kit lies in understanding its components and applying them thoughtfully. Quality tools like dual-action polishers and microfiber towels, combined with knowledge, elevate the results far beyond mere aesthetics. It’s about creating a holistic approach—combining products, techniques, and patience to get that professional finish every time.
My Arsenal for Enduring Vehicle Care
Over time, I’ve come to trust several tools that consistently deliver. The best foam cannons of 2026 produce rich suds that lift dirt without risking scratches, while a sturdy set of car cleaning accessories tailored for pet owners simplifies tackle tough grime. For spot-on corrections, a reliable paint correction guide illuminates imperfections that might otherwise go unnoticed. These tools, combined with a good understanding of their purpose, form the backbone of my daily routine, ensuring each vehicle I service stands out with perfection.
I’ve also found that the right glass sealants of 2026 can significantly enhance visibility and safety, especially in humid areas. Applying them correctly seals out moisture and prevents streaks, making everyday driving safer and more enjoyable. This personalized collection of tools and techniques continues to evolve as I stay informed and adapt to new innovations—the key to sustained excellence in mobile detailing.
Step Forward with Confidence and Curiosity
You now have the insights and tools to elevate your car detailing game. Remember, every scratch polished away and every shine restored is a step toward not just a beautiful vehicle, but a deeper understanding of quality and craftsmanship. Start experimenting with new products, refine your techniques, and don’t shy away from challenging areas. Every vehicle you work on is an opportunity to learn and perfect your skills, turning passion into mastery. Dive into these resources, embrace the process, and watch your success grow—one detail at a time.
What’s the next upgrade you’re considering for your car detailing toolkit? I’d love to hear about your plans—drop your thoughts below!