There was a moment during my last car wash that made me realize I’ve been doing it all wrong. I had just splurged on a fancy car wash soap and an array of detailing supplies near me, eager to achieve that showroom shine. As I reached for my old foam cannon, it sputtered and barely produced any foam, leaving me frustrated and questioning if my efforts were even worth it. I remember thinking, “Why does my suds look more like schmear than a lush, bubbly blanket?” That lightbulb moment pushed me to dig deeper into what makes a foam cannon truly effective, especially for thick, luxurious soap suds.
Why Choosing the Right Foam Cannon Matters More Than You Think
In the world of auto detailing, the difference between a good wash and a professional-level shine often comes down to the tools we use. A foam cannon isn’t just a gadget; it’s the gateway to that thick, clingy foam that breaks down grime and saves you time. I’ve tested dozens of models, and believe me, not all foam cannons are created equal. Some struggle to produce the dense foam needed for effective cleaning, especially when dealing with the heavy-duty soaps or ceramic coatings you might want to protect or enhance.
What’s more, with the rise of vehicles sporting paint protection and advanced coatings, using a foam cannon that can generate those rich suds without diluting the soap or wasting product is essential. A well-chosen foam cannon makes all the difference in how well your soap bonds, how long the foam adheres to the surface, and ultimately, how spotless your vehicle turns out.
If you’ve ever been disappointed after investing in a new detailing setup or searching for detailing supplies near me, know you’re not alone. Many enthusiasts and professionals make common mistakes early on, like over-diluting soap or choosing a device that simply doesn’t deliver the thick foam needed for serious cleaning. I made this mistake myself—trying to save a buck and ending up with a cannon that barely produced any foam—so I understand the skepticism about whether the latest models are really worth the hype.
But here’s the thing: selecting the right foam cannon can revolutionize your car washing routine. It’ll help you get those thick, luscious suds that stay put longer and lift dirt more effectively. It’s like giving your vehicle a protective layer of foam that works smarter, not harder.
Today, I’m going to share my insights on the top 4 foam cannons for 2026 that can actually produce those thick, foamy suds we all crave for a professional-quality wash. Trust me, once you upgrade your foam cannon, your car’s appearance and your satisfaction will skyrocket.
Ready to ditch the disappointing sprays and elevate your detailing game? Let’s dive into the features that set these top models apart and help you pick the perfect one for your needs.
Prep Your Workspace and Gather Your Supplies
Start by organizing your detailing toolkit, ensuring you have quality car wash soap, a reliable foam cannon, microfiber towels, and a wash mitt. Think of your workspace as a painter’s studio—clear, tidy, and ready for action. I once tackled a stubborn mud streak on my SUV near West Los Angeles, and having all supplies within reach saved me from a messy, frustration-filled morning. Ensure you have a bucket with clean water, grit guards, and your foam cannon attached properly to your pressure washer.
Dilute and Mix Your Car Wash Soap Correctly
Mix your soap at the right ratio—usually about 1 ounce per 2 gallons of water, but check your product instructions. Proper dilution is like seasoning in a recipe; too much or too little can ruin the wash. I learned this firsthand when I used a super-concentrated ceramic coating soap, which, if over-diluted, won’t cling to the surface, and if too concentrated, can strip delicate paint coatings. Testing different ratios on a small section helps perfect the consistency, ensuring thick, clingy foam that sticks to the car’s surface.
Using a Microfoam Cannon
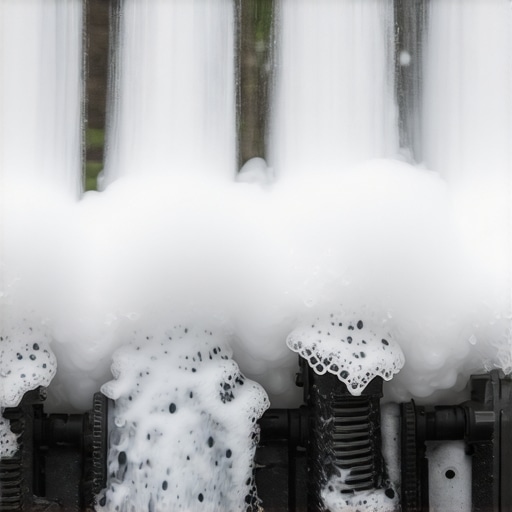
Attach your foam cannon to a high-quality pressure washer—preferably with adjustable pressure settings. Fill the cannon’s bottle with your prepared soap mixture, making sure not to overfill, which can lead to spillage and waste. Tighten securely and test spray on a plastic sheet first to check foam thickness. During my last wash, I set my pressure washer to a medium-high setting, resulting in dense foam that lasted longer, effectively loosening dirt and brake dust. Remember, a good foam cannon is like a thick whipped cream—luxurious, and it sticks around to do its work.

This image shows a well-set-up foam cannon with a properly mixed soap solution, ready for a thick foam application.
Applying the Foam Layer for Effective Cleaning
Spray the foam generously across the entire vehicle, starting from the top and working your way down. The goal is to create a uniform, thick layer of suds—like a whipped blanket—that clings to every curve and panel. Use the foam lance’s adjustable nozzle to control spray pattern and foam density. I once used a cheap nozzle that produced a watery spray, which reduced foam coverage and extended my wash time. Upgrading to a precision nozzle made all the difference, allowing the foam to stay longer and lift grime from deep within the paint’s micro-scratches.
Allow Foam to Work Before Rinsing
Let the foam sit for 3-5 minutes, but don’t let it dry. This dwell time allows the soap to loosen dirt and road grime, including that stubborn bug splatter you might have near the grille. For areas with tough contamination, gently agitate with a wash mitt afterward. During a recent wash, I noticed that letting the foam sit without rinsing immediately prevented dirt from migrating across the surface, and the final rinse revealed a sparkly, clean finish—almost like a mirror.
Final Rinse and Drying Techniques
Use a high-efficiency, soft-bristled auto detailing brush or a dedicated microfiber drying towel to remove excess water. Rinse from the top down, ensuring all foam and loosened debris are washed away. For dry-out, employ a mobile detailing blower like those listed on this guide to speed up the process—especially helpful on sunny days or in tight spaces. My goal during these steps is to avoid water spots and streaks, leaving a pristine canvas for applying paint protection or ceramic coating if desired.
Many car enthusiasts and professionals assume that picking the right auto detailing products is straightforward, but in reality, there’s more nuance than most realize. One prevalent mistake is relying solely on brand reputation or popular search terms like ‘detailing supplies near me’ without understanding the chemistry and compatibility of products with your vehicle’s specific coatings and paint. For instance, choosing a generic car wash soap because it’s affordable might seem practical, but not all soaps are pH-balanced for your car’s paint—using a low-quality soap can strip protective coatings and cause premature deterioration. Instead, opt for pH-balanced products designed explicitly for automotive finishes, such as premium car wash soaps available at your local detailing shop.
Another misconception is believing that ceramic coatings are maintenance-free wonders. In fact, improper application or neglecting proper paint correction prior to coating can lead to poor adhesion and diminished durability. A common pitfall is skipping the paint correction process, which leaves micro-scratches and imperfections that trap dirt and reduce the coating’s effectiveness. For expert advice on achieving long-lasting ceramic durability, review the latest application techniques here. Moreover, some assume that all detailing kits are universally suitable—they’re not. Instead, selecting a DIY car detailing kit tailored to your vehicle’s needs and your skill level can dramatically improve results.
Beware of the so-called ‘quick fixes’—like using cheap polish or abrasive pads—that can actually cause more harm than good. These can lead to swirl marks or uneven paint correction, especially on complex finishes such as metallics or OEM clear coats. Advanced users understand that proper polish selection and proper technique are critical. For example, utilizing high-quality, fine-grit polish in conjunction with a dual-action polisher ensures an even, mirror-like surface.
In my experience, many overlook the importance of compatible detailing tools—brushes, towels, and applicators—that are suited for delicate surfaces like matte finishes or vinyl wraps. Using abrasive tools on these surfaces can cause permanent damage. Instead, invest in specialized products, such as matte paint protectants or vinyl-safe cleaners, found among the best detailing supplies near me.
A vital yet often unrecognized nuance involves water quality; hard water with high mineral content can leave spots even after thorough rinsing. Professional detailers often use deionized water or water filtration systems to avoid this. This small investment can significantly extend the life of your ceramic coating and overall paint protection.
Have you ever fallen into this trap? Let me know in the comments. Let’s keep our vehicles looking flawless by understanding these subtle aspects of car wash supplies and auto detailing products, especially in West Los Angeles where high-end finishes demand meticulous care. Remember, the right supplies and techniques, used correctly, can make or break your detailing results. For advanced tips on applying ceramic coatings or paint correction, check out our comprehensive guides.Maintaining your professional-grade auto detailing setup demands more than just quality equipment; it hinges on proper upkeep and strategic tool choices. Investing in high-end equipment, like the [4-mobile detailing air blowers](https://cardetailingservicesupplies.com/4-mobile-detailing-air-blowers-for-2026-drying-efficiency), ensures efficient drying and reduces the risk of micro-scratches caused by improper drying techniques. Personally, I swear by these blowers because they provide a consistent airflow, which is crucial when you’re working on delicate finishes or ceramic coatings. Regularly inspecting and replacing worn-out brushes, towels, and nozzles keeps your results sharp and prevents cross-contamination, especially when dealing with coatings like [self-healing ceramic coats](https://cardetailingservicesupplies.com/3-self-healing-ceramic-coatings-to-watch-in-2026). I recommend establishing a routine of monthly checks—think of it as maintaining a well-oiled machine, so your results remain top-tier over time.
Lessons That Changed My Approach to Car Detailing
One of the biggest surprises I encountered was realizing how much I underestimated the importance of a quality foam cannon. Upgrading to a model with adjustable nozzles and better foam retention transformed my entire wash routine, saving me time and ensuring a more thorough clean. I learned that thicker foam isn’t just about aesthetics—it’s crucial for loosening dirt without scratching delicate surfaces. This discovery pushed me to experiment with different soaps and pressure settings, leading to a level of detail I hadn’t achieved before.
Another insight was understanding how improper soap dilution impacts foam density and cling. Even the best foam cannon can underperform if the soap isn’t mixed correctly. I now take time to test ratios, ensuring my suds stay thick and sticky longer. This small adjustment significantly improved my ability to lift grime, especially on stubborn areas like wheel wells and grilles. It dawned on me that investing in high-quality detailing supplies near me, like premium soap and compatible nozzles, is just as vital as the equipment itself.
Finally, I realized how critical nozzle adjustments are for controlling foam spray patterns. A simple twist can mean the difference between a uniform, lush layer and a watery mess that quickly drips away. By fine-tuning the spray, I achieved even coverage on complex curves and tight spaces. This experience underscored that mastering the nuances of your foam cannon—beyond just plugging it in—can be the difference between a good wash and a show-quality finish.
My Go-To Resources for Elevated Detailing Results
Besides trial and error, I rely on trusted sources that keep me updated on the latest in auto detailing. For instance, the comprehensive guides on applying ceramic coatings can be game-changers—especially the detailed steps on achieving long-lasting protection, which you can explore here. When researching tools like mobile detailing air blowers, I turn to expert reviews and hands-on comparisons, such as those found on this page. High-quality brushes and microfiber tools from reputable brands have helped me avoid common pitfalls and ensure my work maintains a professional finish.
For in-depth knowledge, books like “The Complete Guide to Professional Car Detailing” have provided insights I still refer back to when refining my techniques. These resources have been invaluable for understanding the chemistry behind products and how best to tailor your approach for different vehicle finishes and coatings.
Take Action and Elevate Your Car Detailing Game
If you’re serious about upgrading your auto detailing routine, start by evaluating your current foam cannon and supplies. Remember, the secret isn’t just in having the latest gear, but in mastering each step—from soap mixing to nozzle adjustments—that brings out that thick, clingy foam we all love. Investing time in learning these details can turn a mundane wash into a satisfying ritual, delivering results that stand out. Don’t forget, the journey toward professional-quality results is ongoing; continuous learning and experimentation are part of the process.
So, what’s one area in your current car wash routine you’d like to improve? Share your thoughts below and let’s elevate our detailing skills together!