Ever spent hours buffing, polishing, and cleaning your car only to realize it still doesn’t have that glossy, showroom-worthy shine? I’ve been there. My first attempt at DIY detailing was a disaster—using the wrong car wash soap, skipping proper paint correction, and rushing through the process. The result? A scratched-up, dull finish that made me question if I’d ever get it right. That lightbulb moment made me realize something crucial: the right supplies can make or break your auto detailing game.
Why Proper Car Detailing Supplies Matter More Than You Think
Choosing quality top car detailing supplies near you isn’t just about having shiny cars on weekends. It’s about protecting your investment and ensuring a professional look. Good supplies like ceramic coatings, premium waxes, and effective cleaning products create a barrier against dirt, UV rays, and scratches. Plus, they save you time and money in the long run. When I started investing in better products, I noticed a dramatic difference in the results, and so did my neighbors who kept asking for my secret.
Is It Really Worth the Hype? My Honest Take
Early on, I bought cheap, generic car wash soaps and skipped primer before applying ceramic coatings. Big mistake. I learned the hard way that not all products are created equal. A poor-quality detailing kit might seem tempting because of the price, but it often leads to streaks, swirls, or worse—damage to your paint. If you’re serious about achieving that mirror-like finish, you need to choose wisely. I recommend exploring DIY car detailing kits that include everything from quality wash soaps to paint correction tools. Trust me, the right gear transforms your car from average to stunning.
So, if you’ve ever felt frustrated with lackluster results or wondered if there’s a secret to that perfect shine, stick around. We’re about to dive into how to select the best supplies near you and turn your car into a true showstopper.
Prepare Your Workspace and Gather Supplies
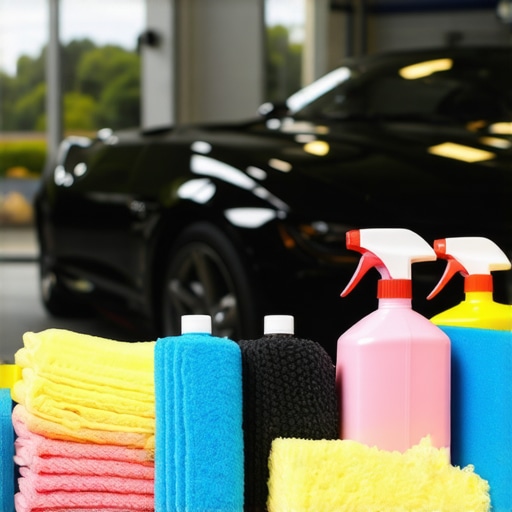
Start by setting up a clean, organized space free of dust and debris, ideally in a well-lit garage or driveway. Gather all necessary car detailing supplies near you such as high-quality car wash soap, microfiber towels, clay bars, and applicator pads. Having everything within reach prevents interruptions and ensures a smooth process. I once tried to detail my car without proper organization, which led to missing tools and a frustrating mess, but now I always prep first.
Wash the Car Properly
Choose the Right Car Wash Soap
Select a gentle, pH-balanced car wash soap designed for your vehicle’s paint. Avoid dish soaps or harsh detergents that strip protective coatings. I remember using dish soap early on, which left my car dull and stripped of wax. Switching to a dedicated soap made a huge difference.
Use Two-Bucket Technique
Fill one bucket with soapy water and another with clean water for rinsing your mitt or sponge. This reduces dirt transfer back onto the paint, preventing scratches. I learned this trick from a professional detailer and it saved my paint from swirl marks during my first DIY wash.
Decontaminate and Clay the Paint
After washing, the surface might still have embedded contaminants. Use a clay bar combined with a lubricating spray or detailer’s clay kit to remove stubborn dirt, brake dust, and environmental pollutants. Think of it as exfoliating your car’s skin. I once skipped this step and noticed tiny imperfections after applying wax—a clear sign I missed decontamination.
Paint Correction to Remove Swirls and Scratches
If your car’s paint is dull or has visible scratches, paint correction is essential. Use a dual-action polisher with a suitable paint correction compound to buff out imperfections. Apply the compound with a foam pad, work in small sections, and keep the polisher moving to avoid heat buildup. My first attempt resulted in a hazy finish, but practicing with a small area and using proper pads improved my results.
Apply Protective Coatings and Wax
Once the surface is smooth and clean, protect it with a high-quality ceramic coating or wax. For DIY enthusiasts, a ceramic coating offers long-lasting protection and gloss, but it requires careful application. Use an applicator pad, apply in a thin, even layer, and allow it to cure as per instructions. I found that applying multiple thin layers yields better durability and shine. For quick protection, a premium wax can be buffed on and off easily, giving your car a beautiful finish.
Detailing the Interior and Final Touches
Don’t forget the interior—vacuum carpets, wipe dashboards, and clean windows with appropriate car cleaning products. Use microfiber cloths for a streak-free finish. A thorough interior cleaning complements the exterior, making your car look freshly detailed. I always finish with a quick spray of protectant on rubber and plastic parts for a uniform look.
By following these concrete steps and using the right supplies, you’ll turn your car into a showstopper. Remember, patience and attention to detail make all the difference in achieving that mirror-like shine you’re after.
Many car enthusiasts believe that all detailing products are created equal, but in reality, this couldn’t be further from the truth. One common myth is that cheaper car wash soap or generic detailing supplies near you will do the job just as well as premium options. However, these products often lack the necessary pH balance or cleaning agents to effectively remove dirt without stripping protective coatings. Investing in high-quality auto detailing products ensures you’re not just cleaning but also preserving your vehicle’s paint and finish.
Another trap many fall into involves the misconception that DIY car detailing kits are enough to achieve professional results. While these kits can be convenient, they often contain subpar items that can cause more harm than good, especially when it comes to painting correction or applying ceramic coatings. For advanced results, you need to pick specialized detailing supplies near you that are designed for professional-grade work.
A significant mistake is overlooking the importance of surface prep before applying protective coatings. Many misjudge the necessity of thorough decontamination and clay barring, thinking these steps are optional. Skipping this process can trap embedded contaminants, leading to uneven coating application and premature paint failure. Always remember, proper prep is the foundation of a flawless finish.
For those venturing into mobile detailing equipment or looking for the best paint protection products, it’s crucial to understand the nuances. Using low-quality products in these areas can lead to uneven application and reduced durability, which is why investing in reputable brands and proper techniques is essential.
Have you ever fallen into this trap? Let me know in the comments. Remember, the devil is in the details, and understanding these nuances can elevate your auto detailing game from amateur to professional.
Maintaining your car’s shine and protection over time requires more than just quality products; it demands the right tools and a strategic approach. As someone who’s been deep into auto detailing, I can attest that investing in durable, professional-grade equipment makes all the difference in achieving and preserving that flawless finish. Whether you’re a DIY enthusiast or running a mobile detailing business, having the right gear ensures efficiency and top-tier results.
Why a Dual-Action Polisher Is a Game Changer
One of my most valuable investments has been a dual-action polisher. Unlike basic buffers, a good quality DA polisher provides even paint correction without risking burn marks or swirl damage. I personally prefer models with variable speed controls and ergonomic grips, which make long detailing sessions more comfortable. For those serious about paint correction, a reliable polisher paired with high-quality compounds (like those found in paint correction gear near West Los Angeles) will elevate your results significantly.
Durable Microfiber Towels and Applicator Pads
High-quality microfiber towels are the backbone of clean, scratch-free detailing. I opt for plush, 70/30 blends that absorb well and are gentle on paint. For applying ceramic coatings or waxes, I recommend dense foam applicator pads that hold product without excess waste. Regularly replacing worn towels and pads is crucial for avoiding scratches and ensuring consistent application. This small investment in quality supplies consistently pays off in the glossy results you want to achieve.
Portable Lighting for Spotless Results
Proper lighting is often overlooked but is essential for inspecting your work, especially during paint correction or applying coatings. A portable LED work light with adjustable brightness helps reveal imperfections that might otherwise be missed. I keep a lightweight, rechargeable LED flashlight in my kit, which allows me to see every detail, even in shaded areas. Good lighting ensures you don’t miss spots and helps maintain professional standards, whether you’re working in your garage or on-site at a customer’s location.
How do I maintain my detailing tools over time?
Regular cleaning and proper storage extend the lifespan of your tools. Rinse and wash microfiber towels after each use with a mild detergent, avoiding fabric softeners that reduce their effectiveness. Keep your polisher’s pads clean and replace them when they show signs of wear. Store all equipment in a climate-controlled area to prevent rust and damage. For accessories like polishing compounds and waxes, always seal containers tightly to prevent drying out or contamination. Following these simple maintenance steps ensures your tools stay effective and ready for the next detailing session.
Looking ahead, I believe the trend toward smart detailing equipment, such as app-controlled polishers and AI-assisted inspection tools, will grow. These innovations will make detailing more precise and accessible for enthusiasts and professionals alike. For now, I recommend trying out a high-quality dual-action polisher paired with proper lighting to truly elevate your detailing game. Remember, the right tools do more than save time—they help you achieve that perfect, long-lasting shine.
The Hardest Lesson I Learned About Car Detailing Supplies, Auto Detailing Products, and More
One of the biggest lightbulb moments in my auto detailing journey was realizing that cheap, generic products often lead to frustration and subpar results. I used to think that a basic car wash soap was enough, but I discovered that investing in high-quality supplies like ceramic coatings and professional-grade waxes truly makes a difference. It’s about protecting your investment and achieving that mirror-like shine that turns heads.
Another lesson was the importance of thorough surface prep. Skipping decontamination and clay barring my car left tiny imperfections that even the best wax couldn’t hide. It taught me that patience and attention to detail in prep are crucial for long-lasting results. Plus, I learned that a good dual-action polisher isn’t just a luxury but a game changer for removing swirl marks and scratches efficiently.
Finally, I realized that lighting and proper organization can elevate your detailing game. Good portable LED lights reveal flaws you might miss otherwise, and keeping your tools organized ensures a smooth, frustration-free process. These insights transformed my approach from amateur to confident DIY enthusiast, and I believe they can do the same for you.
My Essential Toolkit for Auto Detailing Success
Over the years, I’ve come to trust a few key tools and supplies that consistently deliver professional results. My first recommendation is a high-quality car detailing supplies near you that include a dual-action polisher, which saves time and reduces the risk of damage. I also rely on plush microfiber towels and dense foam applicators—these are the backbone of a scratch-free finish.
For surface decontamination, a reputable car wash soap designed for paint protection, combined with clay bars, ensures your surface is spotless before applying coatings. When it comes to protection, I swear by a trusted ceramic coating that offers durability and a glossy finish. These tools have become my go-to arsenal for achieving that perfect auto detail.
Your Turn to Make the Difference
Now it’s your chance to step up your auto detailing game. Whether you’re just starting or looking to upgrade your supplies, remember that the right tools and products are essential for a flawless finish. Invest in quality, take your time with preparation, and use proper lighting to inspect every detail. The results will speak for themselves, and your car will thank you.
What’s the one step in car detailing you find most challenging? Drop your thoughts below—I’d love to hear your experiences and help you get closer to that showroom shine!