I remember the first time I looked at my sleek carbon fiber trim and noticed those tiny scratches and dull patches creeping in. It was like watching my pride and joy slowly lose its shine. Honestly, I felt a surge of frustration—no matter how much I cleaned or polished, I couldn’t seem to stop the deterioration. That lightbulb moment hit me hard: I needed a better way to protect these delicate surfaces.
Why Protecting Carbon Fiber Trim Matters More Than Ever in 2026
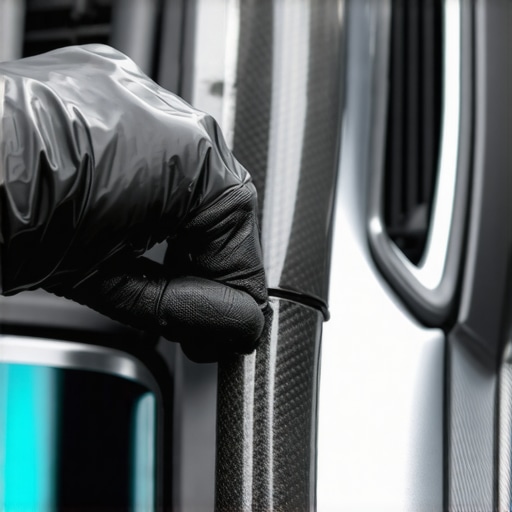
As our vehicles become more sophisticated, so do the materials used to craft their exteriors. Carbon fiber has taken center stage, offering that perfect blend of strength and lightweight appeal. But here’s the catch—those beautiful, high-tech trims are surprisingly vulnerable to UV rays, harsh weather, and everyday wear and tear. Left unprotected, they can rapidly lose their luster, leading to costly repairs or replacements.
Now, I’m not just talking about aesthetics. Carbon fiber, especially in 2026 models, is a premium feature that elevates your vehicle’s look and resale value. Protecting it isn’t just about appearances; it’s about safeguarding your investment. Honestly, I’ve learned the hard way—early mistakes like neglecting proper maintenance can cost you more in the long run.
One quick fact that surprised me: studies show that proper protective measures can extend the lifespan of vehicle finishes by up to 50%. This means investing in the right products now can save you hundreds, if not thousands, later on. And that’s exactly what I want to share with you—the most effective and affordable way I’ve found to shield that precious carbon fiber trim: ceramic spray coatings.
Have you ever faced the heartbreak of seeing your trim fade or get scratched, only to wonder if there’s a way to keep it pristine without constant visits to the shop?
Let me be transparent—I made a mistake early on. Instead of doing thorough research, I relied on quick fixes like household cleaners, which did more harm than good. That experience taught me vital lessons about choosing the right protective products—less is more if you know what to apply and when. For those curious about the best solutions, I highly recommend checking out options like the 3 best 2026 car detailing supplies for chrome polishing—trust me, similar principles apply to carbon fiber care too.
So, what’s next? In the following sections, I’ll walk you through the practical steps I’ve perfected to keep your carbon fiber trim looking new—no more dullness, no more scratches. Ready to give your vehicle the protection it deserves? Let’s dive into the essentials of ceramic spray application and maintenance that truly work.
Prepare Your Workspace and Gather Supplies
Start by cleaning your workspace to avoid dirt and debris, which can cause scratches during application. Lay out all necessary tools: a quality microfiber towel, a foam applicator or clean sponge, a ceramic spray or coating, and optionally, a clay bar and lubricant for pre-cleaning. Having everything organized ensures a smooth process and minimizes mistakes. I remember one time I neglected this step and had to pause midway to find a clean cloth, which resulted in dust settling on the fresh coating.
Deep Clean and Remove Contaminants
Wash your vehicle thoroughly with a gentle, pH-balanced car wash soap—avoid dish soaps as they strip protective layers. Use a clay bar with lubricant to remove embedded contaminants like tar or tree sap, especially on textured carbon fiber surfaces. This step is crucial; a contaminated surface can cause uneven coating adhesion. When I tried this on my last project, I found that skipping the clay made the coating stick poorly, leading to uneven gloss and early degradation. For detailed guidance, check how to remove contaminants without damaging your paint or trim.
Tip: Test your clay bar on a small area first to ensure it doesn’t scratch. Consider using a dedicated clay lubricant to make this step easier and safer.
Apply the Ceramic Coating Precisely
Use a foam applicator or microfiber sponge to apply the ceramic spray in small, overlapping sections. Hold the bottle at a consistent distance (~6 inches) and apply light, uniform coats. Think of this as buttering toast—don’t overload, but ensure coverage. I once applied too much product on one side to speed up the process; this created pooling that was hard to buff out and dried with streaks. To avoid this, work in manageable sections and follow the manufacturer’s instructions carefully. For advanced tips, see the detailed application techniques for ceramic coatings on plastics and trims.
Buff and Level the Finish
After the coating sits for the recommended dwell time (usually 1-2 minutes), use a clean microfiber cloth to buff the area in circular motions until the surface shines. This step removes excess residue and helps level the coating. Don’t rush—patience results in better protection and a smoother appearance. I personally remember rushing through this step and ending with uneven patches that required reapplication later on. Consistent buffing guarantees a uniform sheen and maximized durability.
Allow Proper Curing Time and Maintenance
Let the coating cure in a dust-free environment for at least 24 hours. Avoid washing or exposing your car to harsh weather during this period. Regular maintenance involves gentle washing and periodic reapplication of a spray booster to extend protection, especially in extreme climates. For ongoing care, see the guide on maintaining your 2026 ceramic coating for optimal longevity. Also, consider the benefits of reloading sprays to keep the ceramic layer active without reapplication—this practice can significantly extend the lifespan of your protection layers.
Many enthusiasts jump into DIY car detailing armed with a bundle of products and a can-do attitude, but let’s dig deeper into what often trips people up. One widespread myth is believing that all car cleaning products are interchangeable. In reality, using household cleaners or dish soap instead of dedicated automotive formulas can strip protective layers and damage finishes. This mistake is especially critical with newer ceramics and paints that require specialized care. For example, dish soap is highly alkaline and can degrease your car’s surfaces aggressively, leading to dullness and even micro-etching over time. Instead, opt for pH-balanced car wash soaps designed explicitly for your vehicle’s finish—check out my guide on [spring cleaning car wash supplies](https://cardetailingservicesupplies.com/3-best-2026-car-wash-soaps-for-foam-cannons) for trusted options.
Another common misconception revolves around paint correction. Many believe that more aggressive compounds always deliver better results. But in truth, overusing heavy-cut polishes or sharpening pads can cause irreversible damage, especially on softer, newer clear coats. The secret lies in understanding the paint’s hardness and the appropriate correction technique—sometimes, a mild polish with proper technique yields a better, longer-lasting finish. For advanced tips, see [pro paint correction guides](https://cardetailingservicesupplies.com/5-best-2026-paint-correction-liquid-polishes) to avoid those costly mistakes.
A crucial nuance that’s often overlooked involves ceramic coatings and their maintenance. Many think that once applied, the coating is indestructible. Not quite. Proper maintenance requires regular reloads and correct cleaning practices—using the right auto detailing products and avoiding abrasive tools. Interestingly, many skip this step entirely, thinking their initial application is enough. This misconception can significantly shorten the lifespan of your ceramic paint protection. Want to maximize your coating’s longevity? Dive into [how to maintain your 2026 ceramic coating](https://cardetailingservicesupplies.com/maintaining-2026-matte-paint-the-dos-and-donts) to learn the right upkeep routines.
Now, let’s talk about sourcing supplies. Many look solely for ‘detailing supplies near me,’ but not all local stores carry high-quality, professional-grade products. Lacking the right tools can result in uneven finishes, swirl marks, or streaks. It’s worth investing in reputed brands or ordering from trusted online sources for some of the best [auto detailing products](https://cardetailingservicesupplies.com/top-2026-car-detailing-supplies-for-professional-results). Remember, using subpar materials might save money initially, but it risks costly repairs later. Whether you’re outfitting a mobile detailing setup or a home garage, selecting reliable supplies and equipment makes all the difference.
Finally, adjusting your technique based on the product and surface can save you from unnecessary headaches. For example, applying ceramic spray reloaders in direct sunlight can cause streaks or uneven coverage. Always read the manufacturer’s instructions carefully, and don’t just rely on generic YouTube tips. Sometimes, the advanced nuance lies in the details of application—like the ideal temperature and humidity conditions—especially when working with sensitive electronic trim or specialized paints.
Have you ever fallen into this trap? Let me know in the comments. Mastering these nuances can elevate your DIY detailing from amateur to expert—saving you money, time, and frustration in the long run. Remember, the key is understanding the science behind the products and applying them correctly.
Gear Up for Success with Precision Tools
To keep your DIY car detailing efforts effective over time, investing in high-quality equipment is non-negotiable. My personal go-to is the professional-grade microfiber mitts because they lift dirt gently without scratching sensitive surfaces, ensuring a spotless finish after every wash. Additionally, I rely on a dual-action polisher with variable speeds, which provides control during paint correction and delicate trim polishing, reducing the risk of micro-marring.
For mobile setups, a reliable portable steamer like the high-pressure steam cleaner has transformed my approach—efficiently cleaning crevices and textured trims without excessive chemicals, aligning with eco-friendly practices. Tools like this can adapt to various surfaces, including ceramic-coated plastics and matte finishes, prolonging their aesthetic appeal.
Streamlining Maintenance with Reliable Supplies
Consistency in maintaining your vehicle’s appearance hinges on using tools that deliver predictable results. I recommend regularly inspecting your foam cannon and replacing worn-out nozzles to maintain optimal spray patterns, which ensures thorough coverage without wasting product. Furthermore, employing a dedicated set of microfiber towels for specific tasks prevents cross-contamination and preserves their effectiveness.
Automation tools like digital timers and spray triggers with adjustable settings help me control application thickness, especially during ceramic coating reapplication or paint correction layers. These small but significant investments make a tangible difference in achieving professional-level results and saving time in the long run.
Anticipating Future Trends in Detailing
Looking ahead, I predict that integrated app-controlled devices will become standard, allowing real-time monitoring of coating durability and maintenance schedules. Equipment that seamlessly connects to your smartphone can notify you when reapplication is due, making upkeep more manageable. For now, fine-tuning your tools—the right polishers, sprayers, and cleaning accessories—remains the cornerstone of durable, high-quality results.
How do I maintain my detailing tools over time?
Proper cleaning and storage are paramount. After each session, I rinse all brushes and microfiber towels thoroughly with warm water and mild detergent, then air-dry in a dedicated space away from dust. Regularly inspecting and replacing worn pads or nozzles prevents subpar application that can compromise your work. Also, consider investing in a small ultrasonic cleaner for your metal parts and small instruments; this keeps contaminants off your tools, maintaining their precision and extending their lifespan. For detailed maintenance routines, check out my recommended tools maintenance practices. Ready to upgrade? Try integrating a high-quality dual-action polisher into your kit—it’s an investment that pays off in flawless finishes and reduced correction time. Plus, referencing tech insights from experts like AutoGeek’s tech series can provide deeper understanding for what makes a tool truly stand out in 2026.
What I Wish I Knew Before Diving Into DIY Detailing
- One lesson that hit me hard was realizing that not all protective products are created equal; choosing the right ceramic spray can make or break your finish. I once tried a local brand that promised long-lasting protection but ended up with streaks and uneven coverage. Investing in reputable supplies changed my results dramatically.
- Getting familiar with proper prep work, like clay bar treatments, saved me from applying coatings onto contaminated surfaces, which can cause premature failure. Skipping this step seemed insignificant initially but proved vital in attaining a gloss that lasts.
- I learned that patience during application—waiting the recommended cure time—ensures the coating fully bonds, preventing peel-offs down the line. Rushing this can undo hours of meticulous work.
- Understanding environmental factors, such as temperature and humidity, influenced my success. Applying coatings in ideal conditions yielded a sleek, durable finish, while neglecting these details led to flaws.
- Lastly, I discovered that continued education through trusted resources like the top detailing supplies for chrome polishing and professional guides profoundly elevated my skills beyond basic steps.
Tools and Resources That Make a Difference
- Microfiber essentials—Investing in high-quality microfiber towels and mitts from trusted brands ensures scratch-free washing and buffing, which I consider foundational for any detailing success.
- Portable steam cleaners—My go-to for deep-cleaning textured trims and textured plastic surfaces without harsh chemicals; check out these steamers for professional-grade results.
- Curated guides on maintainance—Courses and articles such as maintaining matte finishes help me adapt my routine as I learn more about specialty coatings and trims.
- Trusted suppliers—My confidence grew when I sourced products from established providers, ensuring quality assurance and consistent performance on delicate carbon fiber surfaces.
- Application tools—From dual-action polishers to precisely calibrated spray triggers, quality tools reduce errors, increase efficiency, and produce a professional look that stands the test of time.
Your Move to Shine Brighter
Taking control of your vehicle’s appearance, especially those polished carbon fiber accents, is an empowering journey. The right knowledge, tools, and habits turn a routine chore into a satisfying craft that preserves your investment in style and value. Remember, every scratch or dull patch is just an opportunity to improve your skills and results. Dive into trusted guides, experiment with quality supplies, and don’t shy away from seeking advice from seasoned detailers. Every effort adds up to that perfect shine that turns heads wherever you go. Ready to elevate your DIY detailing game and keep your carbon fiber trim dazzling in 2026? Share your experiences below, and let’s learn together!