I remember the moment clearly — I had just finished detailing my prized car, only to step back and notice those tiny swirl marks and dull patches glaring back at me in the sunlight. It was frustrating. For years, I believed that perfect, showroom-quality paint was reserved for professional shops with fancy equipment and top-tier training. But that lightbulb moment changed everything: I realized I could get professional results at home with the right techniques and supplies.
Why Staying Ahead of Your Car’s Paint Problems Matters Now
In 2026, car enthusiasts and everyday drivers alike are realizing the importance of maintaining their vehicle’s finish. Why? Because your car’s paint isn’t just about looks — it’s your first line of defense against environmental damage like UV rays, bird droppings, and road grime. Plus, a flawless finish significantly boosts your vehicle’s resale value.
I’ve learned through personal experience that neglecting paint correction can lead to decades-old paint flaws becoming permanent scars. Trust me, I made the mistake early on of rushing through the process without proper prep, which only worsened the imperfections. That’s when I discovered that mastering proper paint correction techniques not only restores clarity and gloss but also extends your clear coat’s life. And you don’t need a professional shop to do it — if you’re willing to invest a little time and the right quality *Car detailing supplies near me*, you can achieve stunning results right in your driveway.
Supporting this approach, industry experts highlight that “advanced paint correction techniques, when properly executed, can rival professional outcomes for weekend detailers” (source: professional painting results at home). But let’s be honest — it’s easy to get overwhelmed. How do you know where to start?
The truth is, a lot of folks jump into paint correction without the necessary knowledge or tools, which can lead to more harm than good. That’s exactly what happened to me — I tried to leap into correction with cheap products, only to find myself chasing imperfections I’d made worse. Recognizing those mistakes early on was key to refining my approach.
So, are you facing the same challenge? Is your car’s finish losing that deep, mirror-like shine? Rest assured, with the right guidance and quality supplies, you can restore your vehicle’s paint to look professionally corrected — and I’ll show you how.
Preparing Your Workspace and Supplies
First and foremost, ensure your workspace is clean, well-lit, and free from dust. A cluttered area increases the risk of introducing scratches during detailing. Gather high-quality car detailing supplies near me, including soap, clay bars, polishing pads, and compounds. I remember a time when I mistakenly grabbed leftover household cleaning sponges, which only smeared dirt and caused micro-scratches. Learning to select proper tools makes all the difference.
Correcting Paint: Breaking Down the Process
Step 1: Wash and Decontaminate Thoroughly
Start with a meticulous wash using a pH-neutral car wash soap. This removes surface dirt without stripping wax or sealant. After washing, use a clay bar (or clay mitt) with a clay lubricant to remove embedded contaminants. Think of clay as a gentle eraser removing stubborn dirt particles that soap alone can’t eliminate, much like I experienced when I removed tree sap buildup caused by city parking.
Step 2: Assess the Damage
Dry the car with a microfiber towel and inspect the paint under good lighting. Look for swirl marks, oxidation, or scratches. Use a paint depth gauge if available to understand paint thickness, especially on softer clear coats. Recognizing the severity early helps you choose the right abrasive (e.g., polishing compound) to avoid removing too much clear or causing new imperfections.
Step 3: Choose the Right Polish and Pad
Pick a polish suited for your paint’s condition. For light swirl marks, a fine-cut polish with a foam finishing pad suffices. For deeper scratches, consider a cut with a more aggressive pad. Remember, applying too much pressure is akin to sanding wood without a plan — it can ruin the finish. I learned this the hard way when I used a rotary polisher on soft paint, creating holograms instead of fixing them.
Executing the Correction
Attach the foam pad to your dual-action polisher. Apply a small amount of polish directly on the pad — about the size of a coin. Turn the polisher on to a low speed and spread the product evenly over a 2×2 foot section, then gradually increase to higher settings. Use overlapping passes with light to moderate pressure, like buffing a coin to a shine, not grinding metal. I once attempted to rush through a panel, which led to uneven correction and a haze — patience is your best tool here.
Polishing and Refining the Finish
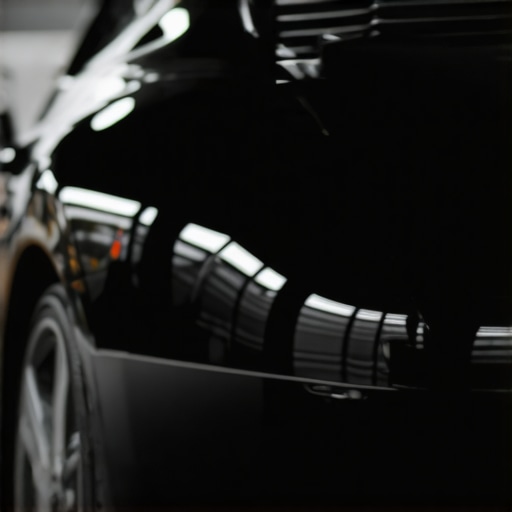
After correction, switch to a softer pad and a finishing polish to enhance gloss. This step is critical to remove any haze left by the abrasive compound. Think of it as the final buffing of a jewelry piece — it reveals that mirror-like shine that turns heads. For best results, consider a ceramic coating or paint protection film afterward to preserve your work and add extra gloss.
Test and Final Touches
Inspect the surface under different lighting angles and use a clean microfiber towel to wipe away any residue. If imperfections remain, repeat the correction process carefully, adjusting the pad or product as needed. Remember, patience during this step is crucial to achieving a professionally corrected finish that stands out in your local detailing supplies near me.
 Many enthusiasts believe that achieving a flawless paint job simply depends on using the most aggressive polish or the latest equipment, but let’s dig deeper into what most people get wrong about paint correction. One common misconception is that harder abrasives always lead to better results. In reality, aggressive compounds can cause irreparable damage, especially on soft or old clear coats. This is why understanding the nuances, like paint hardness and the type of polishing pad used, is essential. Rushing into correction without assessing your vehicle’s specific paint condition can lead to holograms or uneven finishes. For instance, novice detailers often rely solely on brute-force techniques, which not only risks thinning the clear coat but also diminishes its long-term protection. Instead, expert advice suggests starting with the least abrasive options and gradually increasing cut if necessary, as outlined in the detailed guidance at this resource.When you’re serious about achieving a mirror-like finish on your vehicle, having the right tools and maintaining them properly is essential. I personally rely on a high-quality dual-action polisher, like the Griot’s Garage 6-inch Random Orbital Polisher, which offers smooth operation and consistent correction without risking holograms or burns. The variable speed control allows me to dial in the perfect setting for each step, from cut to finishing. For pads, I prefer foam options like Lake Country’s Force series, because their density and shape provide excellent cut and gloss with minimal heat buildup, prolonging the life of my paint job. Using a microfiber polishing pad for the final touches helps in refining the gloss even further. Additionally, I swear by a paint thickness gauge—it’s invaluable for soft or brittle clear coats, ensuring I don’t remove too much material and cause long-term damage. Regularly cleaning and inspecting my tools, especially the pads, prevents buildup that could cause micro-scratches and ensures optimal performance over time. Looking ahead, the trend points toward smart detailing equipment with integrated sensors and AI-assisted correction algorithms, which will make achieving professional-level results even more accessible. How do I maintain my tools over time? I always clean my pads with a dedicated pad cleaner after each use, store my polisher in a climate-controlled case, and replace pads at the first sign of damage or wear to maintain peak performance. If you’re looking to elevate your paint correction game, I highly recommend trying out a high-quality foam pad combined with a dual-action polisher—I guarantee you’ll notice a difference in your results. For supplies and expert strategies, check out the comprehensive tips at this resource.
What I Didn’t Expect About Achieving Flawless Results
One key lesson I learned was that patience truly is a virtue. Rushing through paint correction often leads to mistakes that are costly and time-consuming to fix. I’ve discovered that taking the time to evaluate each section carefully, and adjusting techniques accordingly, results in a much more satisfying finish. It’s tempting to want quick results, especially when you see other polished cars, but careful, deliberate work pays off in the end.
Why Consistent Quality Tools Make All the Difference
Having reliable, high-quality tools isn’t just about better results—it’s about consistency. A good dual-action polisher with variable speed control, coupled with premium foam pads, helps me avoid holograms and swirl marks, especially on delicate or older paint. Investing in proper tools keeps the process smooth and enjoyable, and helps you develop your skills faster. Learn to care for your supplies, as I regularly do, and you’ll notice improvements in your finish over time.
How Tiny Details Elevate Your Finish
It’s often the small touches that set professional results apart. Properly cleaning your pads, inspecting your work under different lighting conditions, and applying finishing polish meticulously can transform a good correction into a show-stopping shine. These little steps require discipline but are worth every effort if you’re passionate about making your car stand out. Remember, perfection isn’t about achieving it instantly—it’s about mastering the craft one step at a time.
Where Experience Meets Equipment
Over the years, I’ve realized that understanding your vehicle’s paint type and history is crucial. Soft or aged clear coats demand a gentler touch and specific compounds, which I now select based on thorough assessments. Top-tier paint correction gear has made my work more precise, but it’s my knowledge and patience that truly drive the results. Check out expert resources to stay updated on the latest techniques and tools.
Turning Skills Into a Personal Art
One of the most rewarding aspects of paint correction is seeing the transformation happen before your eyes. It’s a fusion of science and artistry. As you progress, you’ll develop your unique style—whether you prefer a mirror-like gloss or a deep, rich finish. My advice? Keep experimenting with different products and methods, and take pride in your improvements. You’re building more than a shiny car—you’re honing craftsmanship that can elevate your entire approach to vehicle care.
Curated Resources for Elevating Your Detailing Game
For the tools that make a difference, I recommend exploring advanced foam pads like Lake Country’s Force series, and a dependable dual-action polisher such as the Griot’s Garage 6-inch model—both trusted by professionals and enthusiasts alike. To deepen your understanding, books like this comprehensive guide have been instrumental in shaping my technique. Don’t overlook reliable info sites and forums, where real-world tips from experienced detailers can accelerate your learning curve.
Ignite Your Passion for Perfect Paint
Remember, every polished panel is a step closer to mastering your craft and transforming your vehicle into a masterpiece. Dedicated effort, patience, and the right supplies turn complex processes into enjoyable routines. This journey is about continuous improvement and pride in your work. So, why not start today? Your car deserves to shine at its very best. Are you ready to take on your next paint correction challenge and elevate your auto detailing skills? Share your experiences below—I’d love to hear your tips and triumphs!