I remember the moment clearly. I was beside my driveway, staring at my aging car’s faded paint, feeling that familiar pang of frustration. I had just splurged on a new set of detailing supplies from our local shop, hoping to restore that glossy charm. But after hours of careful washing and buffing, I realized I was still far from the showroom shine I craved. Why? Because I’d underestimated how crucial professional paint correction really is—and whether it was worth that hefty $500 price tag in 2026 dollars.
Why I Questioned the Cost of Paint Correction
That lightbulb moment made me wonder if investing so much in paint correction made sense. Was it really necessary, or just a fancy add-on? As someone who’s always been passionate about keeping my ride in top shape, I started digging into what justifies that price. I find that many fellow car enthusiasts grappling with similar dilemmas often weigh the true value against their budget constraints. It’s a common scenario—spending hundreds on auto detailing products and wondering if the investment will pay off in the long run.
Is Paint Correction Actually Worth the Hype?
Early in my journey, I made a rookie mistake: rushing into a professional service without understanding what it entailed. I assumed that all paint correction offered was superficial gloss. Turns out, a quality correction can remove years of damage, swirl marks, and scratches—giving your car that mirror-like finish everyone envies. According to motor industry experts, proper paint correction can even increase your vehicle’s resale value by preserving its surface quality, which is supported by studies indicating that well-maintained paint jobs retain their value longer (source).
But here’s the catch—there’s a wide range of services and pricing schemes, making it tough to discern if that $500 expense is justified or if I could do it myself on a budget. That’s why today, I want to walk you through what makes paint correction worthwhile and how to decide if it’s right for you—so you can avoid wasted money and achieve the results you truly desire.
Ready to dive into the details? Let’s explore whether giving your car the professional touch is a smart investment or a debate for another day.
Prepare Your Workspace and Gather Supplies
Start with a clean, dust-free environment to prevent debris from scratching your paint during the process. Assemble high-quality auto detailing products such as clay bars, polishers, foam applicators, and microfiber towels. Think of this step as laying out your tools before cooking; organization is key to smooth execution.
Wash and Decontaminate the Vehicle
Thoroughly wash your car using a premium car wash soap to remove dirt, grime, and road salts. Follow up with a clay bar treatment—similar to using a buffer for your skin—to eliminate embedded contaminants. I once tackled this on a weekend project, splattering soap everywhere, but the resultant glassy finish made all the mess worth it.
Assess the Paint Condition and Protect Surroundings
Inspect your paint for swirl marks, scratches, or oxidation. For delicate areas, tape off edges and trim to avoid accidental damage. Similar to protecting your kitchen surfaces when baking, safeguarding non-target areas ensures a focused correction. Use painter’s tape around vulnerable edges, which prevents compound overspray. This step ensures precision and minimizes rework later.
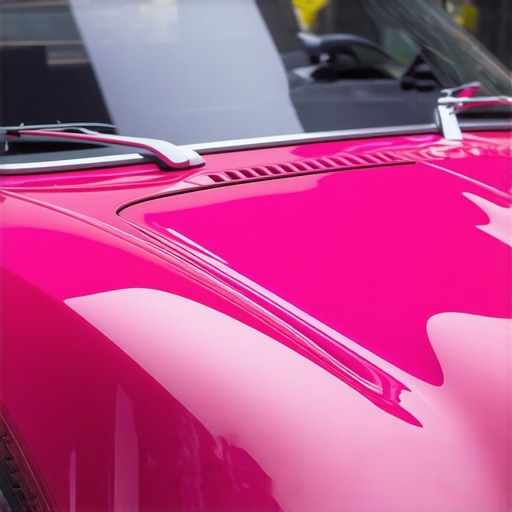
Start with Light Polishing to Remove Swirl Marks
Select a dual-action polisher with a backing plate and a polishing pad suited for your paint type. Apply a few drops of paint correction compound directly onto the pad. Work in small sections, about 2×2 feet, using low speed to spread the compound. Think of this as kneading dough—gentle but firm movements ensure even coverage. I once took on a stubborn swirl mark on my hood; with patience and a bit of elbow grease, it disappeared, revealing a mirror-like surface.
Fine-Tune for a Flawless Finish
After the initial cut, switch to a finer polish to remove haze and refine the gloss. Again, lightly press the polisher into the surface, moving methodically over each section. For best results, switch to a higher-grit compound or polish as needed. This step is similar to polishing shoes—small, deliberate motions create a lasting shine that turns heads.
Assess and Correct Imperfections
Inspect your work under bright lighting. If any swirl marks or scratches remain, reapply polish to those areas with a clean pad. This iterative process is akin to editing photos—sometimes you need multiple passes to achieve perfection. During my last session, a stubborn scratch required a second pass, but it disappeared, giving the paint that professional-level clarity.
Seal and Protect the Fresh Finish
Finish with a high-quality paint sealant or coating. Apply evenly with a foam applicator, letting it cure for the recommended time, then buff to a glossy shine. Think of this as applying a foundation before makeup—protecting your work from environmental damage and preserving the gloss longer. Once sealed, your car will radiate that showroom-worthy glow, as mine did after this final step.
Final Touches and Inspection
Use a microfiber cloth to wipe down the entire vehicle, removing any residual product or haze. Walk around and compare your car’s surface to a mirror—if it reflects images clearly, your paint correction is successful. I recall a time when I overlooked a corner; double-checking revealed a missed spot, reminding me that patience and attention to detail pay off.
By following these precise steps, you’re transforming a basic wash into a professional-grade paint correction. Each phase builds upon the previous, culminating in a finish that not only looks stunning but also protects your investment for the long haul. Dive into the details and get ready to turn heads with a glare that says you’ve got skills.
Many car enthusiasts and detailers assume that simply purchasing popular auto detailing products near me guarantees professional results. However, in my experience, this overlooks critical nuances that can make or break your finish. For example, a common myth is that all car wash soaps are created equal; in reality, using a harsh soap can strip protective coatings and dull your paint over time. A dedicated, pH-balanced car wash soap designed for gentle cleaning preserves both your vehicle’s gloss and its underlying paint correction treatments.
What Advanced Detailers Know About Paint Correction that Beginners Miss
Understanding the intricacies of paint correction involves more than just choosing the right compounds. Applying the wrong abrasive grit or neglecting proper surface preparation can lead to swirl marks or uneven finishes. Many overlook that the choice of auto detailing equipment—like dual-action polishers versus rotary buffers—significantly impacts defect removal quality and paint longevity. For instance, professional-grade tools, like those found in [premium DIY kits](https://cardetailingservicesupplies.com/diy-car-detailing-kits-for-2026-high-gloss-finishes), allow for precise control and better finish quality, especially during complex correction jobs.
Another critical aspect is understanding the importance of paint protection immediately after correction. Using an inferior sealant or coating can result in micro-marring or rapid degradation. Advanced detailers emphasize that proper application techniques and selecting high-quality [paint protection products](https://cardetailingservicesupplies.com/diy-car-detailing-kits-for-2026-advanced-mirror-shine-gloss-results-gear-sets) are essential to maintaining your work’s brilliance.
Avoid falling into the trap of purchasing cheap, generic supplies solely based on location or price. Instead, focus on selecting tailored products suited for your vehicle’s paint type and your desired finish. This approach ensures your investment in quality tools and materials pays dividends in effortless maintenance and stunning results.
Have you ever fallen into this trap? Let me know in the comments. Remember, mastering the nuances of auto detailing isn’t just about money—it’s about understanding the science and art behind every stroke and product. For those serious about elevating their craft, exploring advanced sets like [professional-level kits](https://cardetailingservicesupplies.com/diy-car-detailing-kits-for-2026-advanced-mirror-shine-performance-results-gear-sets) can unlock a new level of mastery, especially in demanding markets like West Los Angeles where competition and environmental factors challenge even seasoned detailers.
Keep It Running: Tools I Recommend for Lasting Results
Proper maintenance of your auto detailing toolkit ensures consistent, professional-quality results over time. Personally, I rely on durable, high-performance equipment designed specifically for the rigors of frequent use. One standout in my arsenal is the advanced mirror shine gear set, which includes a versatile dual-action polisher with adjustable speed controls—ideal for both beginners and experienced detailers. Its ergonomic design reduces fatigue during prolonged sessions and provides precise control, essential for paint correction.
Another critical component is quality lighting. I recommend portable LED work lights like the mobile detailing lights. These offer daylight-balanced illumination that reveals swirl marks and imperfections otherwise hidden under weaker lighting conditions, allowing you to maintain a high standard throughout your detailing process. Proper lighting is becoming increasingly vital as car owners demand showroom-quality finishes that stand out even under variable sunlight conditions.
For cleaning supplies, I prefer bacteriostatic, pH-balanced car wash soap formulated to preserve wax and sealant layers. It’s vital to choose products that are gentle yet effective. Another often-overlooked tool is a high-quality microfiber towel. I opt for ultra-soft, chemical-resistant towels that don’t mar the paint—making them perfect for applying polish and removing debris without introducing new scratches.
To protect your investment, investing in a reliable paint protection product is non-negotiable. I prefer ceramic coatings with nano-technology for durability and hydrophobic properties. Applying this correctly requires precision tools, such as a buffer with variable speed control, which ensures an even, spotless finish.
Looking ahead, the trend is moving toward integrating smart technology with traditional tools. Automated spray systems and app-controlled polishers are likely to become industry standards, streamlining workflow and ensuring consistent application. As a professional, I predict that our equipment will become more adaptable and intuitive, ultimately reducing the learning curve for newcomers.
Wondering how to keep your tools in top shape? Aim to regularly inspect and replace worn pads, brushes, and filters. Proper storage in climate-controlled environments prevents mold and corrosion, extending their lifespan. This simple yet effective routine preserves the integrity of your gear, saving you money and ensuring dependable performance on every project.
Finally, I challenge you to try a professional-grade gear set for your next detailing job. The difference in control and finish quality can be astonishing. With the right equipment, you transform your space into a mobile detailing haven, ready to tackle any paint correction or protection task that comes your way!
What the Expert-Grade Tools Taught Me About Precision
Investing in top-tier polishing gear and high-quality supplies revealed that meticulous attention to detail is non-negotiable. My experience taught me that cutting corners with cheap equipment inevitably compromises results, making the initial investment worthwhile if you aim for a flawless finish. This realization pushed me to seek out trusted resources like the advanced mirror shine gear set, which provides excellent control and durability, essential for consistent paint correction.
The Power of Proper Technique Versus DIY Guesswork
I quickly learned that even with the best products, improper application can sabotage your efforts. Understanding the importance of working in controlled, deliberate motions and respecting the grit progression differentiated amateurs from professionals. My lightbulb moment was realizing that patience and technique trump brute force—something that can be refined by studying detailed guides and tutorials, such as those on trusted auto detailing sources. Remember, your results depend more on how you work than what you use.
Why Attention to Lighting Elevated My Results
Bright, white LED work lights made imperfections immediately visible, allowing me to adjust instantly. This approach prevented oversight and ensured each section received equal treatment. This lesson underscored the value of quality lighting systems like the mobile detailing lights, which can dramatically improve your ability to identify swirl marks and finish flaws during paint correction. Bright lighting isn’t just a tool; it’s an essential partner in your detailing journey.
Learning When to Seek Help—And When to Trust Your Gut
Initially, I hesitated to engage professional services for complex correction tasks, believing I could handle everything myself. But then I realized that knowing when to consult experts or invest in high-end products for stubborn issues often saves time and preserves the paint. For instance, advanced products like high-gloss finishing kits can be game-changers when you understand their proper use. Embracing this balance of self-education and expert input is vital for impressive results.
How My Commitment to Quality Transformed My Perspective
Every step I took to elevate my detailing approach reinforced that quality supplies and techniques produce a lasting, truly professional shine. Whether it’s choosing a gentle yet effective car wash soap or applying refined polishing strokes, these lessons culminate in a surface that feels and looks superior. This commitment not only enhanced my vehicle’s appearance but also reignited my passion to refine my craft continuously.
Are You Ready to Elevate Your Detailing Game?
Embarking on a journey of mastering paint correction requires patience, quality tools, and a willingness to learn. The reward? A mirror-like finish that turns heads and preserves your vehicle’s value long-term. My advice is to regularly explore curated resources like professional enthusiast kits and stay curious about new techniques. The more you invest in understanding what works, the more your results will speak for themselves.
What’s been your biggest challenge in achieving a flawless paint finish? Share your experiences below—I’d love to hear your story and help you troubleshoot those stubborn imperfections.