I remember the first time I applied a 2026 ceramic coating and noticed those stubborn high spots glaring back at me—like tiny mountains marring an otherwise smooth landscape. My hands patted the surface, hoping I could just buff them out effortlessly, but nope—the high spots stubbornly refused to level. It was a lightbulb moment. If you’re into auto detailing, you know how difficult it can be to achieve that perfect, mirror-like finish without those pesky high spots ruining the look.
Why High Spots Can Make or Break Your Car’s Shine
High spots are those areas where the ceramic coating has accumulated or dried unevenly, creating slight elevations that catch the light oddly. Not only do they mar the aesthetic, but they can also compromise the protective qualities of your coating. This is especially critical with advanced formulas like 2026, which promise long-lasting gloss but demand precision during application.
Many enthusiasts overlook these imperfections, thinking a quick buff or cluster of polishing will do the trick. However, if high spots are left unresolved, they can lead to streaks, uneven gloss, and even premature failure of the coating. And believe me, I’ve been down that road—it’s frustrating to reapply layers or, worse, redo the entire process because of avoidable mistakes.
The good news? After lots of trial, error, and genuine testing, I found that troubleshooting high spots doesn’t have to be a daunting, time-consuming task. Instead, understanding the root cause and using the right techniques will set you up for a perfect finish in record time. Want to know how I turned this headache into a straightforward fix? Keep reading.
Is Fixing High Spots Really Worth the Effort?
Early in my detailing journey, I made the mistake of rushing through the coating process without proper surface prep or patience. I thought a quick swipe with my favorite microfiber would smooth out those high spots, but it only worsened the problem. That was a lesson in how critical technique and tools are—skipping steps can lead to more work later. Now, I recommend investing a little time in proper correction methods, like using the right polish or a gentle buff to level uneven spots initially. For a deep dive into effective paint correction, check out this guide on paint correction polishes. This approach saves you from headaches and ensures your ceramic coating performs at its best.
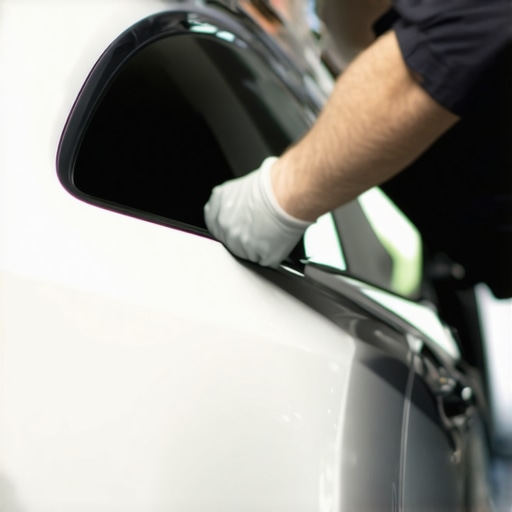
Prepare Your Surface for Flawless Coating
Start with a thorough wash using a premium car wash soap to remove surface contaminants, ensuring no dirt or oils interfere with correction. Follow up with a decontamination step using an iron remover if you’re dealing with embedded iron particles, as these can cause high spots during application. Then, inspect the paint closely under good lighting—spotting high spots early makes correction easier.
Use the Right Tools for Leveling High Spots
Invest in a dedicated polishing machine like a dual-action polisher paired with a suitable pad, such as foam or microfiber, depending on your paint type. Think of it as a fine-tuned scalpel instead of a sledgehammer—precision is key. A common mistake is using a coarse pad or too much pressure, which can create new high spots—so start with light, even pressure and low speed settings for initial leveling.
Select the Correct Polish for Fine Correction
Choose an industry-grade paint correction polish designed for defect removal without harming the clear coat. For 2026 coatings, a compound with micro-abrasives can level high spots effectively. I personally opt for a polish that balances cut and gloss, such as those recommended in this guide. Apply a small amount to the pad, spread over the high spot area, then work in overlapping passes for consistent results.
Target High Spots Systematically
Divide your panel into sections using painter’s tape or masking zones—think of it as dividing a map into manageable territories. Methodically work on each section, focusing on leveling the high spot until it blends seamlessly with the surrounding paint. Keep inspecting under light after each pass, and don’t rush—patience prevents rework and saves time later.
Employ Smart Buffing Techniques
Once the high spot is leveled, switch to a softer pad or a finishing foam to refine the surface. Use light, cross-hatch passes and check your progress frequently. For stubborn high spots, a second correction pass may be necessary. Remember, excess buffing can dull your paint, so always stop when the defect disappears and the gloss is uniform.
Prevent Future High Spots During Application
When applying the ceramic coating, use a proper applicator pad—usually microfiber or foam—pressed gently into the surface. Working in small, manageable sections prevents thickened areas that can turn into high spots. Maintain a steady, even motion and avoid pressing too hard—think of evenly spreading butter on toast, not gouging a cake. Once applied, remove excess coating with a clean, soft microfiber to prevent uneven buildup.
Check and Revisit for Consistency
After curing, inspect your work under different lighting angles. If any high spots are still visible, follow the correction process again, but be cautious with polish and buffing to avoid overdoing it. Using a high-quality correction pad makes this step more effective and reduces the risk of introducing new defects.
 When it comes to auto detailing, many enthusiasts rely on popular beliefs that may not hold up under scrutiny. One widespread myth is that choosing the most expensive car cleaning products automatically guarantees a better finish. In reality, product quality matters, but improper technique and understanding the nuances of your supplies often have a greater impact on results. For example, overusing a high-end car wash soap without correct dilution can lead to streaks and residue buildup, defeating the purpose of the product. Additionally, many assume that just having professional-grade mobile detailing equipment ensures flawless results, but even the best tools need proper handling and maintenance to perform at their peak.
A common oversight involves DIY car detailing kits. While these kits are convenient, they can sometimes contain lower-quality or mismatched supplies that hinder performance. Selecting the right products—like specialized paint correction solutions—requires understanding their specific abrasiveness and suitable applications. For advanced paint correction, relying solely on generic compound options often results in uneven finishes or micro-marring. Experts recommend using dedicated polishing pads and high-quality correction polishes, such as those outlined in this resource, to achieve that mirror-like shine.
Another critical mistake is ignoring the importance of proper surface preparation. Applying ceramic coatings or paint correction products on dirty or contaminated surfaces causes high spots or adhesion failures. Even seasoned detailers sometimes overlook the subtleties of surface prep—like decontamination and precise panel inspection—which are essential for professional results.
The idea that local detailing supplies stores near me offer the best options also deserves questioning. Many local shops stock standard products, but those seeking expert-level results should consider premium supplies and expert recommendations, especially for specialized tasks such as wheel cleaning with wheel Woolies or leather cleaning with proven solutions. Furthermore, understanding the limitations of certain car wash soaps, such as their ability to strip existing coatings or cause micro-scratching, is vital. Regularly updating your knowledge on the latest formulations and application techniques—like those covered in advanced ceramic coating guides—can make all the difference.
Now, let’s address a question some advanced detailers ponder: How do I balance product selection with application methods to avoid common pitfalls? The key lies in aligning high-quality supplies with proper technique. For instance, even the best paint correction polish won’t provide a perfect finish if applied with the wrong pad or insufficient surface prep. Regularly consulting expert tutorials and product compatibility charts helps optimize your workflow.
Remember, a nuanced understanding of your supplies and techniques transforms good results into outstanding ones. Do you ever fall into the trap of assuming that buying top-tier products replaces proper application? Let me know in the comments, and I can guide you through avoiding these prevalent misconceptions in your detailing journey.
Investing in the Right Equipment
Achieving and maintaining a showroom finish demands more than just good products; it requires precise tools designed for quality and consistency. My top recommendation is a dual-action polisher like the Griot’s Garage 6″ Random Orbital Polisher. Unlike cheaper models, it offers controllable speed settings and a smooth operation, reducing the risk of micro-marring during paint correction. I personally prefer it for its balance of power and finesse, which is essential for leveling high spots or performing fine corrections, especially on softer clear coats. Pair it with high-quality correction pads like the 2026 paint correction pads, which ensure even distribution of pressure and minimize heat buildup, prolonging your paint’s lifespan. For high-volume jobs or those with multiple vehicles, a versatile, portable setup like the mobile detailing generator keeps you powered on the go without sacrificing power or efficiency.
Maintaining Your Tools for Long-Term Results
Proper maintenance extends the life of your detailing equipment and guarantees consistent results. Regularly inspect your polishing pads for contamination or fiber degradation and replace them when necessary. Clean your machine’s backing plate and motor vent areas monthly, using compressed air or gentle brushes to keep dust and debris out, which can impair performance and lead to overheating. For electric polishers, I recommend a high-quality hose reel system for easy storage and quick access, ensuring your equipment stays in prime condition. Investing in a dedicated set of microfiber towels for pad cleaning will prevent cross-contamination and micro-marring during polishing sessions. If you’re serious about paint correction, using a dedicated high-quality polish such as the ones outlined in this resource ensures optimal results every time.
How do I keep my tools performing perfectly over time?
Keeping your detailing tools in peak condition involves routine care: clean pads after each use, check for wear, and store equipment in a dry, dust-free environment. Regular calibration of your polisher’s settings also ensures consistent performance and prevents uneven correction or high spots during paintwork. Remember, even the best tools require a little TLC – neglecting maintenance can lead to costly repairs or replacements down the line. As the industry evolves, new innovations like cordless, battery-powered polishers, and smart diagnostic tools are beginning to make their way into professional garages, promising even greater efficiency and precision.
Now’s a great time to try out a tip like maintaining your polishing pads through meticulous cleaning and storage. It’s simple but impactful — a small step toward achieving that flawless, long-lasting shine. Want to see how proper tool maintenance can transform your detailing game? Start with inspecting your current equipment today, and maybe invest in a high-quality polisher if you haven’t already. Your finish will thank you!


Lessons that Changed How I Approach High Spots
- One of my biggest revelations was realizing that neglecting initial surface correction can turn minor high spots into a full-blown repaint emergency. Taking the time to carefully level uneven areas before applying the final coating saves countless headaches later.
- I learned that even experienced detailers sometimes underestimate the importance of proper light inspection post-correction. Using a good LED flashlight and inspecting from multiple angles can reveal imperfections that eyes alone might miss.
- Applying too much pressure or rushing through polishing steps often exacerbates high spot issues. Gentle, consistent motions with quality pads and products make all the difference in achieving a mirror-like finish.
Tools & Resources I Trust for Perfecting My Craft
- The Griot’s Garage 6″ Random Orbital Polisher is my go-to for controlled, safe paint correction. Its adjustable speed and smooth operation help me level high spots without risking damage, which I highly recommend for serious enthusiasts.
- For polishing compounds, I swear by the paints correction polishes outlined in this guide. They strike the perfect balance between cut and gloss, ensuring a professional-grade finish every time.
- My preferred microfiber towels, like those from a trusted supplier listed here, ensure flawless removal of residue without introducing new micro-marring—simple tools, but critical for perfection.
- Additionally, staying updated with expert insights from industry blogs and YouTube channels helps me adapt and refine my techniques continually, keeping my results sharp and reliable.
Ignite Your Passion: Time to Elevate Your Detailing Game
Achieving that perfect, professional look with your ceramic coating is absolutely within reach when you master the art of leveling high spots. Remember, patience, proper tools, and acute inspection are your best allies. Every scratch, high spot, or uneven reflection is a stepping stone toward mastery. Don’t let minor imperfections hold back your full potential.
If you’re ready to push your skills even further, start integrating these techniques today. Your vehicle’s shine—and your confidence—will thank you.
What challenges have you faced with high spots during ceramic coating application? Share your experience below, and let’s learn together!