It was a sunny Saturday afternoon when I finally swung open my garage door, eager to give my car a quick wash before heading out. But as I stepped back to admire my work, my stomach sank. The once-shiny black plastic trim around the windows and bumper looked dull and streaked, like I’d scrubbed it with a dirty rag. Frustration bubbled up—how could I mess up such a simple task? I realized I’d overlooked one crucial detail that kept slipping through my fingers: cleaning the exterior plastic trim. That moment sparked a lightbulb for me. If you’re like me, you’ve probably experienced this too—struggling to get that plastic to look glossy without leaving behind unsightly streaks, especially with all the auto detailing products promising so much but delivering so little.
Why Your Plastic Trim Gets Streaked and How to Fix It
Today, I’ll walk you through the method I finally mastered—one that’s simple, effective, and doesn’t require endless hours or expensive equipment. When I first tried to clean those stubborn plastic parts, I made a common mistake: using regular car wash soap or general cleaners not designed for plastic surfaces. That’s like trying to scrub a stain with a toothbrush—inefficient and often damaging. The truth is, the right product and technique make all the difference. Proper cleaning not only improves your car’s appearance but also prolongs the life of your trim, keeping it protected from UV damage and oxidation. Want to restore that factory-fresh look? Stick around because I’ll share exactly what worked for me, including some pro tips and trusted products. And if you’ve ever wondered whether new cleaning methods or products are worth the investment, I’ll address those doubts too. By the time you finish reading, you’ll have the confidence to tackle your exterior trim without worrying about streak marks or dullness. Trust me, I’ve been there—and now, I want to help you avoid the same pitfalls.
Select the Right Products for Plastic Trim Revival
Begin by choosing a cleaning product specifically formulated for exterior plastic trim. Avoid generic car wash soaps, which can leave residues or streaks. Instead, opt for a dedicated plastic cleaner or a detailing spray that’s designed to penetrate grime without damaging the material. Think of it like choosing a gentle exfoliant for your skin—effective but not abrasive. I remember using an all-purpose cleaner that left my trim worse—streaked and dull—until I switched to a product recommended in several auto detailing communities. For the best results, consider products like those found at auto detailing products for glass hydrophobics that are safe for plastics.
Prepare Your Workspace and Gather Supplies
Set up in a shaded area or garage—UV rays can cause new streaks or uneven drying. Gather microfiber towels, a soft detailing brush for crevices, a foam applicator, and a plastic-safe degreaser if the trim is heavily soiled. Microfiber towels work like gentle squeegees—removing dirt without scratching. Remember, having the right tools is essential; using a stiff brush might damage the surface or leave unwanted scratches. I learned this the hard way when I used a scrub brush, which made the surface look worse. For advanced cleaning, consider portable steamers from mobile detailing equipment, which can loosen grime in hard-to-reach areas.
Deep Cleaning the Plastic Surface
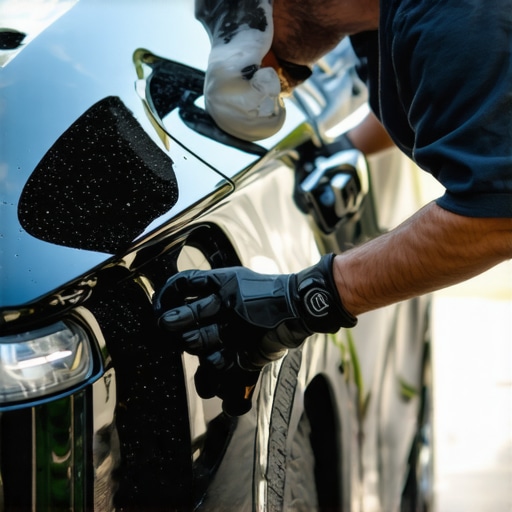
Start by rinsing the area with water to remove loose dirt. Then, dilute your chosen plastic cleaner—usually a few ounces of concentrate in a spray bottle—and spray liberally across the trim. Use the soft brush to agitate stubborn grime, focusing on crevices and textured parts. Think of this step as exfoliating; it removes the surface contaminants that dull the plastic’s appearance. I once spent half an hour scrubbing with a stiff brush before realizing a gentle approach with a soft brush and cleaner yielded a better shine, especially on textured surfaces. Take your time and avoid harsh scrubbing to prevent damage.
Drying and Removing Residues
After cleaning, rinse thoroughly with water to wash away residue. Use a microfiber drying towel—like the ones designed for large SUVs—patting gently to absorb moisture. This prevents water spots and streaks from forming during evaporation. A crucial tip is to dry the area completely, as residual water can cause streaks or mineral deposits if left to evaporate on its own. When I finally used a microfiber drying towel from microfiber towels for large SUVs, the difference was night and day. The classic approach of air drying often resulted in streaky finishes, especially under direct sunlight.
Applying a Plastic Protectant for Long-Term Shine
Finish by applying a high-quality plastic protectant or dressing. This not only enhances the gloss but also creates a barrier against UV rays and environmental contaminants. Apply the product with an applicator pad or microfiber cloth, working in small sections. Think of this as applying a moisturizer—your trim looks refreshed instantly, with a slick, uniform appearance. For best protection, choose products that are biodegradable and free from silicones, like those recommended at DIY ceramic maintenance kits. I found that a light, even coat prevents streaks and prolongs the sleek look I was aiming for. Remember, less is more—overapplication can lead to a greasy or streaked appearance, defeating the purpose of your efforts.Many enthusiasts believe that investing in expensive auto detailing products guarantees a perfect finish, but in my experience, technique and understanding nuances matter more. A frequent misconception is that all car wash soaps are created equal; however, using generic cleaners not formulated for specific surfaces can cause damage or streaks—something I learned the hard way. For example, many overlook the importance of choosing pH-balanced cleaning agents, as highlighted by industry experts. This oversight can lead to dull finishes or premature aging of paint and trim. Another trap is overusing or misapplying paint correction liquids; less is often more, and applying excessive product can worsen scratches or hazing. It’s crucial to follow manufacturer instructions meticulously and to use the right tools—such as high-quality polishing pads or clay lubricants—to avoid marring delicate surfaces. When it comes to detailing near me or professional-grade equipment, understanding the advanced features of portable steamers or dual-action polishers can significantly elevate results, but only if used correctly. An underrated aspect is the proper maintenance of your supplies, which prolongs their effectiveness and prevents cross-contamination. For instance, cleaning microfiber towels thoroughly and storing chemicals correctly are simple steps that prevent streaking or adverse reactions during application. Make no mistake—picking the best car cleaning products doesn’t mean much if you don’t master advanced techniques or avoid common pitfalls. For comprehensive guidance, check out detailed resources on paint correction, such as paint correction liquids. Remember, in detailing, the devil truly is in the details. Have you ever fallen into this trap? Let me know in the comments.
Keeping Your Equipment in Top Shape
Investing in quality auto detailing tools is just the beginning; maintaining them ensures peak performance and longevity. Regular inspection of your mobile detailing equipment, such as portable steamers from this collection, helps identify wear and tear early. Clean your brushes and apply lubricant to moving parts following the manufacturer’s guidelines to prevent rust and operational issues. Proper storage in a dry, organized space further extends their lifespan, reducing the need for frequent replacements and saving you money in the long run.
Tools I Personally Recommend and Why
One of my go-to devices is a dual-action polisher like the PortaPolish X2. Its variable speed settings and ergonomic design make paint correction more precise and less fatiguing. For inspecting exterior surfaces, I depend on a high-quality LED light, which reveals imperfections even in shaded areas. When it comes to cleaning, I swear by acid-free, biodegradable car wash soaps like these premium formulas, because they maintain coatings and prevent streaks.
Future Trends in Detailing Tools
Automation and smart technology are starting to influence auto detailing supplies markedly. Expect to see more AI-driven cleaning devices capable of adjusting their operation based on surface analysis, drastically reducing human error. Additionally, portable equipment with integrated data logging could become standard, offering insights on product usage and surface conditions. Staying ahead means embracing these innovations—consider experimenting with smart sprayers or app-controlled polishers to streamline your workflow and achieve more consistent results.
How do I keep my tools working effectively over time?
Proper maintenance involves cleaning tools after each use, replacing worn pads promptly, and storing everything in climate-controlled environments. For example, regularly replacing your vacuum systems filters prevents clogging and ensures optimal suction. Periodic calibration and testing of your polishers and sprayers can catch issues early before they impact your work quality. Remember, your tools are an investment—treat them like one, and your results will reflect that commitment. For your next upgrade, try a professional-grade clay lube sprayer; it’s a game-changer for ease of use and surface safety, backed by industry experts. Properly maintained gear not only saves money but also ensures consistent, high-quality results that keep clients coming back.
The Hardest Lesson I Learned About Car Detailing Supplies, DIY Car Detailing Kits, Detailing Supplies Near Me, Auto Detailing Products, Car Cleaning Products, Paint Correction, West Los Angeles Detailing Supplies, Mobile Detailing Equipment, Car Wash Soap, Car Wash Supplies
One of my most surprising realizations was how crucial surface preparation is before applying any protective coat. I once skipped a thorough cleaning and paid the price with streaks that wouldn’t budge—proving that even the best products can’t compensate for poor prep. Patience in surface prep is a virtue that can make or break your finish.
I also discovered that not every detailing product is created equal. Some cheap protectants might be tempting, but they often cause hazing or streaking, especially on textured plastics. Investing in quality dressing products pays off in long-term shine and durability.
Finally, I learned that consistent maintenance keeps plastics looking sharp. Regularly cleaning and reapplying protectants prevents dullness and UV damage—think of it like skincare for your vehicle. Trust me, a little ongoing effort yields a lasting glossy look that turns heads.
My Essential Toolkit for Plastic Trim Revival
Here are my go-to tools and resources that have transformed my detailing routine:
- Auto detailing clay and lubricant — for removing embedded contaminants that can cause streaks.
- Microfiber towels — soft, non-abrasive, perfect for delicate wiping.
- High-quality plastic protectants — to restore and shield the surface effectively.
- Specialized plastic cleaners — formulated specifically for exterior trim, ensuring safe and effective cleaning.
These tools, combined with learned techniques, have saved me hours and improved my results exponentially. Remember, the right toolkit paired with patience makes all the difference in achieving that showroom finish.
Keep Your Passion Alive and Your Car Shining
Taking the time to master plastic trim cleaning and protection isn’t just about aesthetics; it’s about taking pride in your vehicle. Every successful detailing session boosts confidence and reveals your dedication to excellence. So, whether you’re a seasoned pro or just starting, I urge you to embrace the process—it’s incredibly rewarding.
Our cars are more than transportation; they’re reflections of ourselves. When you see that lush, mirror-like plastic trim, you’ll feel proud knowing you’ve nailed it. Keep experimenting, ask questions, and don’t shy away from trying new products—growth comes from effort and curiosity.
Your Turn to Try
Are you ready to elevate your plastic trim restoration game? Or maybe you’ve faced challenges you’ve yet to conquer? Share your experiences below—let’s learn from each other and keep our vehicles looking spectacular!