Ever spent hours trying to buff out a stubborn scratch or bring that faded paint back to life, only to be disappointed with the shiny results? I’ve been there—trust me, nothing’s more frustrating than investing time and effort into DIY car detailing, only to end up with a mediocre finish. It’s like trying to paint a masterpiece with a crayon—disappointing and wasteful.
Why DIY Car Detailing and Paint Correction Matter More Than Ever
When I first started exploring the world of car care, I thought I could save money by DIYing everything. Turns out, I was making rookie mistakes—using cheap products, skipping proper prep, and rushing the process. Not only did my paint look worse, but I also wasted valuable time and money. It was a lightbulb moment when I realized that having access to the right paint correction supplies near me could make all the difference. Today, I want to help you avoid the pitfalls I encountered and show you how to get professional results without leaving your driveway.
Is DIY Car Detailing Actually Worth the Hype?
Honestly, I used to wonder if all the hype about DIY car detailing was just marketing fluff. Early on, I bought cheap polishes and skipped proper surface prep. The result? Swirl marks, uneven finishes, and a frustrated wallet. The truth is, with the right tools and products—like those available in top DIY car detailing kits for 2024—you can achieve a stunning shine that rivals professional work. It’s all about knowing what works and where to find quality supplies nearby. For example, using a high-quality ceramic coating can provide long-lasting protection—something I wish I had known earlier. It’s no exaggeration to say that a good kit can transform your car’s appearance and save you a fortune in the long run.
So, if you’ve ever felt overwhelmed by the sheer number of products or skeptical about whether you can really do it yourself, I get it. I was there too. But once I started with the right auto detailing supplies near me, my confidence skyrocketed. Now, I want to share the secrets to mastering your own car care routines and finding the best supplies close to home. Ready to turn your garage into a professional-grade detail shop? Let’s dive into the how-to’s and save you from costly mistakes.
Prepare Your Workspace and Gather Essential Tools
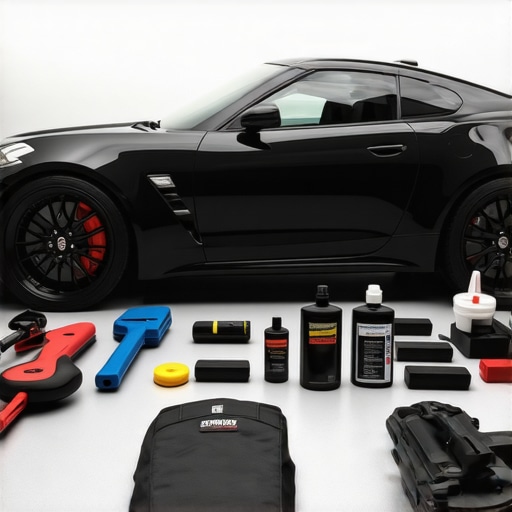
First, set up a clean, well-ventilated area where you can work comfortably without dust or debris. Think of this as your personal auto spa. Gather your car wash soaps, microfiber towels, foam applicators, and polishing pads. Having everything within arm’s reach prevents interruptions and keeps your workflow smooth.
Thoroughly Wash Your Vehicle
Start by rinsing your car with water to remove loose dirt. Use a high-quality auto wash soap designed for gentle cleaning. Work from the top down, using a wash mitt to lift dirt without scratching the paint. Remember, a clean surface is the foundation for effective correction. I once rushed through a wash, skipping this step, which led to dragging dirt during polishing and leaving micro-scratches—lesson learned.
Clay Bar for Ultimate Smoothness
After washing, dry the car thoroughly with a microfiber towel. Use a clay bar lubricated with a clay lubricant or quick detailer to remove embedded contaminants. Think of it as exfoliating your skin; it reveals a smoother surface ready for correction. I practiced on a test panel and immediately saw how much smoother and glossier the paint became, setting the stage for better results.
Assess and Plan Your Paint Correction Strategy
Inspect your paint under good lighting. Identify swirl marks, scratches, or oxidation. Decide whether you need a light polish or more aggressive correction. For minor imperfections, a dual-action polisher with a medium-cut pad and a paint correction compound will suffice. I once underestimated the importance of this step, trying to go straight to polishing; the result was uneven, and I had to redo the work.
Apply the Corrective Polish
Use a small amount of polish on your pad. Work in sections, starting at low speed, then increase to distribute the polish evenly. Think of this as buffing out a scuff on your shoe; patience is key. Keep the pad flat and consistent pressure. I remember spending extra time on stubborn areas, which paid off with a mirror-like finish. For best results, check your work frequently and wipe off excess product with a clean microfiber cloth.
Seal and Protect with a Coating
Once the paint is corrected, apply a protective layer such as a ceramic coating or wax. Use a foam applicator to spread the product thinly and evenly. Allow it to cure as per manufacturer instructions before buffing off. This step locks in your hard work and provides long-lasting shine and protection. I’ve found that a good ceramic coating not only enhances gloss but also simplifies future maintenance.
Final Inspection and Finishing Touches
Inspect your vehicle in different lighting. Use a clean microfiber towel to give a final wipe-down, removing any remaining residues. Consider applying tire shine or glass cleaner for that complete showroom look. This meticulous final step makes your DIY effort stand out—like a professional detail, right in your driveway.
By following these concrete steps and using quality supplies, you’ll transform your car’s appearance without the need for a professional. Remember, patience and attention to detail are your best tools. Happy detailing!
Many car enthusiasts jump into DIY detailing with high hopes, but there’s a lot of misconceptions that can trip you up. Let’s dig deeper into what most people get wrong and how to avoid these pitfalls to achieve truly professional results.
Why Using Cheap Products Is a False Economy
Everyone tells you to save money by opting for cheaper car wash soaps or polishes, but in my experience, this is a classic mistake. Low-quality products often contain abrasives or fillers that can worsen your paint rather than improve it. For example, a cheap car wash soap might lather well initially but can strip away protective layers or cause micro-scratches over time. Investing in quality supplies, like those found in premium paint correction tools, pays off by providing a better finish and long-term protection. Always remember, you get what you pay for, especially with detailing products.
Overlooking Surface Preparation Before Polishing
One of the biggest myths is that you can skip proper surface prep and jump straight into polishing. This is a surefire way to trap dirt and debris under your polish, causing micro-marring and swirl marks. Proper prep includes thorough washing, decontaminating with a clay bar, and inspecting your paint. Failing to do so means your effort is wasted, and you might even damage the surface. For advanced results, consider using auto detailing supplies that help prepare the surface for correction.
Getting Too Aggressive with Correction Pads
Many DIYers believe that more aggressive pads or compounds will fix their paint faster, but this often leads to uneven results or even paint removal. The key is matching the pad and compound to the severity of the imperfections. Using a paint correction compound with a medium-cut pad and working in controlled passes produces the best results. Remember, patience and consistency beat brute force every time. Over-aggressive correction can lead to costly rework or worse, permanent damage.
Are You Making These Common Detailing Errors?
Many people overlook simple details, like not using a clean microfiber towel to wipe off polish or neglecting to inspect their work under proper lighting. These small mistakes can ruin your finish and make your effort look amateurish. Keep your tools and towels spotless, and always double-check your work. If you want to elevate your DIY game, consider investing in specialized car care supplies designed for professional results.
Have you ever fallen into this trap? Let me know in the comments. Remember, mastering your own car detailing is about understanding these nuances and avoiding common pitfalls. With the right knowledge and supplies, you can achieve a finish that rivals professional detailers.
Keeping your car looking pristine over time requires more than just a one-time effort; it demands consistent maintenance and the right tools. Personally, I rely on a few specialized equipment pieces that have transformed my detailing routine from a weekend chore to a satisfying hobby. One such essential is my dual-action polisher, which I use for both correction and finishing. Unlike rotary polishers, dual-action models like the Griot’s Garage Polisher provide a safer, less aggressive polishing experience, making them perfect for hobbyists aiming for professional results without risking damage. This tool ensures even correction, reduces micro-marring, and saves time—especially when paired with quality compounds and pads.
Another critical piece is my high-grade microfiber towels. I always choose plush, lint-free towels for final wipes and buffing. Their soft surface prevents scratching and removes residues efficiently, which is vital for maintaining that mirror finish long after the initial correction. I prefer to keep multiple towels dedicated solely for different stages—one for polishing, another for sealing, and a separate one for final wipe-downs. This small but impactful habit prevents cross-contamination and keeps your paint pristine.
Maintaining your tools is just as important as owning them. Regularly cleaning your polishing pads and microfiber towels prevents buildup of abrasive particles, which could cause micro-scratches during future use. For pads, I soak them in a dedicated pad cleaner, like the auto detailing pad cleaner, and rinse thoroughly. Microfiber towels can be washed with a gentle detergent and air-dried to preserve their softness. Proper care extends the useful life of your tools and ensures consistently high-quality results.
Looking ahead, I believe that automation and smarter equipment will play a larger role in car detailing. For example, advancements in cordless, battery-powered polishers are making it easier to work efficiently without the clutter of cords or the risk of accidental disconnections. Similarly, software that tracks your maintenance schedule or guides you through correction steps is becoming more accessible. These innovations promise to make DIY detailing more accessible and less time-consuming, which is great for enthusiasts who want professional results without the hefty price tag.
How do I keep my detailing tools in top shape over time?
To ensure your equipment remains effective, dedicate time to regular maintenance. Clean your pads immediately after each session using a auto detailing supplies designed for this purpose. Store your tools in a dry, dust-free environment, ideally in a dedicated case or organizer. Periodically inspect your equipment for signs of wear or damage, replacing pads or brushes as needed. This proactive approach guarantees that every time you work on your vehicle, your tools perform at their best, delivering that flawless, professional finish every time. So, I encourage you to try out a quality dual-action polisher and commit to regular tool maintenance—your car’s finish will thank you for it.
What I Wish I Knew When Starting Out in Car Detailing
- Patience is a Virtue: Rushing through steps like polishing or coating can lead to micro-scratches and uneven finishes. Taking your time ensures a professional-looking result.
- Quality Over Cost: Investing in top-tier products and tools, such as a reliable paint correction supplies, saves you money and frustration in the long run.
- Preparation is Key: Proper washing, decontaminating with a clay bar, and inspecting your paint before correction dramatically improve results and reduce rework.
- Tools Make a Difference: A good dual-action polisher like the Griot’s Garage Polisher simplifies the process and delivers consistent results.
- Consistent Maintenance: Regularly cleaning and caring for your tools ensures they perform optimally, giving you professional-quality finishes every time.
My Top Picks for Car Detailing Resources That Elevate Your Game
- Auto Detailing Supplies Near Me: Local stores like auto wash soaps and paint correction tools are essential for quality results.
- DIY Kits for 2024: Starting with a comprehensive DIY car detailing kit can streamline your process and teach you the fundamentals.
- Professional-Grade Products: Upgrading to ceramic coatings from trusted sources like top ceramic coating supplies enhances durability and shine.
- Tool Maintenance Guides: Properly caring for your polishing pads and microfiber towels prolongs their effectiveness and ensures consistent excellence.
Your Turn to Transform Your Car with Confidence
Now that you’ve uncovered these insider tips and curated your toolkit, it’s time to take action. With patience, the right products, and consistent care, you can achieve that professional-level shine right in your driveway. Remember, every detail matters—your car’s appearance is a reflection of your effort and pride. So, what’s the first step you’re excited to try? Share your plans or questions below and let’s elevate your DIY car detailing journey together!
,
This post resonates with me because I recently invested in a good dual-action polisher after struggling with swirl marks on my car’s paint. Trust me, the quality of tools really makes a difference, and I’ve found that proper surface prep is often overlooked by beginners. I do wonder, however, how many of you use specific brands or types of clay bars and polishes? It seems like there’s a lot of variety out there, and finding the right match for your paint type can be a game-changer. Also, I’d love to hear if anyone has tips for maintaining tools long-term, especially in humid environments where mold or rust can be an issue. Overall, this deep dive into supplies and proper procedures has definitely motivated me to be more patient and detailed with my future projects. What’s been your biggest lesson or game-changer in DIY car detailing? I’m eager to hear your experiences!
I totally relate to the frustrations of chasing that perfect mirror shine without professional training or the right tools. Like many, I started off using cheap products just to see quick results, but I quickly learned that quality supplies make all the difference. I’ve found that investing in a good dual-action polisher and quality pads really elevates the finish, especially when paired with true instruction on surface prep. One thing I’d add is that technique matters just as much as products—taking your time and testing small sections can prevent costly mistakes. Also, I’d love to get others’ opinions on the best storage solutions for detailing tools, especially in humid climates; I’ve struggled with keeping my pads and microfiber towels in top condition. Has anyone found a great way to extend tool life and prevent mold or rust? I believe the key is consistent maintenance, but I’d welcome any personal tips or product recommendations from experienced DIYers.
I really appreciate the detailed step-by-step approach in this post. I’ve learned through my own experience that a lot of beginners jump into polishing without proper preparation, which often leads to uneven results or even more scratches. Using a clay bar is such a game-changer—once I started exfoliating the paint surface, the correction process became so much smoother and more effective.
One thing I’ve struggled with is maintaining my microfiber towels and polishing pads, especially in a humid environment where mold can be an issue. I’ve found that air drying in a well-ventilated space and storing tools in airtight containers helps a lot. Also, a quick soak in a dedicated pad cleaner keeps everything in top shape. Have others found particular storage solutions that work well for protecting their tools from humidity?
Finally, I’m curious—what products or brands do you all swear by for clay bars and polishes? I’m always eager to try new quality supplies that deliver professional looks without breaking the bank.