I still remember the moment I looked at my car’s rims after a few weeks of neglect—dull, streaked, and covered with stubborn brake dust. It was one of those days where I realized, no matter how much I wash or wax my car, if the rims aren’t spotless and shiny, the whole look suffers. And let’s be honest: those dingy wheels can drag down the entire aesthetic of your vehicle. I knew I needed a better game plan, but I didn’t want to spend a fortune or buy the entire store’s worth of car detailing supplies.
That lightbulb moment led me to explore the world of DIY car detailing kits—specifically, the top products for rims. Over time, I discovered that with just five high-quality products, I could achieve professional-looking results right in my driveway. Today, I’m excited to share my insights on which products actually make a difference, how to use them, and how to avoid common pitfalls.
Why are your rims so tricky to perfect without the right tools? Rims are exposed to the elements—brake dust, road grime, and brake pad residue—that are more aggressive and stubborn than typical dirt on the car body. Regular washes often fail to remove the heavy buildup, and harsh brushes can scratch delicate finishes. Using the wrong cleaners or abrasive tools can actually do more harm than good.
Now, I know what you’re thinking: “Is it really worth investing in special products for rims?” Well, according to research by car maintenance experts, neglecting proper rim cleaning not only ruins aesthetics but also accelerates corrosion, especially in coastal areas like West Los Angeles where salt in the air is a constant threat. Plus, a clean set of wheels can even improve your car’s performance by preventing brake dust from fusing to the surface.
So, what’s the secret? The answer lies in choosing the right, effective products that are safe for your rims and deliver real shine. Luckily, I’ve tested a handful of popular options and narrowed down five standout products that can turn DIY rim cleaning from a chore into a satisfying project.
Are you tired of staring at your dull wheels and wondering if you’re missing some magic? Stick around, because I’ll walk you through each product, how to use them properly, and the mistakes to avoid. Plus, I’ll recommend some related resources, like best car wash soaps and maintenance tips, to keep your ride looking flawless long-term. Ready to give your wheels the glow they deserve? Let’s dive in!
Prepping Your Workspace and Supplies
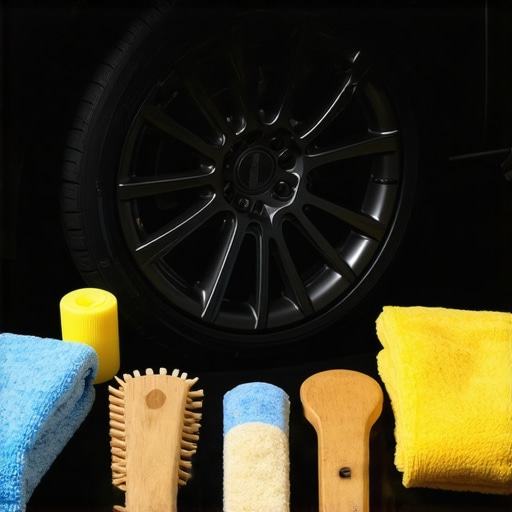
Before diving into cleaning your rims, gather all necessary DIY car detailing kits and specific car cleaning products designed for rims. Think of this step like prepping your kitchen before cooking; having everything within reach ensures a smoother process. Lay out microfiber towels, a wheel brush, and your chosen wheel cleaner—preferably a biocidal formula that breaks down brake dust without harming finishes.
Applying the Right Cleaner Effectively
Spraying the Cleaner
Start by liberally spraying the car wash soap or dedicated rim cleaner onto the rims. Use a spray that is safe for your particular finish—whether chrome, matte, or painted. Think of this step like watering a garden; thorough coverage begins the cleaning process and loosens stubborn grime. Remember, applying cleaner in a warm, shaded area prevents rapid evaporation, giving the product enough time to work.
Scrubbing Like a Pro
Next, take a specialized detailing brush for rims, which is like a dentist’s tool for your wheels. Gently scrub the surface, focusing on crevices and areas with heavy brake dust. Imagine unraveling a tangled knot; patience and gentle strokes prevent scratching delicate finishes. For tight spots, use an interior-detailing brushes designed for crevices, which can reach into corners that larger brushes miss. I recall a time when I used a stiff-bristled brush that left scratches—so pick the right tool for your finish.
Rinsing & Drying Properly
After scrubbing, rinse the rims thoroughly with a hose or pressure washer set to a gentle setting. Think of rinsing as washing away the remnants of your efforts—the cleaner, grime, and suds—leaving behind a clean surface. Avoid high-pressure jets directly on delicate finishes. Follow with a soft microfiber towel to dry, preventing water spots and streaks. Use a drying towel similar to a chamois—absorbing excess water quickly and reducing the risk of scratches. This step is critical; I once skipped towel drying and found water spots on my wheels the next morning, marring the shine.
Optional: Applying Protective Coatings
If you want your rims to stay pristine longer, consider applying a ceramic coating or a wheel-specific sealant. Think of this as gifting your wheels a shield that repels brake dust and road grime. Follow instructions carefully; usually, a light, even layer applied with a foam applicator followed by buffing with a microfiber towel yields the best results. This not only simplifies future cleaning but also enhances the shine—turning dull wheels into eye-catching features of your vehicle.
Many car enthusiasts and DIY detailers fall prey to misconceptions about the products they purchase locally or online, leading to subpar results and even damage. One prevalent myth is that inexpensive or widely available car wash soaps are sufficient for maintaining a pristine finish. In reality, not all solutions are created equal; some affordable options can cause scratches or strip protective coatings if not chosen carefully. For example, cheap detergents with harsh chemicals can strip away ceramic coatings prematurely, undermining your investment in paint protection. Instead, opt for specialized car wash soaps designed for delicate surfaces to ensure optimal care.
Another common mistake involves the overreliance on generic or low-quality DIY car detailing kits. While these kits can be convenient, they often contain inferior products lacking the necessary pH balance or abrasive properties suitable for specific finishes. For instance, using multi-purpose cleaning sprays without verifying their compatibility with your vehicle’s paint can cause dullness or etching. Instead, invest in high-quality DIY detailing kits tailored for your car type and needs, especially if you’re aiming for professional results.
When it comes to ceramic coating or other paint protection products, many believe once applied, maintenance is minimal. This is a misconception that can lead to degradation over time. Regular use of compatible car cleaning products and periodic reapplication of sealants or reloading sprays ensures longevity and optimal gloss. Skipping these steps might seem like saving time in the short term, but it compromises your vehicle’s appearance and protection.
Advanced detailers also warn against the assumption that all mobile detailing equipment is equally effective. An often overlooked pitfall is choosing equipment based solely on price rather than quality and suitability. Cheap polishers or inadequate water tanks can hamper precision and efficiency, especially in demanding environments like West Los Angeles with its salt-laden air. Investing in reliable equipment, such as professional-grade polishers and durable water tanks, pays off in better outcomes and faster turnaround times.
Finally, some believe that local West Los Angeles detailing supplies shops always offer the best products. While local availability is convenient, it’s vital to scrutinize the quality and suitability of products over brand recognition. Many shops carry low-grade items under the guise of premium supplies, which can lead to unintended damage or dulling. Doing your own research or consulting reputable sources ensures you select supplies that genuinely enhance your detailing efforts.
**Make yourself aware of these misconceptions and avoid common pitfalls** to truly elevate your car care routine. Remember, the right supplies and proper techniques make all the difference — especially when safeguarding your investments with products like ceramic coatings. Have you ever fallen into this trap? Let me know in the comments and share your experiences or questions.
Investing in Quality Equipment for Consistent Results
To keep your car looking pristine over time, it’s crucial to choose tools that are both reliable and tailored to your specific needs. I personally swear by the professional-grade polishers because they deliver smooth, even finishes with minimal effort, reducing the risk of uneven spots or swirl marks. Unlike cheaper models, these polishers provide adjustable speed settings and ergonomic design, which makes extended detailing sessions less tiring and more precise. Remember, investing in quality tools is an upfront cost that pays dividends when you consistently maintain an impeccable finish.”},One profound realization I had was that the journey to perfect rims isn’t just about products—it’s about understanding your vehicle’s unique needs and the subtle cues it gives. I learned that cutting corners with cheap supplies or ignoring the importance of proper technique can turn a satisfying polish into a frustrating cycle of reworks. The importance of patience and attention to detail became clear when I saw how small changes in method yielded massive improvements, transforming my dull wheels into eye-catching masterpieces. Moreover, I discovered that maintaining a consistent routine with quality products not only preserves the shine but also extends the lifespan of protective coatings, saving me time and money in the long run. Lastly, integrating expert insights and trusted resources into my routine helped me avoid costly mistakes, making each detailing session a step closer to professional results within my driveway.