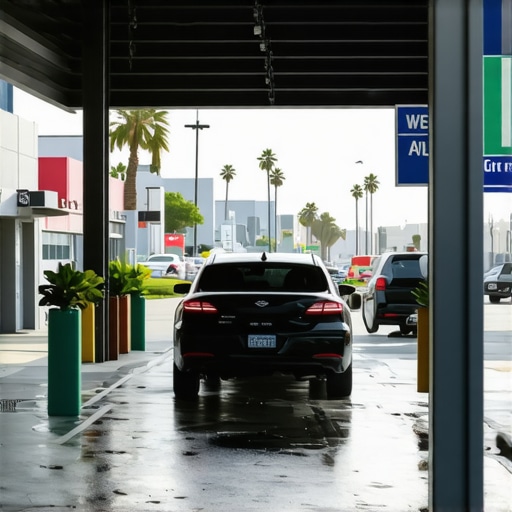
It was a bright Saturday morning in West LA, and I was eager to give my car that perfect shine. But after spending hours applying what I thought were top-tier supplies, I stared in frustration at a dull, streaky finish. The truth hit me then: not all car wash products are created equal, and choosing the right supplies can make or break your car’s appearance. Have you ever faced this disappointment after a meticulous wash, only to realize your car still looks lackluster?
Why Finding Quality Car Wash Supplies & Ceramic Coatings Matters Now
In a city like West LA, where the sun is relentless and the roads are busy, maintaining your vehicle’s pristine look is more than just aesthetic — it’s about protecting your investment. The right car wash supplies and ceramic coatings can shield your car from harmful UV rays, dirt, and road grime, ensuring it looks its best every day. Plus, using quality products reduces the risk of scratches and swirl marks—mistakes I learned the hard way early on, when I tried to DIY my way through a ceramic coating job without proper knowledge or tools.
According to a recent study, proper car detailing products can extend the lifespan of your vehicle’s paint by years, saving you money on repairs and repainting. But with so many options out there—from local shops to online marketplaces—it’s easy to feel overwhelmed. That’s why I’m here to share my journey and help you navigate the maze of supplies to find the best fit for your needs.
What You’ll Learn Today
We’ll explore how to identify quality products, where to find the best supplies near you, and how to avoid common pitfalls. Whether you’re a seasoned DIYer or just starting out, my goal is to make your car care routine easier, more effective, and even enjoyable.
Addressing Your Biggest Skepticism: Is DIY Ceramic Coating Really Worth It?
When I first considered applying ceramic coatings myself, I was skeptical. Would I really get the professional shine? Was it worth the cost? My early attempts were riddled with mistakes—applying too much product, uneven coverage, and even damaging my paint. But I learned that with the right products, proper technique, and a little patience, DIY ceramic coatings can be just as effective as professional services. Curious? Check out the top DIY kits in West LA to get started confidently.
Now, let’s dive into how you can choose the best supplies for your vehicle and achieve that showroom shine without breaking the bank.
Choose Your Equipment Wisely: The Foundation of a Perfect Car Shine
My first attempt at applying ceramic coating was a disaster—uneven coverage, excess product, and a streaky finish. I learned that selecting the right tools is essential. Start with a high-quality dual-action polisher, a microfiber applicator pad, and a foam wash mitt. These tools help you achieve even application and reduce the risk of swirl marks. When I tried to do it all with cheap sponges, I ended up with scratches that took weeks to fix. For reliable options, check out the best auto detailing products near West LA.
Picking the Right Car Wash Soap and Supplies
Next, I focused on choosing a superior car wash soap. I once used a generic soap that left my car with water spots and dullness. Instead, opt for a pH-balanced car wash soap designed for ceramic coatings and paint protection. Use a two-bucket method—one for soapy water, one for rinsing your mitt—to prevent dirt from scratching your paint. Remember, never wash a hot car under the sun; it causes soap to dry too quickly, leaving spots. I learned this the hard way after my first sunny West LA Saturday, resulting in a streaky mess.

Mastering the Application of Ceramic Coatings
Applying ceramic coating requires patience and precision. I once rushed through the process, leading to uneven coverage and visible streaks. Clean the surface thoroughly with a clay bar to remove embedded contaminants, then wipe it dry. Use the applicator pad to apply the coating in small sections—think of it as painting tiny canvases. Work in a crosshatch pattern to ensure even coverage, and avoid applying too much; a little goes a long way. After application, let the coating cure for the recommended time—usually 24 hours—before exposing the car to water or dirt. For top-rated DIY ceramic coatings, visit the best ceramic coatings in West LA.
Final Rinse and Drying Techniques
Once the coating has cured, rinse your car with cool water to remove any remaining residue. Use a leaf blower or a microfiber drying towel to dry the surface thoroughly, avoiding any water spots. I once tried to dry my car with a rough towel, which caused micro scratches—defeating the purpose of my efforts. Instead, gently pat the surface to finish. This step is crucial in ensuring your car maintains that mirror-like finish. For the best drying tools and supplies, browse the top car wash supplies near you.
Many enthusiasts believe that applying a ceramic coating is a straightforward process, but the reality is more nuanced. One of the most common myths is that simply applying the product is enough to achieve a professional finish. In truth, the devil is in the details—meticulous preparation and understanding the product’s nuances are crucial. For instance, failing to properly clean and decontaminate the paint surface can lead to poor adhesion, resulting in streaks, bubbles, or uneven coverage even if you use the best supplies. This is why using high-quality prep products and following a detailed cleaning regimen is non-negotiable for advanced results.
Another widespread misconception is that all ceramic coatings are the same. However, not all coatings offer the same durability or gloss. Many DIY kits contain products that are marketed as durable but may only last a year or less under harsh conditions like West LA’s intense sun. Advanced users understand that selecting a coating with proven UV resistance and hydrophobic properties requires research and sometimes a higher investment. For example, some coatings are designed specifically for maximum longevity, and choosing the right one can significantly impact your car’s protection and appearance over time. For expert insights, check out top-rated ceramic coatings.
What about the myth that DIY ceramic coating is always cheaper and easier than professional services?
This is a trap many fall into. While DIY kits can save money initially, poor technique or inadequate surface prep can lead to costly repairs down the line. Scratches, swirl marks, or uneven coverage may require professional correction, ultimately costing more than a professional application in the first place. Moreover, advanced techniques like proper curing, temperature control, and application in a dust-free environment are often overlooked by amateurs, leading to subpar results. The key is understanding that quality supplies, proper training, and patience are essential—skimping on any of these can negate the cost savings. For those ready to elevate their skills, exploring professional-grade DIY kits combined with expert tutorials can make a significant difference.
Finally, many assume that once a ceramic coating is applied, maintenance is minimal. However, neglecting routine washes with proper car wash soaps designed for coatings can compromise the coating’s performance. Regular maintenance with suitable products preserves the hydrophobic properties and gloss, extending the life of your investment. Remember, even the best coating can degrade prematurely if not properly cared for.
So, if you’re considering DIY car detailing, especially ceramic coatings, keep these advanced nuances in mind. Being aware of common pitfalls and myths can save you time, money, and frustration. Have you ever fallen into this trap? Let me know in the comments!
Keeping Your Car Detailing Equipment in Top Shape
To ensure your car always shines, regular maintenance of your tools is essential. I personally recommend using microfiber cloths that are specifically designed for automotive use; they are gentle on paint and can be washed and reused hundreds of times without losing their effectiveness. For example, my go-to microfiber towels are from a trusted supplier in West LA. Regularly inspect your applicator pads and replace them if they show signs of wear or contamination, as dirty tools can introduce scratches or leave residues that compromise your finish.
Investing in a high-quality dual-action polisher is a game-changer for maintaining that professional look. Not only does it reduce fatigue during long detailing sessions, but it also ensures even application of products like ceramic coatings or polish. I prefer models with variable speed settings, such as the best mobile detailing equipment, because they give me precise control over the polishing process, preventing damage and achieving that mirror finish.
Tools I Recommend for Long-Term Car Care
One tool I swear by is a paint thickness gauge, like the professional-grade paint meter. It helps me monitor the condition of my paint over time, so I know when to polish or reapply protective coatings. Additionally, a good quality foam cannon connected to a pressure washer streamlines the washing process, allowing thorough cleaning while reducing the risk of micro scratches. For drying, I use a blower designed specifically for cars, which minimizes contact and prevents micro scratches that towels can sometimes cause.
How Do I Maintain My Detailing Tools Over Time?
Proper cleaning and storage are crucial. After each use, I rinse my applicator pads and microfiber towels with a gentle detergent to remove any residues or contaminants. Storing tools in a clean, dry environment prevents mold and deterioration. For power tools like polishers, I follow the manufacturer’s maintenance guidelines, including checking brushes and electrical components periodically. This routine keeps my tools performing optimally and extends their lifespan. Remember, investing in quality tools and maintaining them properly not only saves money long-term but also guarantees consistent, professional results every time.
Looking ahead, I believe the trend in car detailing tools will lean heavily towards automation and smart technology, such as AI-powered polishers that adapt to your vehicle’s specific needs. Staying updated with new innovations can give you a competitive edge in DIY or professional settings. For now, focus on maintaining your current equipment diligently—it’s the foundation of a long-lasting, glossy finish. Ready to elevate your detailing game? Try out a professional-grade paint thickness gauge to monitor your paint health, and see how it transforms your long-term results. For more advanced tools, explore the top auto detailing equipment available today.
The Hardest Lesson I Learned About Achieving That Mirror Finish
One of the most valuable lessons I discovered was the importance of meticulous surface preparation. Rushing through cleaning and decontaminating the paint often led to uneven coatings and a lackluster finish. Taking the time to clay bar and thoroughly clean my car made a dramatic difference in the final result, teaching me that patience is key to professional-looking results.
3 Myths About DIY Ceramic Coatings That Held Me Back
Initially, I believed that all ceramic coatings were equally durable and that a quick application would suffice. I also thought that DIY kits could replace professional services entirely. Over time, I learned that choosing a high-quality coating with proven UV resistance and understanding proper curing processes are crucial. Dispelling these myths helped me avoid costly mistakes and achieve longer-lasting protection for my vehicle.
What Experts Won’t Tell You About Maintaining Your Car’s Shine
Many overlook the importance of routine maintenance with the right products. I underestimated how quickly a coating can degrade if not washed regularly with pH-balanced, coating-friendly soap. Using the appropriate supplies to maintain the gloss and hydrophobic properties of my ceramic coating extended its lifespan and kept my car looking showroom-ready longer than I expected.
Reading this, I can definitely relate to the frustration of using subpar products and ending up with uneven or streaky results. When I first started detailing my car, I thought more product meant better protection, but I quickly learned that technique and quality matter more. I’ve found that investing in good applicators and a proper cleaning routine, especially using clay bars and microfibe r cloths, really makes a difference. One thing I struggled with was drying—I used a rough towel and ended up micro-scratching my paint, which set me back. Now, I swear by a microfiber drying towel and even a leaf blower to finish dry. What’s everyone’s favorite drying method—towels or blowers? Also, are there specific brands of applicator pads or microfiber cloths that you all swear by for maintaining that glossy, streak-free finish?
I really relate to this post because I used to think that any car wash supplies would do the trick, but I quickly learned the hard way that quality tools and products make all the difference. My biggest breakthrough was switching to a pH-balanced soap and investing in a good microfiber wash mitt. It prevented scratches and left my car looking much shinier after washes. One thing I’d add is that proper drying is often overlooked. I used to rush with a towel, but now I prefer using a blower, which really prevents micro-scratches. Also, I’ve started checking the paint thickness periodically with a gauge to monitor any issues over time—absolutely worth it for peace of mind. Do you all find that regular tool maintenance, like replacing applicator pads and microfiber towels, prolongs their effectiveness? I’d love to hear others’ tips for keeping their detailing arsenal in top shape, especially those in sun-heavy climates like West LA.
This post really resonated with me because I’ve also struggled to get that flawless finish despite using what I thought were quality products. Like the writer, I’ve learned that the technique, especially in applying ceramic coatings, makes all the difference. I used to rush the process, thinking that more product or a quick swipe would do, but I quickly realized the importance of patience and thorough cleaning beforehand. The part about avoiding micro scratches really hit home—using a microfiber towel and a blower has transformed my drying routine. It made me wonder, how do others in sun-heavy climates like West LA adapt their detailing techniques to prevent water spots and streaks during hot days? Also, does anyone have recommendations for beginner-friendly, high-quality ceramic coatings that offer good durability without being overly complicated to apply? Any tips on how to properly maintain the shine after the initial polish? Would love to hear your thoughts!