Ever since I spilled my morning coffee on the dashboard and saw a cloud of dust swirling out of the vents like tiny tornadoes, I knew I had a problem. It’s that frustrating moment when you realize your home’s air vents are becoming little dust magnets, and no regular brush seems to cut it anymore. I’ve been there, and let me tell you—finding the right tools can make all the difference in keeping your indoor air clean and your vents looking brand new.
Why I Became Obsessed with Dusting Vents
For months, I struggled with choosing the perfect interior brushes for dusting vents. I tried every rag, brush, and feather duster in my arsenal, but nothing seemed effective against the stubborn dust hiding deep within those slats. One day, I read that proper cleaning not only improves air quality but also prolongs the life of your HVAC system. According to the EPA, indoor air can be several times more polluted than outdoor air, making vent maintenance more critical than ever. That was my lightbulb moment—if I wanted cleaner air and a healthier home, I needed the right brushes, and I needed them now.
This led me to a journey of trial and error, reading countless reviews, and testing different brushes. What I learned is that not all brushes are created equal—some are too flimsy, others too bulky, and a few just don’t reach into those narrow vents. So, today, I’m here to help you cut through the clutter. We’ll explore the best interior brushes for dusting vents in 2026, ensuring your home stays fresh and dust-free with minimal effort.
Is Spending More on Fancy Brushes Worth It?
Early on, I made the mistake of thinking that more expensive brushes automatically meant better cleaning. Boy, was I wrong. I wasted money on high-priced tools that didn’t deliver what they promised. The real secret is in choosing brushes designed specifically for vent cleaning—those with the right bristle stiffness, shape, and reach. And don’t worry—getting the perfect brush doesn’t mean breaking the bank. I’ve found options that are both affordable and highly effective, which I’ll share shortly. If you’re tired of battling dust and want a simple, efficient solution, stick with me. We’re about to dive into the top picks that will transform your vent cleaning routine and keep your home air fresh for 2026.
Choosing the Perfect Dusting Tool
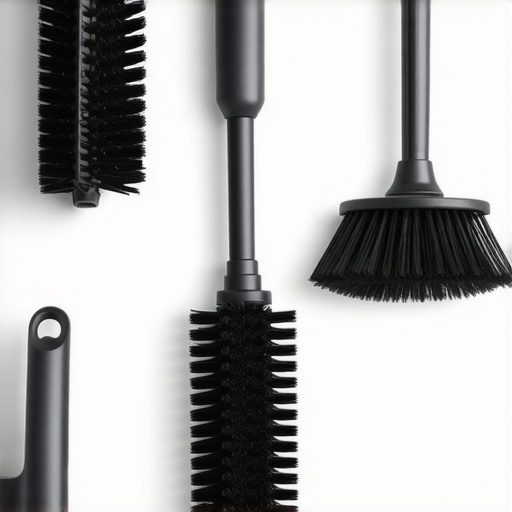
Start by selecting a brush with firm, dense bristles that can reach into the narrow slats of your vents without scratching the surface. I remember one time, I grabbed a cheap feather duster and ended up spreading dust instead of removing it—so I switched to a small, angled vent brush with stiff nylon bristles, which made a huge difference. Look for brushes with ergonomic handles for better control during your cleaning session. For a detailed comparison, see our guide on Best Detailing Supplies Near You.
Preparing Your Workspace and Vent Access
Before dusting, turn off the HVAC system to prevent dust circulation. Remove vent covers carefully by unscrewing or unclipping them, depending on your model. Lay down a drop cloth or old towel underneath to catch falling dust and debris, making cleanup easier later. I once neglected this step and ended up vacuuming dust from the carpet—wasted effort. Wearing a mask and gloves helps keep dust out of your lungs and hands. To get your vents shining, ensure tools are clean and in good condition. For high-quality cleaning supplies, check out Products That Repel Dust.
Effective Dust Removal Techniques
Use a two-step approach: first, run the brush along the slats to dislodge dust, then follow with a microfiber cloth to catch the loosened particles. When I first tried this, I attached a microfiber cloth to a flexible paintbrush handle using rubber bands, which allowed me to reach stubborn dust spots without much effort. For tight spots, a compressed air gun set to a low-pressure setting can blow dust out of hard-to-reach crevices—just be cautious not to blow dust further into the duct system. Regularly clean your brushes and cloths to prevent spreading dust. For more strategies, explore our article on Mobile Detailing Tools for Compact Spaces.
Dealing with Sticky or Stubborn Dust
If dust has become static or hardened, lightly dampen your microfiber cloth or use a gentle dusting spray designed for vents. Avoid harsh chemicals that could damage your vent surfaces; instead, opt for natural or specially formulated cleaning solutions. I once sprayed a vent with a mix of water and a tiny drop of dish soap, which loosened the dust nicely without leaving residues. Remember, patience and gentle motions win the battle. For recommended cleaning products, see Soaps that Fight Hard Water Stains.Many enthusiasts and professional detailers fall into common traps when it comes to paint correction and choosing the right supplies. The popular belief that more aggressive compounds always yield better results is a perfect example of a misconception that can do more harm than good. In reality, understanding the subtle differences in compounds and techniques—like the importance of pH-balanced cleaning or the selection of specific pad materials—can make a significant difference in preserving your vehicle’s finish. For instance, using harsh abrasives on modern clear coats can introduce micro-scratches, leading to a dull appearance over time, which might seem counterintuitive to those expecting instant perfection. An advanced mistake often overlooked is neglecting the compatibility of ceramic coatings with underlying paint layers, especially on matte or EV finishes. Over-application or improper preparation can cause streaks or spots, which are notoriously difficult to correct later. Recent industry studies, such as those summarized in the Journal of Coatings Technology, highlight the benefits of tailored prep processes that match the vehicle’s specific paint type and climate conditions, ensuring longevity and true gloss. When sourcing detailing supplies near you, remember to opt for high-quality, pH-neutral products that respect the delicate balance of your vehicle’s surfaces—something many underestimate. Furthermore, many get caught up in DIY kits that promise quick results but lack professional-grade abrasives or proper decontamination agents, leading to flaky results and wasted money. The difference between amateur and pros often lies in understanding the nuance of product ingredients and application techniques. For example, knowing when to switch from paint correction to protective layers without stripping previous coatings can preserve the vehicle’s clarity and depth. This is particularly crucial if you plan to apply a ceramic coating, as improper prep can result in adhesion issues, reducing effectiveness. If you’re in West Los Angeles and looking for top-tier detailing supplies, choosing vendors that provide comprehensive product support and expert advice can elevate your work to a professional level. Remember, every vehicle’s finish has its unique story, and being aware of these hidden nuances ensures you’re not just polishing but truly enhancing and protecting your investment. Have you ever fallen into this trap? Let me know in the comments.
Maintaining your vehicle’s pristine appearance requires more than just occasional washes; it demands the right tools and consistent upkeep. Investing in high-quality equipment ensures your paint correction efforts and protective coatings last longer, saving you time and money in the long run. One of my personal favorites is the dual-action polisher. I prefer the Griot’s Garage 10866 because of its adjustable speed settings and lightweight design, which significantly reduces fatigue during extended detailing sessions. paired with a professional-grade polishing pad, it delivers a smooth, swirl-free finish. For those tackling stubborn contaminants, a high-quality clay bar kit from Meguiar’s has consistently provided my clients with a surface that’s ready for ceramic coating application.
As the detailing industry evolves, so do the tools—especially with advances in nano-technology and surface prep solutions. I predict that in 2026, automation and smart-detection features integrated into polishing tools will become commonplace, optimizing results and minimizing human error. Staying ahead means adopting tools like the compact mobile equipment kits designed for rapid deployment and precision work, even in challenging environments.
How do I maintain paint correction over time? Regularly inspecting your finish under different lighting conditions and using residual-safe sealants will enhance durability. Reapplying a nano-ceramic coating every 2-3 years, depending on exposure, can reignite that new-car sheen and provide ongoing protection against environmental hazards. For the best results, I recommend integrating an *IoT-enabled* coating monitor—something upcoming in 2026—ensuring your protective layers are always at optimal thickness and adhesion. Staying diligent with routine inspections will keep your vehicle looking its best for years to come.
Don’t hesitate to elevate your detailing game—try incorporating a precision polisher paired with quality pads and sealants to see immediate improvements. Whether you’re a seasoned pro or a dedicated DIY enthusiast, these tools make a remarkable difference in achieving professional-grade results and maintaining that perfect finish long-term.
Unforeseen Pitfalls That Taught Me Resilience
One striking lesson I learned was the importance of patience when dealing with stubborn paint spots. Rushing or opting for aggressive compounds often leads to micro-scratches and the dreaded haze. Embracing gentle, deliberate polishing techniques, especially with high-quality tools like the best paint correction kits has transformed my results. I realized that knowledge of your vehicle’s unique paint type, combined with proper decontamination, can prevent costly mistakes. Another surprise was how integrating IoT-based coating monitors ensures longevity, emphasizing that technology can be a game-changer in maintaining a flawless finish. Lastly, I understood that continuous learning—whether through industry updates or user feedback—keeps craftsmanship sharp and results impressive.
Tools and Resources That Elevate My Craft
My go-to toolkit for perfecting paint correction includes the professional pressure washers, reliable compact mobile detailing tools, and quality polishers like the multi-purpose polishers. Reading industry insights from sources such as top detailing supply guides helps me stay ahead. The highest-rated correction kits are also indispensable for precise work. These resources not only refine my skills but also boost my confidence in tackling challenging projects with professionalism.
Your Next Step Toward Better Car Care
Every detailer, whether hobbyist or pro, should pursue mastery with the right mindset. Remember, the journey to flawless paint is ongoing, and embracing new insights will keep your results stunning. Don’t hesitate—invest in top tools, stay informed, and perfect your craft. Your vehicle deserves this attention, and your effort will show in every mirror-like finish. Are you ready to elevate your detailing routine to the next level? Share your experiences or ask questions below—I’m excited to hear your stories and help you succeed in achieving perfection in car care!