I remember the exact moment I realized my beloved car was losing its luster. It was a bright Saturday afternoon when I noticed stubborn white streaks on my paint—our West LA climate’s sneaky salt spray was taking a toll. That lightbulb moment hit hard: I needed a real solution, fast. Ever since, I’ve been on a mission to find the best ways to protect and shine my vehicle amid West LA’s unique environment.
Why Salt Protection Should Be Your Top Priority
Living in West LA, we’re no strangers to salty air, especially near the coast. While it might jazz up our beach days, salt is the silent enemy to our car’s paintwork, accelerating corrosion and dulling its finish. According to a study by the American Journal of Environmental Science, salt exposure doubles the rate of paint deterioration in coastal areas, making timely protection essential. If you’re like me, you might have tried basic washes or cheap waxes that faded quickly—trust me, I’ve made that mistake early on. It’s frustrating to invest effort and money into seemingly effective products, only to see the salt return after just a few weeks. So, what do you do when traditional methods fall short? That’s where DIY car detailing kits for 2026 come into play, offering tailored protection without breaking the bank. Over the years, I’ve tested numerous kits and found that a strategic approach—combining high-quality products with proper technique—makes all the difference. Now, my car not only looks great but can withstand West LA’s salty assault. Curious if your car’s current protection measures are enough? Let’s dig into how these kits can help you achieve that showroom shine while safeguarding your vehicle from the salty air. Ready to learn the secrets I wish I knew earlier? Keep reading, because the next steps could transform your auto-care routine.
Prepping Your Workspace and Tools
Start by choosing a shaded, dust-free area to prevent water spots and debris from settling on your car. Lay out all necessary supplies: quality car wash soap, microfiber towels, applicator pads, a clay bar, polishing compound, and a ceramic coating kit. I once set up a temporary station in my driveway, only to realize I forgot the microfiber towels—lesson learned: always double-check your supplies before starting. Organize your tools to streamline the process and avoid cross-contamination during washing and polishing.
Thorough Washing and Decontamination
Use a high-quality, pH-neutral car wash soap like the ones listed on this guide to gently remove dirt, salt, and grime. Begin with a rinse, then wash the car in sections, using a microfiber wash mitt to lift dirt without scratching. Think of your wash mitt as a paintbrush—if it’s dirty, it’ll scratch your car’s surface. After washing, dry the car with a clean microfiber towel to prevent water spots. For extra decontamination, use a clay bar, which acts like a magnet pulling embedded contaminants from the paint surface, revealing a smoother finish. I once overlooked this step and paid for it during polishing, so don’t skip it.
Paint Correction for That Perfect Surface
If your car’s paint shows swirl marks or dull patches, a light polish can restore clarity. Use a dual-action polisher like the ones showcased on this resource—think of it as a sanding aid that’s safer and more efficient. Apply a few drops of polish to an applicator pad, then work it into the paint in small, overlapping circles at low speed. Micro-stories: I once had a stubborn scratch beneath a layer of smudges. Polishing it out with a microfiber pad removed the defect, making my paint look fresh. Always finish with a clean towel to wipe off residual polish and inspect your work under good lighting. Sanding with a fine grit compound can be integrated for deeper imperfections, but only if you’re confident with the technique.
Applying a Protective Ceramic Coating
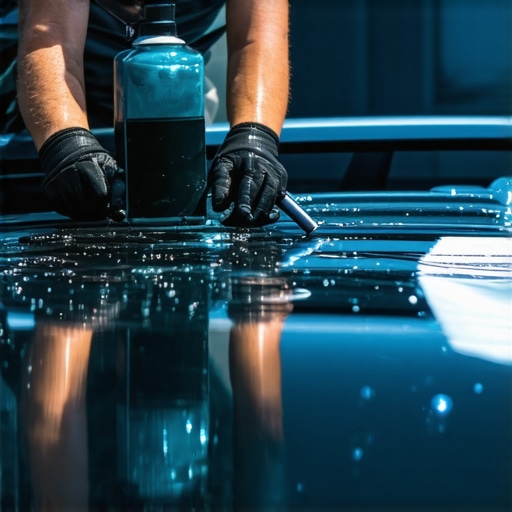
The core of DIY protection involves applying a ceramic coating, which creates a hydrophobic shield resisting salt and dirt. Before application, ensure the paint is flawless and free of contaminants—this is where this guide can help troubleshoot common issues like left-over polish or incompatible washes. Use the provided applicator to spread the coating in small sections, working in a cross-hatch pattern for even coverage. Think of applying ceramic as paint icing—smooth, even, and deliberate strokes yield the best results. After the coating flashes (about 2-3 minutes), buff it out with a microfiber towel to achieve a mirror shine. This step requires patience—rushing can cause streaks or uneven protection, but the payoff is a glossy, salt-resistant finish.
Final Care and Maintenance Tips
Post-application, avoid washing the car for at least 24 hours to let the coating cure completely. Use a pH-neutral soap regularly to maintain the protective barrier, as per recommended products. For daily protection, keep handy a spray wax or quick detailer, which can revive the shine and bolster the ceramic’s properties. I found that employing these routine steps keeps my car looking freshly detailed week after week, despite the coastal salt that challenges West LA cars daily.
Many car enthusiasts and DIY detailers often believe that stock or generic auto detailing products are sufficient for professional-level results. However, in my experience, this mindset can hinder real progress, especially when it comes to mastering nuances like paint correction and ceramic coatings. One common misconception is that more expensive or elaborate equipment automatically guarantees superior results. While quality tools play a vital role, improper technique or product selection can nullify their benefits. For instance, using low-quality car wash soaps can strip away protective layers, undermining your paint’s integrity. An advanced mistake is neglecting proper surface preparation before applying ceramic coatings; even a tiny particle of contamination can create streaks or reduce durability, as emphasized by experts in automotive detailing. When selecting auto detailing products, many overlook the importance of pH-neutral formulations that preserve existing protections. Rushing into paint correction without assessing the underlying cause of defects often leads to unnecessary work or damage. For example, aggressive polishing on sensitive clear coats risks causing micro-scratches or haze. Are you aware of the hidden traps that can compromise your auto detailing efforts? Make sure to check out my guide on avoiding these common pitfalls, like the ones discussed in the article on [specific guide link], to elevate your skills. Have you ever fallen into this trap? Let me know in the comments.
Investing in the right equipment can dramatically improve the quality and efficiency of your car detailing routine. I personally swear by a dual-action polisher like the Griot’s Garage 6-Inch Polisher, which provides even paint correction without risking micro-scratches typical of cheaper rotary buffers. Its variable speed settings and ergonomic design let me work confidently on delicate clear coats, ensuring a smooth finish every time.
For cleaning, a reliable ceramic coating sprayer, such as the Chemical Guys HydroSonic, allows for precise application of products and minimizes waste. Its ultrasonic technology ensures a consistent mist, which results in a more uniform coating and a longer-lasting seal. I recommend pairing this with high-quality microfiber towels, like the McKee’s 360 Towels, for buffing off excess product without streaks or lint.
To keep your workspace organized and prevent cross-contamination, a dedicated detailing cart with multiple compartments is invaluable. I found that having specific brushes and applicators for different areas — wheels, paint, glass — prevents dirt transfer and maintains the integrity of each product application. For example, using a separate wheel brush ensures that brake dust does not ruin your paint or ceramic coating efforts.
How do I maintain my detailing tools over time?
Regular cleaning and proper storage are key. After each session, rinse brushes and applicators thoroughly with water and mild detergent to remove product residue and dirt. For equipment like polishes and sprayers, follow the manufacturer’s cleaning instructions to prevent clogs and ensure longevity. Using a tool maintenance spray, such as CarPro Restart, can help keep pads and brushes in top shape, extending their lifespan and maintaining polishing effectiveness.
As the detailing industry evolves, new tools and tech are continuously emerging. For instance, advances in nano-technology spray systems are making product application faster and more uniform, potentially reducing detailing time by up to 30%. Keeping an eye on these innovations and investing in proven equipment—like the top car detailing supplies near you—can give you a professional edge and produce stunning results consistently. I urge you to try integrating a high-quality, automated sprayer into your routine; it’s a game-changer for achieving even ceramic coatings and sealants. Ready to elevate your detailing game? Start with one of these essentials and see the difference firsthand.
Lessons That Changed How I Tackle Auto Care
- One of the biggest discoveries was realizing that not all ceramic coatings are created equal; some chemically bond better with West LA’s salty air, making my protection last longer. I’ve learned to scrutinize product labels and opt for those with proven hydrophobic properties, which I now consider essential in coastal environments.
- Another insight was the importance of proper surface preparation before applying ceramic coatings. Skipping steps like thorough decontamination and paint correction can lead to streaks or premature coating failure. Investing time in a meticulous prep routine has saved me money and frustration in the long run.
- I also found that quality tools significantly impact results. Using a dual-action polisher instead of manual buffing improved my paint correction efficiency and even prevented micro-marring, especially on delicate clear coats common in modern cars. Reliable equipment became a game-changer in my routine.
Tools and Resources That Make a Difference
- Griot’s Garage 6-Inch Polisher – It offers precise control and reduces the risk of damaging your paint. I trust this tool because of its consistent performance and ergonomic design, which makes long detailing sessions easier.
- Chemical Guys HydroSonic Sprayer – This sprayer ensures even product application, minimizing waste and streaks. Its ultrasonic technology is a favorite of mine, ensuring coverage remains uniform across large surfaces.
- McKee’s 360 Microfiber Towels – Soft, plush, and lint-free, these towels have become my go-to for buffing off polish and ceramic coatings, leaving a streak-free shine that impresses every time.
- Top car detailing supplies near you help me access the latest tools and products that match West LA’s unique conditions, keeping my setup current and effective.
Your Turn to Shine Bright in West LA
Mastering the art of car detailing, especially in a coastal environment like West LA, is a rewarding journey. The lessons, tools, and routines I’ve shared are designed to inspire you to elevate your auto-care game. With patience, the right equipment, and a commitment to thorough prep, your vehicle can look stunning and resist the salty air for years to come. Are you ready to take your car detailing routine to the next level? Dive into the techniques and products that resonate with your needs, and watch your car transform before your eyes. Remember, every polished finish is a reflection of your dedication and care—so get out there and make your vehicle the best it can be!