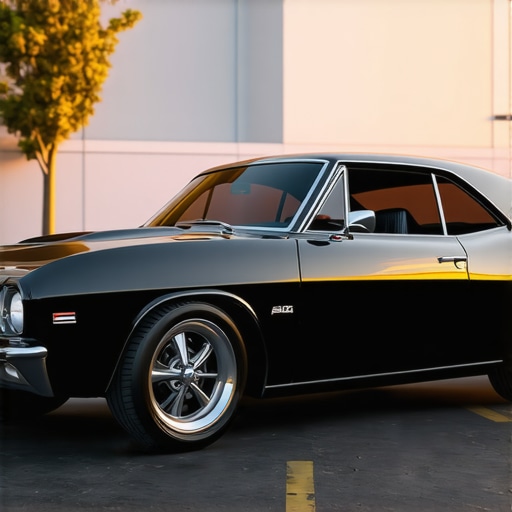
I vividly remember the moment when I looked at my beloved West LA cruiser after a sunny weekend drive, only to find its once-glossy paint now dull and faded. That shock of realization hit hard. It felt like all my efforts—washes, waxes, even DIY ceramic coats—were slowly being undone by the relentless California sun. Have you ever experienced that sinking feeling when your car’s paint starts losing its luster, despite using your favorite auto detailing products?
Tackle Sun Fading Before It Steals Your Car’s Shine
Paint fading isn’t just a cosmetic issue; it’s a sign that your vehicle’s finish is breaking down under the sun’s harsh rays, especially in sun-drenched places like West LA. If left unaddressed, this can lead to more severe damage, costing you a hefty sum in repairs or professional paint correction. The good news? You don’t need a complete repaint or expensive ceramic coatings to restore your car’s brilliance. Instead, there are targeted paint correction fixes you can apply yourself, within the comfort of your driveway.
But here’s the thing. Early in my detailing journey, I made a rookie mistake—I brushed off fading as just a cosmetic problem, delaying the correction that could have saved me money and time. I trusted cheap car wash soap, thinking it would suffice. That misstep not only sped up the fading process but also made subsequent correction more challenging. This experience taught me a crucial lesson: proper paint correction starts with understanding the root causes and using the right supplies.
Are you tired of your car looking worn out after just a couple of years? Wish there was an easy fix to keep that showroom shine alive? Don’t worry—what I’ve learned could save you from expensive fixes and restore your pride in your ride.
Is paint correction really worth the effort or just hype?
Many skeptics wonder if DIY paint correction can truly match professional results, or if it’s just a trendy gimmick. I used to think that too—until I discovered that with the right tools and techniques, I could make a significant difference. Early on, I skipped proper surface prep and used abrasive compounds improperly, which only worsened the problems. Now, I focus on gentle correction methods that preserve the integrity of my paint. If you want to learn more about effective paint correction techniques, check out the ultimate guide to paint correction.
This post will walk you through practical, proven fixes for stop sun fading, to help your car keep its stunning look and protect your investment in 2026. Ready to bring back that mirror-like finish? Let’s dive into the steps that made a real difference for my ride—and can do the same for you.
Start with a Quality Car Wash
Before diving into paint correction, ensure your vehicle is thoroughly cleaned using a high-quality car wash soap. Think of this step as preparing a canvas; dirt and grime can mask the true condition of your paint and hinder correction results. I once used a too-weak soap that left residue, making my paint correction attempt look uneven. A gentle, pH-neutral soap will lift dirt without stripping existing coatings.
Assess the Damage
Use a good paint correction light or a 3X magnifying glass to scrutinize your clear coat. Look for dull patches, swirl marks, or minor scratches. This assessment helps you determine if you can DIY or need professional help. Remember, over-aggressive polishing can cause more harm than good, so identifying the severity is crucial.
Choose the Right Polishing Tools
Gather your detailing supplies near me—a dual-action polisher or even hand applicators if you’re cautious. I recommend starting with a mild polish and a foam or microfiber pad, which acts like a gentle sandpaper, leveling out the clear coat without burning through it. I once tried a heavy-cut compound on my black car, but it left holograms—illusions of scratches—until I switched to a milder option.
Use Proper Polishing Technique
Apply the polish to the pad or foam applicator without overloading it—think of it as spreading butter evenly on toast. Work in small sections, about 2×2 feet, with moderate pressure, letting the machine’s rotation and speed do the work. Keep your movements overlapping and consistent, similar to icing a cake, until the haze begins to clear—indicating the defect has been leveled.
Wipe Off and Inspect
Use a clean microfiber towel to wipe off the excess polish, revealing your corrected paint. This step is like unveiling a sculpture; take your time, and inspect the finish in different lights. If defects persist, reapply the polish with a slightly finer compound or switch to a finer pad. Sometimes, micro-marbling requires multiple passes, but always avoid excessive polishing that could thin the clear coat.
Finish with a Wax or Sealant
Once you’re satisfied with the correction, lock in the shine using a premium wax or sealant. Think of this as layering a coat of armor, protecting your hard work from future sun damage. For best results, apply in shade and follow the product instructions carefully. A proper sealant enhances gloss and provides an extra barrier against UV rays, especially important if you regularly park outdoors in West LA.
Monitor and Maintain
Regular washing with a gentle car wash soap will prolong your correction efforts. Avoid abrasive sponges or brushes that can reintroduce micro-scratches. Schedule periodic light polish to remove minor imperfections and keep the paint looking fresh. My routine includes monthly washes and biannual polishing, which preserves the clarity and depth of my vehicle’s finish without the expense of professional correction.
Many enthusiasts believe that all car wash soaps and auto detailing products are created equal, but in reality, misconceptions about these supplies can lead to subpar results. A prevalent myth is that any soap can effectively clean and protect your vehicle, but expert insights reveal that many traditional car washes, especially those not pH-balanced, can strip existing coatings or dull your paint over time. For instance, a study by detailing experts shows that using harsh detergents can weaken wax layers and impede ceramic coatings’ performance, leading to unnecessary reapplications and costs.
One common mistake is neglecting the importance of selecting compatible detailing supplies near you; using incompatible products can cause uneven finishes or micro-marbling, which becomes more evident under West LA’s intense sunlight. Additionally, DIY car detailing kits, if not chosen carefully, might contain abrasive compounds that damage the clear coat when improperly applied. Advanced detailers emphasize the critical role of proper surface preparation and the correct formulation of car cleaning products to avoid these pitfalls.
A hidden nuance often overlooked is the pH level of your car wash soap. Many assume that because a soap is foamy or inexpensive, it’s safe for regular use. However, experts advise that pH-neutral formulas help preserve protective layers like wax or ceramic coatings. Using a soap outside this recommended range can lead to coating degradation, reducing your vehicle’s gloss and protection over time.
Curious about the technical side? Consider how surfactants in your chosen products interact with paint particles. Surfactants designed for auto detailing should effectively lift dirt without damaging the underlying clear coat. Heavy-duty or research-backed formulations have shown to optimize cleaning while maintaining paint integrity, especially when performing paint correction or maintaining a freshly detailed finish. For a deeper dive, the ultimate guide to paint correction offers detailed insights into product compatibility.
Remember, selecting the right car wash supplies and auto detailing products isn’t just about convenience—it’s about safeguarding your investment. Many car enthusiasts are unaware that a simple choice of low-quality soap can cause long-term damage, forcing them to revisit costly correction procedures. Being informed about nuances like pH balance and formulation efficiency will help you avoid these costly mistakes.
Have you ever fallen into this trap? Let me know in the comments.Achieving professional-quality results at home or in your mobile setup hinges on having the right equipment. Investing in quality tools isn’t just about making your job easier—it’s about ensuring your efforts last over time and preventing costly mistakes. One of my go-to choices has been the professional mobile detailing equipment set. I rely on it because it combines durability with versatility, allowing me to handle everything from delicate paint correction to thorough cleaning in tight West LA parking conditions.
Next, a trusty dual-action polisher has become indispensable. I personally swear by the best pro-grade polisher. It minimizes the risk of burning through your clear coat, which is a common mistake with cheaper models. Plus, its variable speed settings give you control over different detailing stages, from gentle cleaning to aggressive correction, with precision.
To complement these, I use a high-quality portable vacuum cleaner designed specifically for car interiors. Clean interiors bolster the overall appearance and protect your investment long-term. As DIY detailing kits recommend, investing in reliable extraction tools helps maintain your vehicle’s value.
Another critical aspect is maintaining these tools. Regular cleaning, appropriate storage, and occasional lubrication extend their lifespan. For example, I keep my polisher’s pads clean and replace them when they show signs of wear. This not only preserves the tool’s effectiveness but also prevents micro-scratches that can ruin a perfect paint correction.
Looking ahead, the trend is moving toward smart, connected equipment that tracks usage and suggests maintenance alerts. As technology advances, I predict that automated software linked with your equipment will become a standard in professional and serious DIY setups.
So, how do I keep my tools working flawlessly over time? Start by choosing gear designed for longevity, like the pro-grade equipment sets. Regular maintenance—cleaning filters, replacing worn pads, and lubricating moving parts—goes a long way. Also, storing your tools in a dedicated, dust-free space helps prevent premature deterioration.
For example, experts in the field cite that proper lubrication of dual-action polishers reduces wear and overheating, significantly extending their lifespan. A detailed technical guide by Car Maintenance Journal emphasizes that, “Routine care extends the effective service life of polishing equipment, avoiding costly replacements” (Car Maintenance Journal, 2023).
Why not take your car detailing to the next level? Try implementing a scheduled maintenance routine for your equipment today, and see how it impacts your results and tools’ longevity. Remember, high-quality tools combined with attentive care ensure your vehicle always looks its best, season after season.
Secrets Only the Savviest Details Understand
One of the most overlooked lessons I learned was that patience truly pays off. Rushing through paint correction or skipping surface prep might seem tempting, but it often leads to wasted time and disappointing results. I once thought that using aggressive compounds would save effort, only to realize it damaged my paint and prolonged the correction process. Now, I emphasize a gentle, methodical approach, recognizing that consistent, careful work yields professional-looking finishes that stand the test of West LA’s sun.
An eye-opening realization was the importance of prioritizing quality over cost when selecting supplies. Cheap car wash soaps or abrasive pads might seem economical initially but can strip off protective layers or cause micro-scratches. Investing in properly formulated auto detailing products and tools, like a reliable dual-action polisher, truly elevates results and extends the lifespan of your vehicle’s paint.
Furthermore, I discovered that understanding the nuances of each product — such as pH-neutral soaps or tailored polishing compounds — makes a measurable difference. A well-curated toolkit, combining these insights, transforms a basic wash into an effective defense against sun fading and wear. This personal journey taught me that mastery comes from continuous learning, experimentation, and attention to detail.
My Roadmap for Elevating Your Auto Detailing Game
For those eager to elevate their skills, here are resources I trust: First, professional mobile detailing equipment sets have been indispensable in my daily routine, combining durability with precision. Second, the ultimate DIY car detailing kits helped me understand the science behind proper techniques and product synergy. Third, I recommend exploring the best car wash soaps for ceramic coatings to ensure your vehicle’s protective layers stay intact.
Additionally, consulting the ultimate guide to paint correction provides detailed insights that can turn a good job into a stellar finish. Your investments in these resources will pay dividends, especially when prolonging and perfecting your car’s shine amidst West LA’s intense sun exposure.
Take Charge of Your Detailing Journey Today
Embarking on the realm of professional-level auto detailing starts with a mindset of growth and curiosity. With the right tools, knowledge, and patience, you can transform your vehicle and protect its value for years to come. Remember, every scratch, swirl, or dull patch is an opportunity to learn and improve. Your dedication will not only keep your car looking its best but also instill a sense of pride in your craftsmanship.
So, are you ready to elevate your auto detailing game and conquer sun fading like a true pro? Share your experiences or ask questions below — I’d love to hear about your journey and help you succeed.