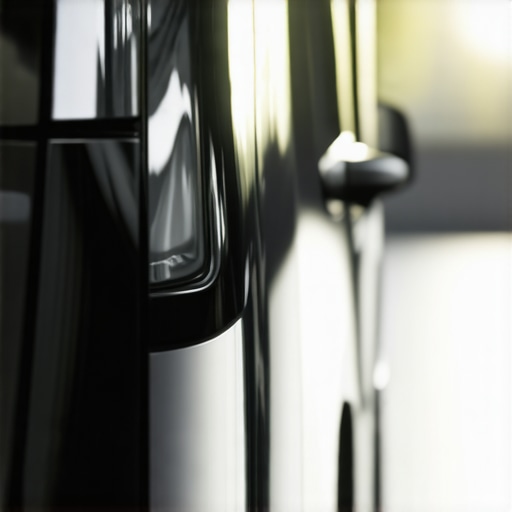
It was a scorching afternoon, and I was meticulously detailing my car in the driveway, confidence high. As I reached for my favorite car wash soap, I noticed a series of fine, yet stubborn scratches across the hood—damage caused by the relentless summer sun and the abrasive scrubbing I had used months ago. My stomach sank. That familiar frustration set in—how had I missed these damage marks, and more importantly, how could I fix them without spending a fortune at the shop? This was my lightbulb moment: I realized that mastering effective paint correction tactics was crucial, especially with the aggressive sun exposure we face in 2026.
Why Sun Scratches Are the Hidden Enemy of Your Car’s Shine
Sun scratches aren’t just an eyesore; they can significantly diminish your vehicle’s resale value and long-term paint health. As sunlight interacts with tiny imperfections on your car’s surface, it amplifies their visibility, making even minor scratches look worse. And if you’re relying on basic car wash soap or DIY kits that aren’t up to the task, these imperfections can deepen or become more widespread over time. I learned this early on after scrubbing my car with subpar detailing supplies—resulting in more damage than protection.
But here’s the good news: there are proven methods to combat and erase those sun-induced scratches. Whether you’re a seasoned detailer or a weekend warrior, understanding the right paint correction tactics can make your vehicle look showroom fresh again. In this post, I’ll share the five expert strategies I’ve personally tested, which will help you restore your car’s finish and keep it protected against the harsh sun’s relentless assault.
Is a Dream Shine Worth the Effort or Just Hype?
Now, I know some might feel overwhelmed—thinking, “Is all this complicated process really necessary?” I’ve been there, rushing into DIY solutions only to end up with streaks or worse, more scratches. One mistake I made early in my journey was attempting to polish my car with an overly aggressive compound, thinking more abrasive meant better results. Spoiler alert: it didn’t. It actually worsened some existing scratches and added new ones.
So, if you’ve been skeptical about whether these tactics truly work or fear damaging your paint further, you’re not alone. The key is to use the right products and techniques tailored to your specific car and scratch severity. And that’s exactly what I’ll guide you through in the upcoming sections. Curious to know if you’ve faced stubborn sun scratches? Trust me, these simple yet effective tactics are game changers, saving you time, money, and the frustration of imperfect results.
Select the Right Car Wash Products for Gentle, Effective Cleaning
Start with a high-quality car wash soap, like the ones featured in best car wash soap options near West LA. Avoid harsh detergents that can strip your wax or ceramic coatings. I once used an aggressive DIY kit with a cheap soap, which left my paint dull and full of micro-scratches—lesson learned to always choose the right supplies.
Pre-Wash to Loosen Dirt
Before touching the paint, spray a pre-wash solution to remove dirt and loose debris. Think of it as a gentle handshake—preparing the surface reduces the risk of scratching during washing. Use a foam cannon attached to your pressure washer, which ensures even coverage. This step is critical if you’re dealing with sun-baked dirt that stubbornly adheres to your car’s surface.
Use Correct Tools for Micro-Refinement
When it comes to paint correction, assemble a set of quality polishing pads. Foam pads are versatile; softer pads are for finishing, while denser ones handle cut-back stages. I recommend starting with a dual-action polisher for controllability. A specific time I tried a worn-out cheap buffer, and I only worsened the scratches—so investing in a reliable machine pays off. Browse top mobile detailing equipment essentials to find professional-grade tools.
Choose Appropriate Polishing Compounds
Pair your tools with the right paint correction compounds. For light scratches, a fine polish with a diminishing abrasive works wonders. For deeper sun-induced marks, opt for a compound with more cutting power but be cautious—overuse can damage your clear coat. I once overpolished a panel with an aggressive compound, which caused holograms—highlighting the importance of patience, and following guides like paint correction techniques.
Master the Technique of Gentle, Even Pressure
When polishing, apply light, consistent pressure, moving the polisher in overlapping passes. Think of it as evenly spreading butter over bread—cover every inch without pressing too hard. I learned this through a messy but instructive experience: I initially pressed too hard, causing uneven patches that I had to re-polish. The secret is holding the machine steady, let the compounds do the work, and check your progress often.
Wipe and Inspect Frequently
After each polishing round, wipe the area with a microfiber towel to remove residual compound. Inspect under direct sunlight or a bright LED lamp to spot remaining scratches or holograms. Patience here prevents overdoing the correction—it’s better to do multiple light passes than one aggressive hit. For the best results, consider investing in good detailing supplies near me.
Protect Your Finish with Proper Sealing
Once scratches are removed or minimized, protect your fresh paint with a durable coating or wax. If you’ve applied a ceramic coating, use a soap formulated for coatings, like the ones recommended in tips for maintaining ceramic protection. Regular maintenance using pH-neutral wash soap ensures longevity. Remember, even the best correction is futile if you don’t protect your work from future sun damage, dirt, and UV rays.
Many car enthusiasts and DIY detailers assume that all car wash soaps and detailing supplies are created equal, leading to costly mistakes and subpar results. One widespread myth is that inexpensive, generic products can deliver professional-grade finishes. However, without understanding the nuances of formulatory differences, you risk damaging your paint or wasting time and money. For instance, using harsh detergents or abrasive compounds can strip your ceramic coatings or clear coats faster than you think, especially if your products aren’t pH-balanced. This is why selecting the right car wash soap designed for your specific needs can make all the difference. Many overlook that high-quality detailing supplies and mobile equipment are engineered to work in harmony, providing gentle cleaning while enhancing protection. A common mistake is assuming DIY kits are sufficient for maintaining a showroom shine, but these often lack the advanced abrasives and conditioners found in professional-grade products. This can lead to a cycle of re-correction, which is both time-consuming and costly. Let’s dig deeper into the hidden nuances that can save you from these pitfalls.
Are You Making This Detailer’s Slip-Up with Your Products?
Many believe that cheaper, off-the-shelf products will save money, but professional detailers know that investing in the right car detailing supplies actually enhances results and reduces long-term costs. Additionally, overlooking the specific formulation of your car wash soap can lead to stripping your vehicle’s protective layers unexpectedly. Studies from the International Car Wash Association highlight that using non-neutral pH cleaners can accelerate paint degradation. Therefore, understanding these subtle but vital differences is key to a durable, glossy finish.
Have you ever fallen into this trap? Let me know in the comments. Keep honing your knowledge to master the art of car care, and always choose the products tailored for your vehicle’s specific needs.
Investing in Reliable Equipment for Consistent Results
To keep your car looking spotless, it’s crucial to have a set of high-quality, durable tools. I personally swear by a dual-action polisher like the Rupes BigFoot, which balances power with control, reducing the risk of over-polishing that can damage your paint. When choosing pads, opting for foam polishing pads allows for an even application of compounds, ensuring a smooth, professional finish. For cleaning, a foam cannon attached to a pressure washer can save time and provide uniform coverage without harming your vehicle’s delicate surfaces. Regularly inspecting and maintaining your equipment—cleaning pads, replacing worn brushes, and calibrating your polisher—ensures optimal performance and longevity.
Tip: Keep your tools protected from dust and moisture when not in use by storing them in sealable containers. This simple step prevents corrosion and keeps your equipment ready for your next detailing session.
Long-Term Maintenance with Proper Supplies
Choosing the right car wash soap plays a significant role in preserving your paint’s health over time. I recommend using pH-neutral, coating-safe products, like the offerings available in West LA’s top car wash soaps. These soaps prevent stripping your ceramic coatings, maintaining that showroom shine longer. Incorporate a weekly wash routine with quality supplies to combat dirt, grime, and sun-induced oxidation, which can accelerate fading and scratching.
Preparation and Quick Repairs for Longevity
Using pre-wash solutions and clay bars before your main wash can eliminate embedded contaminants, reducing micro-scratches during cleaning. For minor scratches or swirl marks, polishing compounds like Meguiar’s Mirror Glaze are effective to refresh your paint. If you notice persistent holograms after correction, applying a finishing polish with a fine pad and a light touch will help eliminate these imperfections. This process ensures your paint remains smooth and reflective, warding off the long-term damage that sun exposure and contaminants can cause.
Future of Car Detailing Equipment and Tech
As technology advances, expect cordless, battery-powered polishers with smarter motor controls and more efficient pads to become standard. Innovations like UV detection apps are already making it easier to identify spots needing attention, optimizing your workflow. Investing in versatile, upgradable equipment now will keep your setup relevant as the industry shifts towards more eco-friendly and efficient solutions.
How do I maintain my detailing tools over time?
Regular cleaning and proper storage are essential. Rinse pads thoroughly after each use, allow them to dry completely, and store in sealed containers to prevent dust buildup. Replacing worn-out brushes and check the calibration of your polisher periodically ensures safe, effective operation. For advanced maintenance, lubricate moving parts as per the manufacturer’s recommendations. Want to elevate your detailing game? Try using a microfiber detailing towel to buff your polish for an even more refined finish, and check out the latest mobile detailing equipment for innovations that will save you time and effort.
Lessons That Could Have Saved Me Money and Time
One of the most eye-opening lessons I learned was that relying solely on DIY kits without understanding the nuances of my car’s paint led to costly mistakes. For example, I once used an aggressive compound on a whim, only to find holograms and deeper scratches afterward—an experience that taught me to always match the product to the scratch severity. Another revelation was that investing in professional-grade detailing supplies and properly maintained tools significantly improved results and reduced rework. Lastly, I realized that the sun’s UV rays are relentless enemies; thus, applying protective coatings immediately after correction is essential to preserve your work long-term. These lessons emphasized patience, education, and the importance of high-quality products, transforming my DIY approach into a professional-level routine.
My Top Picks for Next-Level Car Detailing Gear
To elevate your paint correction game, I recommend starting with a reliable dual-action polisher like the Rupes BigFoot. Its balance of power and control makes it ideal for both beginners and pros. Quality pads, such as Lake Country’s foam polishing sets, ensure even application and smooth finishes. Pair these with fine-grade polishing compounds from trusted brands like Meguiar’s or Menzerna, which I trust for their consistent results. Additionally, a cordless DA buffer can give you the freedom to work in tight spots without sacrificing power. To keep all gear in top shape, consider investing in a small workstation for cleaning and storing your tools—a simple step that prolongs their life and performance. These tools have been instrumental in my detailing journey, saving me from costly errors and achieving that elegant, showroom shine.
The Motivation to Keep Improving Your Car’s Finish
Looking back, I realize that mastering paint correction isn’t just about aesthetics; it’s about cultivating pride in your vehicle and understanding your craft. Every scratch you eliminate feels like a small victory, and each layer of protection becomes a shield against the sun’s harsh rays in 2026. Don’t let frustrations or doubts hold you back—every expert was once a beginner, and the journey is part of the satisfaction. Whether you’re just starting with DIY kits or upgrading to professional tools, know that each step enhances your skills and your car’s longevity. Embrace learning, celebrate progress, and keep pushing toward that flawless finish. Your vehicle deserves it, and so do you.