Ever had that sinking feeling when a paint correction session goes sideways right before your eyes? I remember the first time I dove into detailing a shiny black masterpiece, only to end up with swirls, haze, and regrets. It was a tough lesson, one that made me realize that even seasoned enthusiasts can stumble over avoidable mistakes. Sometimes, the smallest oversight can ruin what should have been a brilliant finish, leaving you frustrated and questioning everything you thought you knew about auto detailing.
Why So Many Detailers Fall Into the Same Traps
In 2026, the world of paint correction keeps evolving, with new products and techniques promising flawless results. But here’s the catch: many errors are rooted in fundamentals we overlook amidst the shiny new gear and trending techniques. I’ve faced my own share of slip-ups—like rushing through a cut that left micro-marring or using the wrong pad pressure, which compromised the entire job. Early on, I made the mistake of assuming that more aggressive approaches always deliver better results. That mindset cost me extra hours, reworks, and a dip in confidence. According to recent industry insights, improper technique remains the leading cause of subpar paint correction outcomes, even among pros (source: Paint Correction Pro).
If you’re tired of seeing paint correction mishaps in your projects, don’t worry—we’re going to tackle these pitfalls head-on. This isn’t about flashy gadgets; it’s about mastering the essentials to get that mirror-like shine every time. Ready to make sure your next correction not only meets but exceeds expectations? Let’s dive into the common mistakes that could be sabotaging your success—so you can fix them early and craft some truly stunning finishes.
Prepare Your Tools and Environment
Start by gathering high-quality auto detailing products, including a dual-action polisher, appropriate pads, and the right compounds. I once attempted paint correction using generic supplies, which resulted in a haze that took hours to fix. Using a dedicated professional-grade polish and clean, dust-free workspace ensures precision and reduces errors. Protect nearby areas from dust and overspray with clean tarps or masking paper.
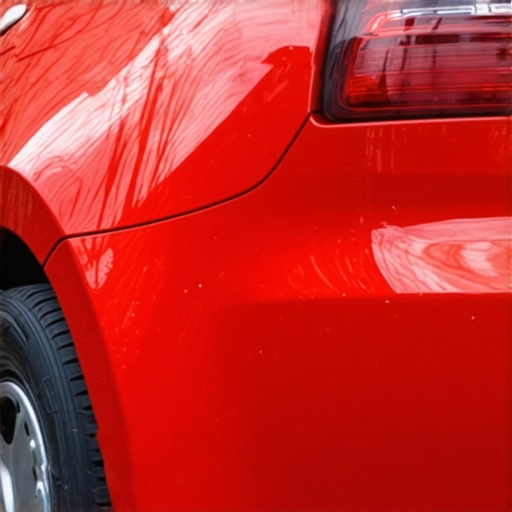
Assess The Paint Condition Carefully
Inspect the surface under varied lighting to identify all imperfections—swirl marks, etching, or haze. I recall working on a luxury sedan, where a quick glance missed buffer holograms, leading to rework. Use a detailing light or a clean microfiber cloth to compare areas and prioritize correction zones. This step prevents unnecessary polishing of unaffected sections and helps focus your efforts effectively.
Choose Corrective Products and Pads
Select the appropriate compound based on the severity of imperfections. For stubborn swirls, opt for a cutting polish; for light haze, a finer finishing compound works better. Attach a soft, firm foam pad—think of it as a paint massage. Using a dual-action polisher with a 3-inch backing plate allows better control on tight curves. Remember, less is more—underspeed and moderate pressure prevent burn-through.
Work in Small Sections with Consistency
Divide the surface into 2×2 foot sections. Keep the polisher moving steadily to avoid creating uneven correction lines. I once neglected this and ended up with uneven gloss, forcing me to redo the area. Use overlapping passes, similar to applying paint, to ensure even correction. Regularly inspect the area under light to check progress.
Control Your Pressure and Speed
Applying too much pressure or moving too fast causes micro-marring or burning the paint. Think of polishing like finger-painting—gentle strokes yield the best results. Start with the lowest effective speed, around 3, then gradually increase if needed. A good rule is the polisher should glide smoothly without force; it’s about finesse, not brute strength.
Wipe and Inspect Frequently
After each section, wipe with a clean microfiber towel to remove residual compound. Check the corrected area’s clarity and gloss. This prevents over-polishing and reveals whether more work is needed. My early mistake was neglecting this step, which led to spotty finishes that required reworking.
Final Finish and Protection
Once satisfied with correction, switch to a fine finishing pad with a polishing compound for that mirror shine. Afterward, apply a high-quality ceramic coating or wax to seal the surface. For premium results, consider a product like luxury mirror-shine products. Proper curing and curing time are critical to achieve long-lasting gloss and protection.
Many enthusiasts believe that choosing the most popular or inexpensive detailing products guarantees a professional finish. However, in my experience, this isn’t always the case. Common misconceptions, such as assuming that generic car wash soaps are sufficient or that all ceramic coatings behave identically, can lead to subpar results. For instance, not all ceramic coatings are compatible with certain substrates, and applying the wrong product can degrade the paint instead of enhancing it. Superior auto detailing products require understanding their specific formulations and intended uses, which is why sourcing supplies from reputable West Los Angeles detailing suppliers ensures quality and compatibility. Moreover, relying solely on basic car cleaning products without considering the nuances of paint correction or finishing techniques can leave micro-marring or holograms unaddressed. Let’s dig deeper into these pitfalls so your next detail job avoids these costly mistakes. Never assume that all car wash soaps or paint correction products are created equal; selecting the right tools hinges on knowing their unique properties and how to use them correctly. Advanced mistake involves misjudging the preparation process, sometimes skipping steps like proper panel inspections or using inappropriate pads, which can dull the shine and reduce the durability of your work. In fact, industry studies emphasize that applying products based on their specific formulations, such as those designed for high-gloss black finishes or matte wraps, significantly enhances results (see the detailed research at Paint Correction for 2026). So, before you pick your next auto detailing product, assess your needs thoroughly. Do you understand the nuances that differentiate a basic car wash soap from a pro-grade foam gun supplement? Do your choices reflect the demands of your specific vehicle’s finish? Making educated decisions on products and equipment prevents common pitfalls and elevates your craft. Keep in mind that even subtle misunderstandings—that some products are incompatible with certain paints—can cause long-term damage. 
Choosing the Right Equipment for Consistent Results
Investing in top-tier tools is essential for maintaining quality over time. I personally recommend a high-performance dual-action polisher like the professional-grade DA polisher because of its reliability and smooth operation, which minimizes user fatigue and ensures even correction. Additionally, a quality foam cannon, such as those found here, allows for faster, more uniform application of wash solutions, saving time during each session.
Regular Tool Maintenance Preserves Performance
Set aside time after every few uses to clean and inspect your equipment. For example, flushing your pressure washer and foam cannon ensures no residual dirt or chemical buildup compromises performance. Lubricate moving parts on your polisher with manufacturer-recommended oils, which prevents premature wear and maintains smooth operation.
Long-Term Results Depend on Proper Storage and Care
Storing your detailing gear in a climate-controlled environment prevents damage caused by humidity or temperature fluctuations. Use dedicated cases or stands to keep pads and brushes clean and organized. I’ve found that well-maintained tools last significantly longer, maintaining their efficacy and making your investments pay off over time.
Stay Ahead with Cutting-Edge Equipment Trends
As industry advancements continue, the move toward cordless, lightweight tools is gaining momentum, especially for mobile detailers. Battery technology improvements mean you can expect longer runtimes and faster recharge cycles, which greatly enhance efficiency on the go. For those interested, exploring top cordless polishers for 2026 can give you a competitive edge.
How do I keep my detailing tools in peak condition over time?
Implement a routine maintenance schedule that includes cleaning after every use, inspecting for wear and tear, and storing equipment properly. For pads and brushes, use gentle cleaning solutions and avoid harsh chemicals that can degrade their fibers. Regular calibration of equipment like pressure gauges and polishing machines ensures consistent results and extends their lifespan. Remember, investing a little time in maintenance now prevents costly replacements later and guarantees your gear performs optimally on every job. Industry insights from Paint Correction Pro emphasize that proactive maintenance is key to long-term success in auto detailing.
To elevate your game, try regularly polishing your equipment with a premium cleaner, such as the ones shown in our mirror-shine maintenance sets. This small step can dramatically improve the performance and lifespan of your tools, ensuring consistently stellar results for your clients.
In the relentless pursuit of perfection, the journey through auto detailing is filled with personal lessons often learned the hard way. From choosing the right car wash soap to understanding the nuances of paint correction, every mistake offers a moment of growth. The deeper you dive, the more you realize that mastery hinges not just on tools, but on an intimate understanding of your supplies and techniques.
What I Wish I Knew About Detailing Supplies Near Me That Changed My Approach
- Quality Over Quantity: The first time I splurged on premium auto detailing products, I saw an immediate transformation. Investing in trusted brands guaranteed better results and saved time on rework.
- Tailored Products Make the Difference: Using the right compound for specific paint types—whether a soft clear coat or hard OEM finish—amplifies your results. Remember, not all products are created equal, and selecting specialized supplies ensures long-lasting shine.
- Equipment Matters as Much as Products: A high-quality dual-action polisher or a professional-grade foam cannon, like those reviewed here, can elevate your detailing game. Proper tools prevent common errors such as micro-marring or uneven polishing.
- Environment Is Key: Maintaining a dust-free, well-lit workspace with quality environmental controls dramatically impacts outcomes. I learned that even slight dust can ruin a flawless finish, leading to frustration and setbacks.
Tools That Transform Your Detailing Routine and Why I Trust Them
- Premium Microfiber Towels: Durable, plush, and lint-free towels are essential for every step, from wiping off compounds to applying sealants. Brands like Chemical Guys or Elite detail supplies are my go-to for consistent quality.
- Specialized Pads and Brushes: Foam and microfiber pads tailored for cutting, polishing, and finishing optimize correction and gloss. Using the correct pad for each stage prevents damage and enhances clarity.
- Reliable Water and Foam Systems: A sturdy foam gun or high-pressure washer streamlines cleaning and prep, saving time while ensuring safety and uniform coverage.
Taking Action: Elevate Your Detailing Game Today
Embracing these insights means stepping closer to that mirror-like, professional finish every car deserves. Every supply, from car cleaning products to advanced tools, plays a vital role in your success. Don’t settle for second best when your passion for perfection is within reach—invest in quality, learn the subtleties, and refine your craft daily. Your journey toward automotive excellence is just beginning, and every small upgrade or new technique brings you closer to mastery.
What’s the biggest mistake you’ve made with your detailing supplies, and how did it change your approach? Share your story below—I’d love to hear your experiences and lessons learned!