I remember the shock I felt the first time I looked at my car after West LA’s relentless sun had beaten down on it all summer. The trim, once shiny and sleek, had turned dull, faded, and chalky. I tried every car wash soap and cheap detailing product I could find, expecting miracles, but nothing seemed to restore that factory shine. Frustration crept in as I realized I needed a real plan—not just random products, but targeted solutions. That lightbulb moment led me to discover the power of DIY car detailing kits designed specifically for sun-damaged trim. So, if you’re like I was—scrambling with products that promise the world but deliver disappointment—stick around. Today, I’ll share how you can use three effective DIY kits to fix your 2026 West LA sun-damaged trim, without breaking the bank or wasting precious time.
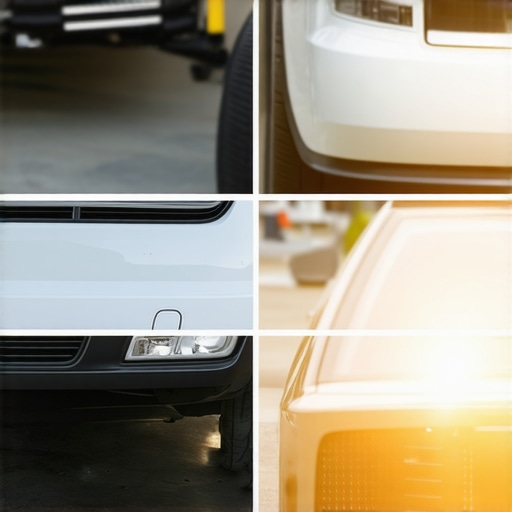
Why Sun Damage Is the Biggest Enemy of Your Car’s Trim
Sun exposure isn’t just a cosmetic nuisance; over time, it causes chemical changes in your car’s paint and trim, leading to fading, chalkiness, and even cracking. In West LA, where sunshine is plentiful almost year-round, this damage accelerates. I learned that if you ignore these signs, you’ll face more expensive repairs later—like paint correction or even replacing trim pieces entirely. Protecting your investment starts with understanding the enemy: UV rays. Studies show that sunlight can break down the polymers in plastics and paint, causing deterioration and discoloration (source: Automotive.com). So, what can you do right now? Let’s dive into some DIY kits that outshine those pricey shop visits.
Is a DIY Fix Really as Good as the Pros?
Honestly, I made a rookie mistake early on—trusting my neighbor’s advice about just buffing the trim with any old polish. That only made things worse, amplifying small scratches and static buildup. I’ve since learned that using the right DIY car detailing kits can not only save you money but also give you professional-looking results. The key is selecting kits specifically tailored for sun-damaged surfaces, which contain the right abrasives, polishes, and protectants. For more options, check out this comprehensive list of DIY detailing kits. Now, let’s look at the essentials you’ll need to restore your trim effectively—because patience and the right tools make all the difference.
Prepare Your Tools and Environment
Start by collecting the right DIY detailing kit—look for one that contains a mild abrasive compound, a clay bar, and a protective sealant. Place your car in a shaded area or garage to prevent quick evaporation of products and avoid new sun damage during the process. Wearing gloves and eye protection can help protect your skin and eyes from chemicals. Have microfiber towels and a detailing clay ready, as these are essential for removing stubborn oxidation and contaminants.
Gentle Cleaning to Remove Surface Contaminants
Begin with a thorough wash using a high-quality car wash soap specifically formulated to prevent streaks and water spots in West LA’s humid climate—avoid generic soaps that can strip protective layers. Use a soft sponge or microfiber mitt, and rinse thoroughly. This initial step ensures all dirt, dust, and surface grime are eliminated, giving you a clean baseline for further correction. Remember, a clean surface is a microdermabrasion’s best canvas.
Clay Bar for Deep Contaminant Removal
Next, use a clay bar lubricant and gently glide the clay over the trim’s surface. Think of the clay like an eraser removing embedded pollutants—if it feels sticky or pulls, reapply lubricant. I once spent a messy afternoon trying to do this without enough lubricant, which led to scratches. Once the surface feels smooth, rinse and dry the area meticulously. This step is critical because oxidation often attaches beneath the surface layer and isn’t removed by washing alone.
Apply an Abrasive Compound for Fading Finesse
This is where a micro-abrasive compound from a well-suited DIY kit works wonders. Use a foam applicator or microfiber cloth to gently buff the compound onto the trim. Imagine sanding a rough wood to reveal smooth layers underneath—that’s essentially what you’re doing but at a microscopic level. Work in small sections, using circular motions, and don’t rush—patience here yields compelling results. For stubborn oxidation, consider professional-grade paint correction techniques.
Seal and Protect with Ceramic or Polymer Sealants
After polishing, rinse off any residue and immediately apply a durable sealant or ceramic coating to lock in the shine. Think of this as a sunscreen—protects your refreshed trim from future sun damage. Use a clean microfiber towel to buff the sealant into the surface, ensuring even coverage. This step reduces the risk of chalkiness recurring, especially during LA’s bright sun and high heat days. For ongoing maintenance, check out recommended maintenance tips.
Final Touches and Tips for Longevity
Finish with a soft, dry microfiber cloth to remove any excess product and enhance the gloss. Regularly washing with the right car wash soap designed for ceramic or coating protection will extend your work’s lifespan. Additionally, applying a UV protectant can add an extra layer of defense against LA’s aggressive sun. Remember, consistent upkeep with quality detailing supplies near me ensures your freshly revived trim stays vibrant and resistant to future oxidation.Many enthusiasts believe that all car cleaning products and paint protection solutions are created equal, but let’s dig deeper into some overlooked nuances. A common misconception is that cheap, generic car wash soaps can effectively preserve your vehicle’s paint and trim—yet, in reality, these products often contain harsh detergents that strip away protective layers and accelerate deterioration, especially under West LA’s intense sun. Opting for high-quality, pH-balanced car wash soaps designed for ceramic coatings makes a significant difference; studies show they preserve the integrity of protective layers longer, preventing premature failure (source: this expert guide). Beware the trap of relying solely on over-the-counter waxes, which fade quickly and don’t offer lasting UV protection—especially in a climate as harsh as West LA. Instead, investing in professional-grade paint correction tools and treatments, like those found in advanced DIY kits, can truly restore and protect your vehicle’s surface. Another mistake often made is underestimating the importance of proper prep before applying ceramic coatings; skipping decontamination or de-greasing can cause streaking and reduce longevity. Advanced detailers understand that meticulous surface preparation combined with high-quality DIY detailing kits ensures optimal results. Have you ever fallen into this trap? Let me know in the comments. Remember, selecting the right detailing supplies near me and understanding their nuances can make all the difference in maintaining your car’s shine and durability long-term.
Maintaining the pristine condition of your vehicle requires more than just high-quality products; it demands the right tools and a strategic approach to ensuring longevity. As an enthusiast or professional, investing in specialized equipment can dramatically improve the durability and appearance of your car’s paint and trim. One of my go-to tools for consistent results is the pro-grade polishing buffer. I personally prefer models with variable speed control and cushioned backing plates, like the Makita 9237CX3 Polisher, because they provide precise control and reduce the risk of over-polishing, which can be detrimental to delicate finishes.
For deep cleaning and contaminant removal, a heavy-duty mobile detailing vacuum has become indispensable. I favor vacuum units equipped with HEPA filters and versatile attachments, enabling me to tackle both interior dust and exterior debris effectively. Using a reliable vacuum ensures that dirt doesn’t scratch the paint during subsequent polishing or coating steps, preserving the clarity of your finish over time.
When it comes to applying protective layers like ceramic coatings or sealants, precision application tools make all the difference. I recommend using foam applicator pads with ergonomic handles. They allow for even coverage without excessive product waste. Moreover, investing in a battery-powered polisher can significantly speed up the application process, especially in tight West LA parking spots where space is limited. I personally find that cordless options eliminate cord clutter and reduce operator fatigue, leading to more consistent results.
How do I keep my tools performing over time?
The key is regular maintenance. Cleaning your pads and buffers after each use prevents product buildup and bacterial growth, which can diminish their effectiveness. For power tools, following manufacturer guidelines—such as replacing brushes or filters periodically—ensures longevity. Additionally, storing equipment in a cool, dry environment prevents rust and degradation. Investing in protective cases or covers further extends your tools’ lifespan, saving money and time in the long run.
Looking ahead, the trend suggests a rise in smart detailing devices that integrate sensors to monitor surface conditions and recommend optimal polishing or coating parameters. Technologies like AI-driven color matching and environmental sensors will revolutionize how we maintain our vehicles in West LA’s unique climate.
If you’re serious about achieving professional-level results, I highly recommend trying a comprehensive set of mobile detailing tools designed for efficiency and precision. Upgrading your equipment today can make your maintenance routine more effective and enjoyable—so give one of these advanced tools a try and enhance your car’s long-term shine!
3 Lessons That Changed How I Approach Car Sun Damage Repairs
- Patience Outperforms Speed: Rushing through polishing or applying sealants often leads to streaks or uneven finishes. Taking the time to work in small sections with proper technique yielded professional-looking results and minimized rework.
- The Right Tools Matter: Investing in quality applicators and buffers, like ergonomic foam pads and variable-speed polishers, made a significant difference in achieving long-lasting results against West LA’s harsh sun.
- Prep Is Key: Skipping thorough cleaning and decontamination shortens the lifespan of any repair effort. Using a clay bar and proper de-greasing before applying protective coatings ensures durability and a flawless finish.
- Protect Your Work with Sealants: After polishing, sealing the surface with a ceramic or polymer coating vastly extends the vibrant look and guards against future sun-related oxidation, saving time and money down the road.
- Consistency Is the Real Secret: Regular maintenance using the right DIY kits and tools keeps sun damage at bay, preserving your vehicle’s appeal amidst West LA’s relentless sunshine.
Top Resources That Elevated My Detailing Game
- DIY Car Detailing Kits: These comprehensive kits contain everything needed to restore and protect sun-damaged trim, offering professional results at home.
- Paint Correction Techniques: Mastering these helps eliminate stubborn oxidation and swirl marks, rejuvenating your car’s finish.
- Durable Detailing Supplies: Sourcing local, high-quality products ensures effectiveness and consistency, especially crucial in West LA’s intense climate.
- Water-Safe Wash Products: Using the right soap prevents water spots and preserves your freshly detailed surfaces amidst West LA’s humidity.
Your Car Deserves the Best—Here’s Your Next Step
Now that you’ve seen how a mindful, tool-equipped approach transforms sun-damaged trim into a glossy testament to care, it’s your turn to act. Dive into quality DIY kits, gather the right tools, and take control of your vehicle’s appearance—because your car is more than transportation; it’s an extension of your pride. Don’t hesitate; start restoring that factory shine today and enjoy the lasting benefits of professional-level care made simple. What’s the first sun damage fix you’ll tackle on your car this weekend? Share your plan below!